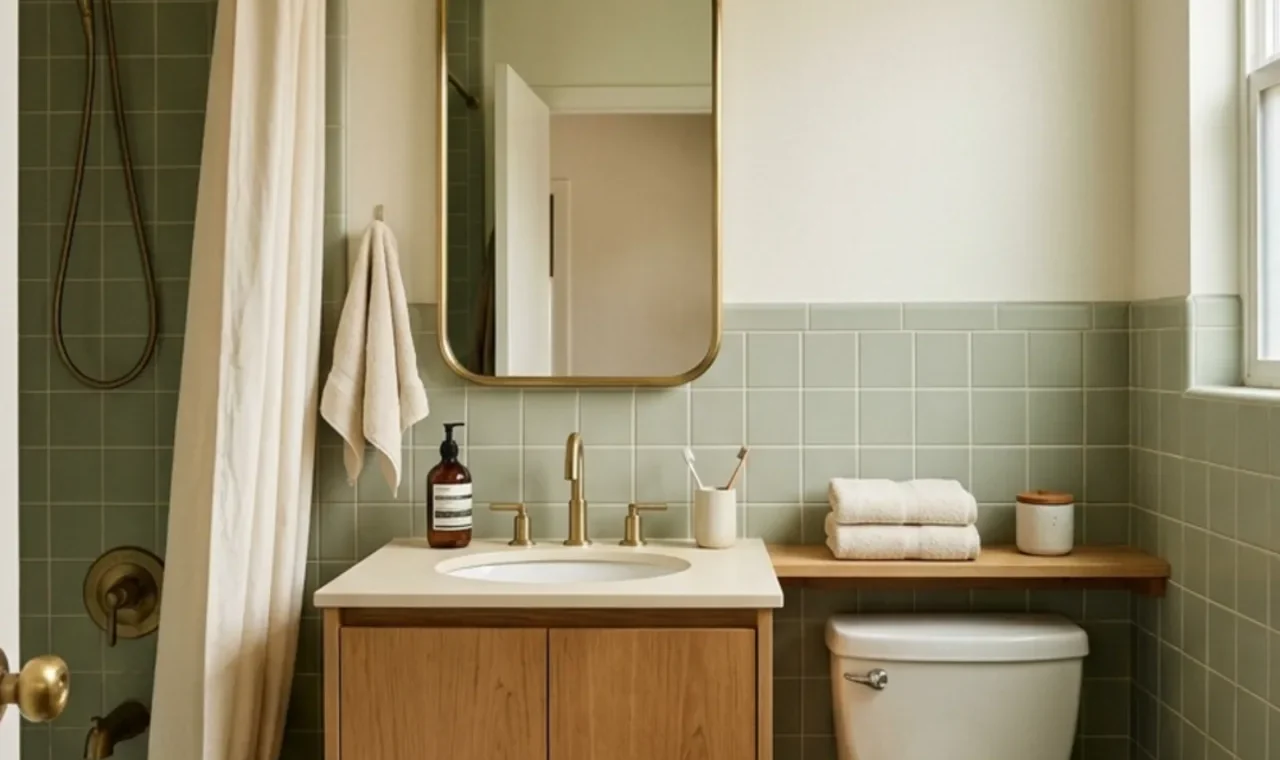
Retro apartment bathroom ideas can make a small bathroom feel much more personal, but the room still has to handle steam, wet towels, toiletries, cleaning, and limited floor space.
That is where the balance matters.
Colorful tile can bring the retro feeling quickly. Warm wood stops the room from feeling cold. A rounded mirror, warm metal hardware, patterned flooring, or a small globe light can add just enough vintage character without turning the bathroom into a themed set.
I would avoid using every retro detail at once. In a compact apartment bathroom, green tile, pink walls, checker flooring, brass fixtures, walnut cabinetry, floral curtains, and colorful accessories can become visually crowded very fast.
Instead, choose one main color story and one warm wood tone. Let the rest of the bathroom stay quieter.
This guide includes practical sizing, rough U.S. planning costs, simple installation or styling methods, and honest pros and cons for every idea. I have also included rental-friendly changes, storage, ventilation, lighting, grout, flooring, vanity sizing, and ways to make a colorful bathroom feel playful without making it look cramped.
If storage is already the biggest problem, start with Bathroom Storage Ideas before adding decorative pieces.
What Makes a Retro Apartment Bathroom Feel Warm Instead of Busy?
A good retro bathroom usually has a strong relationship between color, shape, and material.
Color might come from muted sage, dusty blue, soft pink, terracotta, ochre, burgundy, cream, or warm brown. Retro shape can come from rounded mirrors, globe lights, pill-shaped cabinets, and classic square tile. Warmth can come from oak, walnut, teak-look finishes, cream grout, or aged brass.
The room does not need all of these.
I would choose one dominant color, one warm wood tone, and one small metal finish. That gives you enough character without making a small apartment bathroom feel visually noisy.
For a cooler and more modern reference point, Grey Bathroom Ideas With LED Mirror shows how lighting and wood can keep a restrained bathroom from feeling cold.
Before You Decorate, Plan Around Moisture and Clearance
Bathrooms are not dry decorating spaces.
Tile, paint, wood, mirrors, lights, hardware, storage, and textiles all have to live with humidity and regular cleaning.
The U.S. Environmental Protection Agency recommends controlling bathroom moisture with ventilation and drying damp surfaces. Its guide to mold and moisture specifically recommends running the bathroom fan or opening a window when showering.
The National Kitchen & Bath Association’s planning guidelines also cover bathroom clearances, flooring surfaces, lighting, indoor air quality, and accessibility.
Before adding a larger vanity, storage cabinet, stool, or decorative shelf, measure the usable floor space with cabinet doors and bathroom doors open.
A compact vanity is often around 18–24 inches deep. Narrow models may be shallower. A typical vanity height is often around 32–36 inches, but comfort, sink type, plumbing, and accessibility needs can change that.
Do not assume an inspiration photo’s fixture spacing is appropriate for your home. Local codes, plumbing layout, manufacturer instructions, and actual room dimensions come first.
1. Use Muted Green Tile as the Main Retro Color
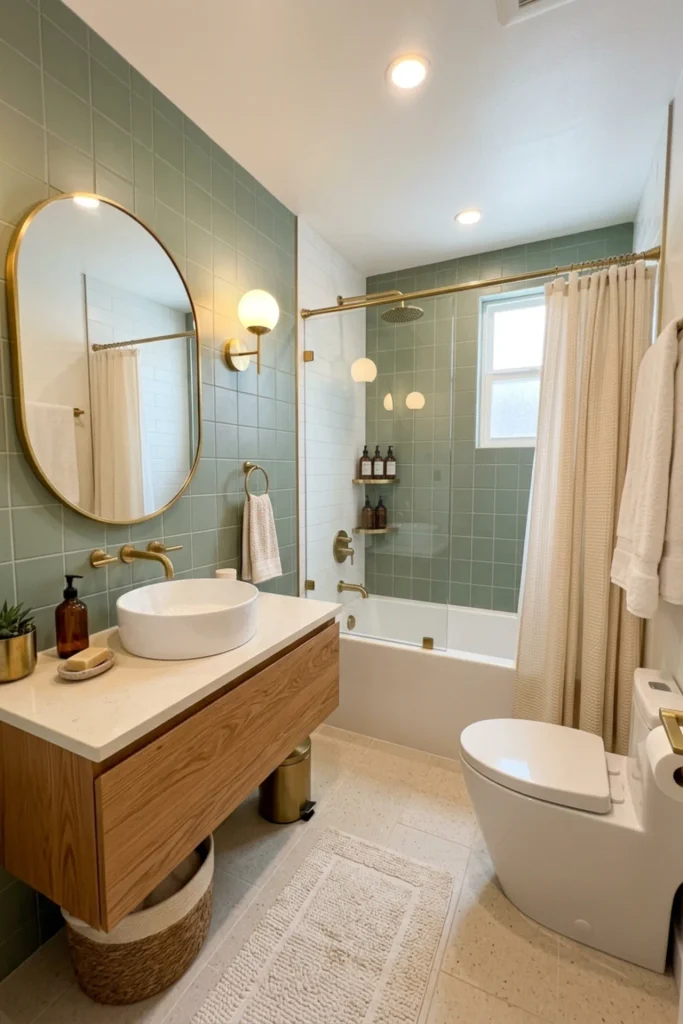
Muted green is one of the easiest retro bathroom colors because it feels vintage without looking cartoonish.
Sage, olive, moss, and soft avocado-inspired tones all work well with warm wood.
I would use the green on one major tile zone and keep the rest of the bathroom cream or warm white.
Size and requirements: For wall tile, a 4-by-4-inch, 4-by-8-inch, or similarly modest format can create a retro feel without looking miniature. In a small bathroom, consider limiting the strongest green tile to the shower wall, vanity backsplash, or lower wall rather than every surface.
Method and cost: Order several tile samples and view them beside the actual wood finish and bathroom lighting. A small backsplash may cost around $300–$1,200 installed. A full shower tile project may cost roughly $1,500–$5,000+, depending on waterproofing, demolition, tile type, and labor.
Pros: Strong retro character; works naturally with oak and walnut; easier to live with than very bright green.
Cons: Green undertones shift under cool light; grout choice changes the whole look; full-room green can make a tiny bathroom feel darker.
2. Try Dusty Blue Tile With a Walnut Vanity
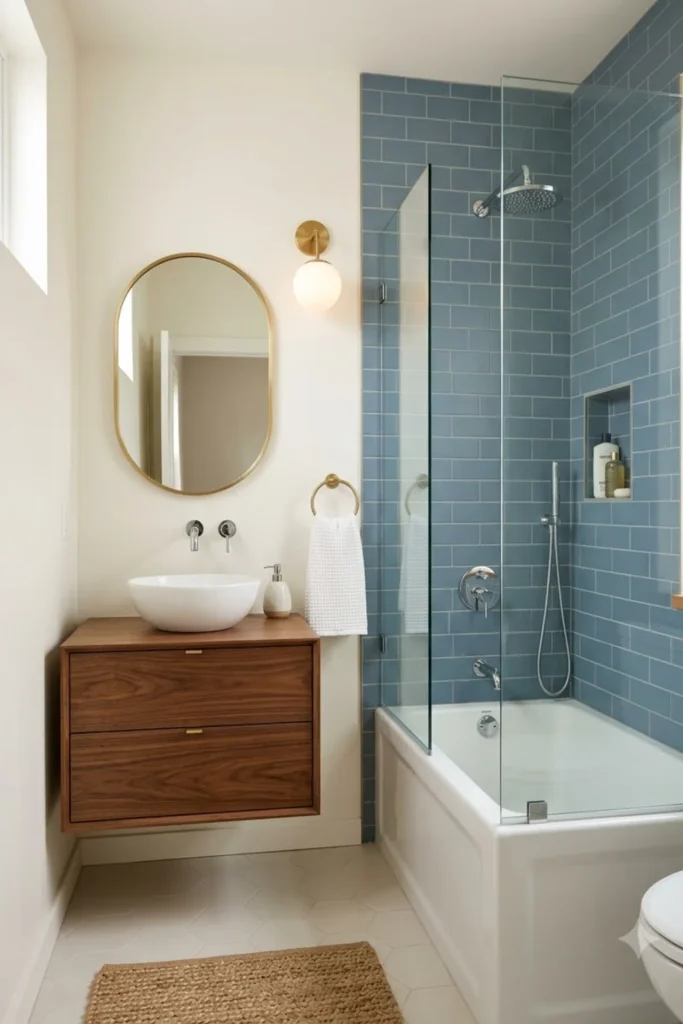
Dusty blue gives a retro bathroom color without the sweetness of pink.
Pair it with walnut or a walnut-look vanity for warmth.
Size and requirements: Keep the vanity around 18–24 inches deep depending on the room. For a very small bathroom, a 24–30-inch-wide vanity may be enough. Measure the toilet, door swing, and drawer clearance before ordering.
Method and cost: Start with the vanity and tile samples together. A compact walnut-look vanity may cost $500–$1,800+. Tile and installation may add $700–$3,500+ depending on coverage.
Pros: Calm color; walnut adds richness; works with chrome, brass, or black hardware.
Cons: Dark wood can feel heavy; cool blue tile can look gray in weak light; custom vanity sizes cost more.
3. Use Soft Pink Tile Only on the Vanity Wall
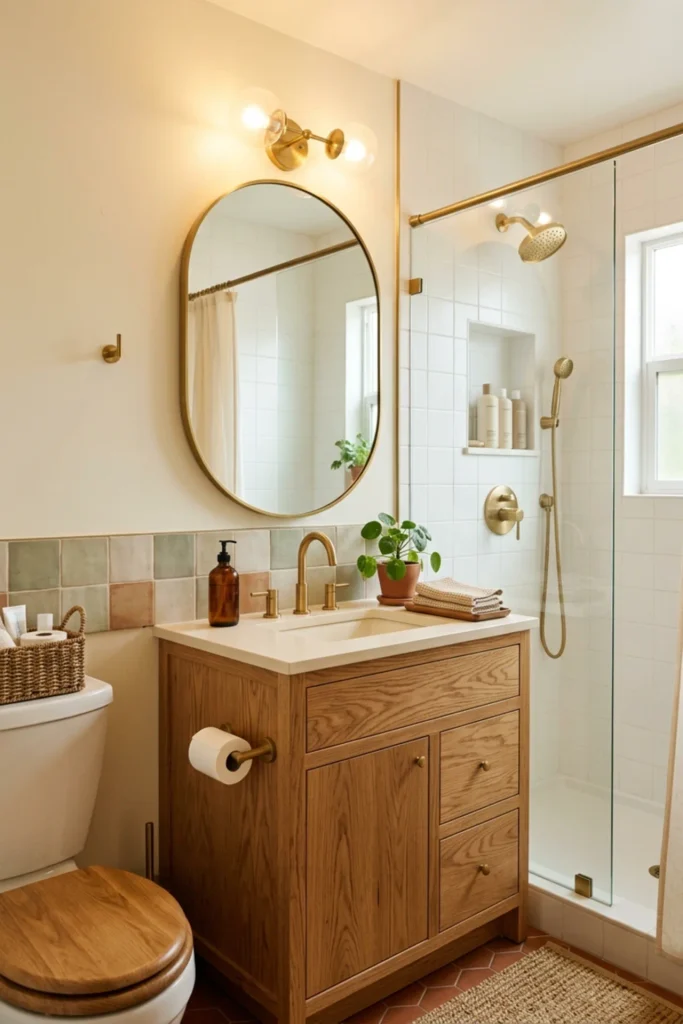
Pink can feel very retro, but a small bathroom rarely needs it on every wall.
I prefer a dusty blush or clay-pink tile behind the vanity.
Warm wood below it keeps the color grounded.
Size and requirements: A vanity backsplash extending around 18–30 inches above the counter can be enough for a strong color moment. If tiling to the ceiling, keep the adjacent walls simple.
Method and cost: Tape the planned tile boundary on the wall before installation. A small vanity-wall tile project may cost around $400–$1,500+, depending on tile and labor.
Pros: Strong personality in a small area; easy to pair with oak; makes a simple mirror stand out.
Cons: Very sweet pink can feel juvenile; matching paint undertones can be difficult; pink tile is a bigger commitment than paint.
4. Add a Warm Oak Vanity
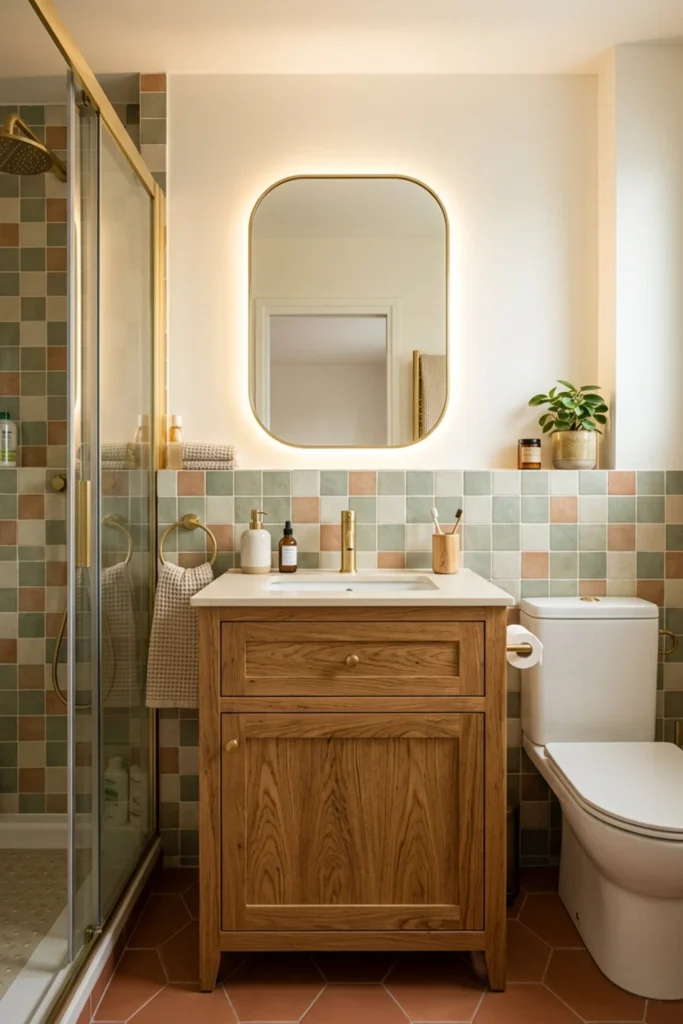
A warm oak vanity is one of the most reliable ways to stop colorful tile from feeling cold.
Natural grain also gives a retro-inspired bathroom more depth than a flat painted cabinet.
Size and requirements: Compact apartment vanities often range around 24–36 inches wide and 18–22 inches deep. Check plumbing location, drawer depth, door clearance, and floor molding.
Method and cost: Measure the plumbing centerline and the full available width. A ready-made oak or oak-look vanity may cost $600–$2,000+. Custom work can reach $2,500–$6,000+ before plumbing and installation.
Pros: Adds warmth; works with many retro colors; grain adds texture without extra decor.
Cons: Real wood needs appropriate bathroom finishing; some oak veneers look orange; larger vanities reduce floor space.
5. Use a Rounded Medicine Cabinet Instead of a Plain Rectangle
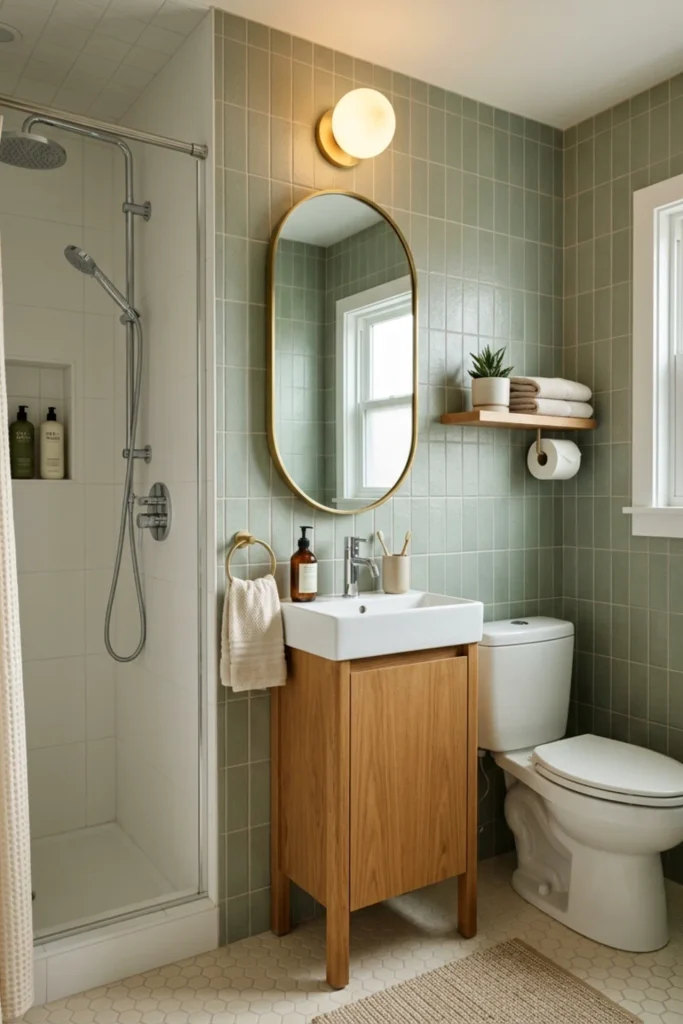
A curved or pill-shaped medicine cabinet adds retro shape and hidden storage at the same time.
This is much more useful in a small apartment than adding a decorative mirror plus another wall cabinet.
Size and requirements: A medicine cabinet around 20–30 inches wide works for many compact vanities. Keep the width proportional to the vanity. Check wall depth, studs, wiring, plumbing, and door swing before choosing recessed installation.
Method and cost: Surface-mounted models are easier for many apartment situations. Recessed cabinets require checking the wall cavity first. Expect around $150–$800+ for the cabinet, with installation adding $150–$600+.
Pros: Adds curves and storage together; saves counter space; helps the bathroom feel less boxy.
Cons: Recessed installation may not be possible; large doors can hit adjacent fixtures; cheap mirror edges can deteriorate in humid rooms.
6. Bring in One Globe Light Fixture
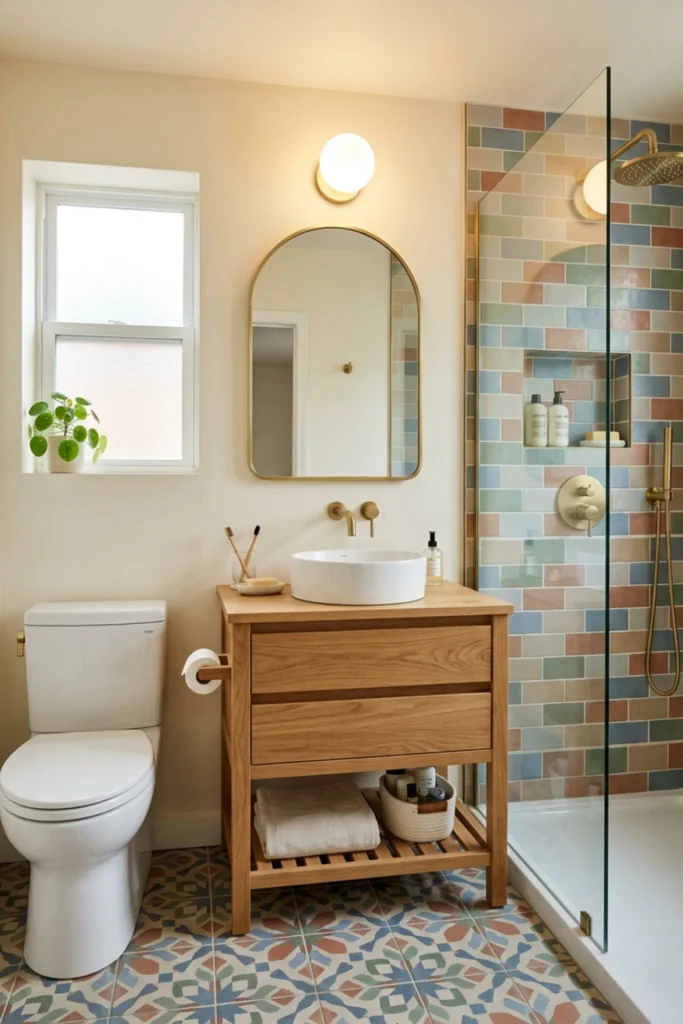
Globe lights are an easy retro detail because the shape feels familiar without being overly themed.
One opal-glass globe above or beside the mirror can add softness.
Size and requirements: A single globe around 6–10 inches in diameter works in many small bathrooms. Make sure the fixture is suitable for the location and follow all electrical and manufacturer requirements.
Method and cost: Use a paper circle to test scale before buying. A simple fixture may cost $80–$400+. Professional electrical installation may add $150–$600+, depending on wiring.
Pros: Strong retro shape; soft diffused light; little visual clutter.
Cons: Decorative globes may not provide enough grooming light on their own; hardwired changes increase cost; incorrect placement creates facial shadows.
7. Add a Cream-and-Brown Checker Floor
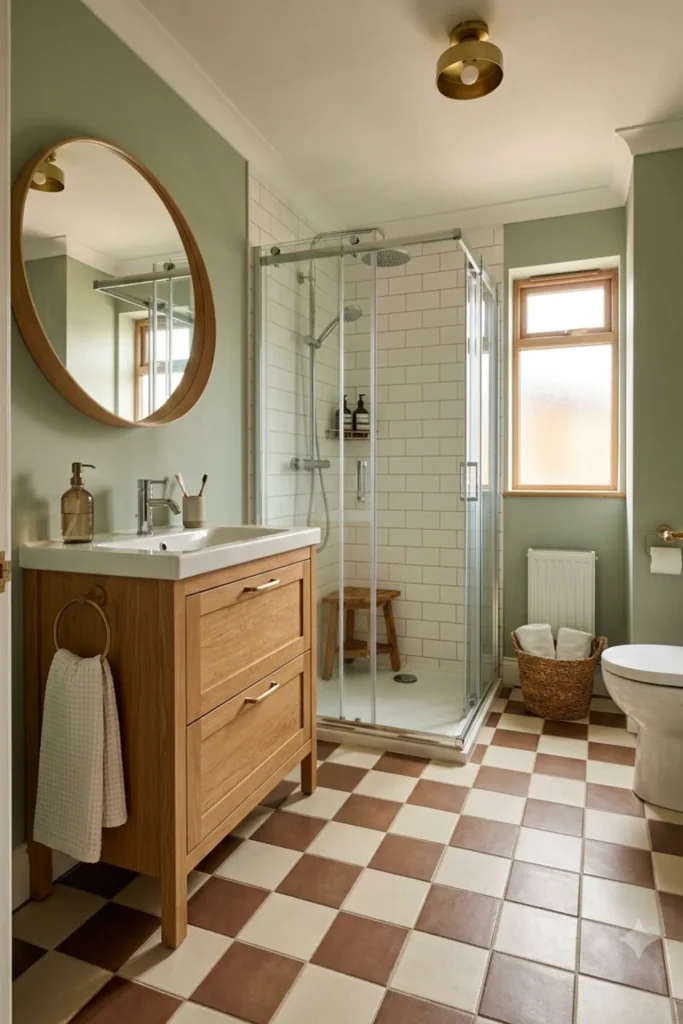
Checker flooring can make the whole bathroom feel retro without adding more color to the walls.
Cream and brown is usually softer than black and white.
Size and requirements: In a compact bathroom, tiles around 8–12 inches square can create a balanced pattern. Check slip resistance, wet-area suitability, substrate condition, and installation requirements.
Method and cost: Dry-lay or digitally mock up the pattern before installation. Vinyl may cost around $500–$1,500 installed in a small bathroom. Tile may cost $1,000–$3,500+, especially if the subfloor needs preparation.
Pros: Strong retro personality; hides small marks better than plain white; gives the room a clear design direction.
Cons: High contrast can make the floor busy; grout requires maintenance; hard tile can be cold underfoot.
8. Use Terracotta-Look Floor Tile With Blue or Green Walls
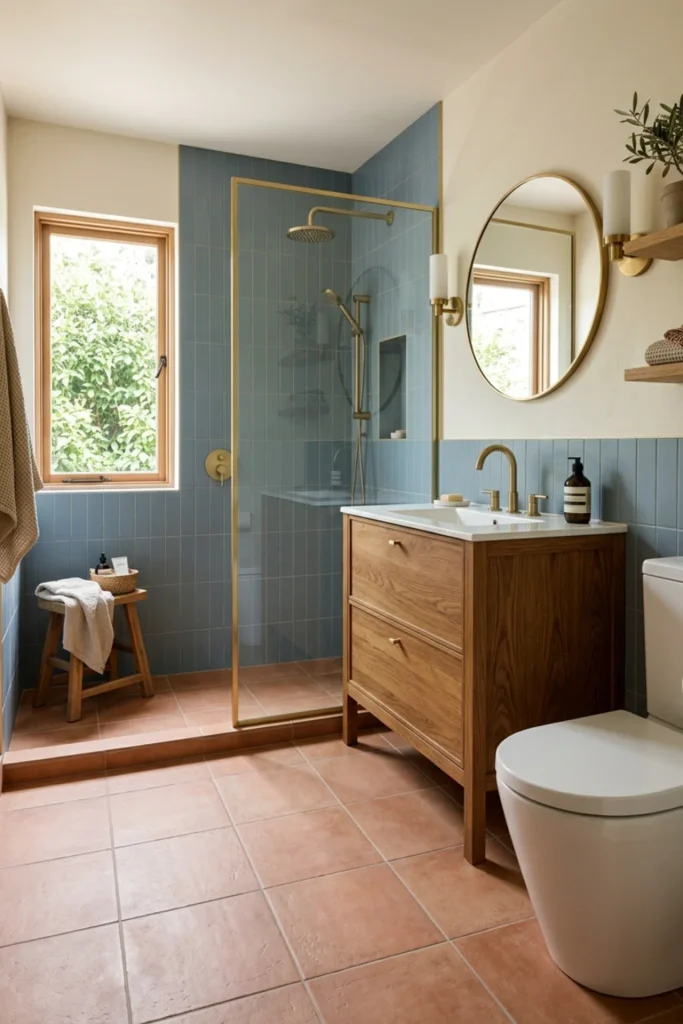
Terracotta and blue or green is a warm retro combination.
Real terracotta can require more care, so porcelain terracotta-look tile may be easier in an apartment bathroom.
Size and requirements: Choose flooring rated for bathroom use and check slip performance. Medium-format tiles around 8–12 inches often suit a compact room, but the layout and tile series matter more than a fixed size.
Method and cost: Bring the tile sample into the room and view it beside the vanity wood and wall color. Installed porcelain tile may cost roughly $1,000–$3,500+ in a small bathroom.
Pros: Adds warmth; works beautifully with muted blue and green; easier to coordinate with wood.
Cons: Orange-toned tile can clash with some oak finishes; grout still needs care; real terracotta requires more maintenance.
9. Use Warm Brass Hardware in Small Amounts
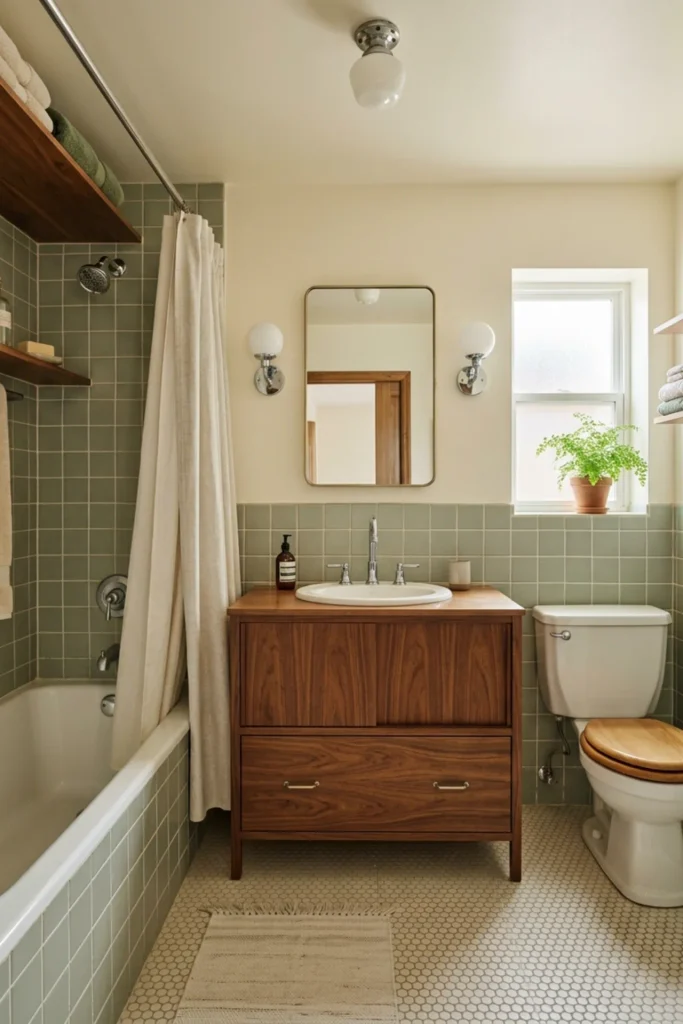
Warm brass can make retro colors feel richer.
Use it on the faucet, mirror frame, or cabinet hardware, but not necessarily every metal surface.
Size and requirements: Keep brass to a small repeated detail, around 5% of the visible palette. If replacing cabinet pulls, match the existing hole spacing where possible.
Method and cost: Order one hardware sample first. A basic hardware refresh may cost $50–$300. A faucet can add $150–$700+, plus plumbing labor if needed.
Pros: Adds warmth; works with wood; reinforces retro styling without using floor space.
Cons: Finishes vary; some brass changes over time; too much can make the room feel glamorous rather than retro.
10. Keep the Shower Curtain Simple but Color-Connected
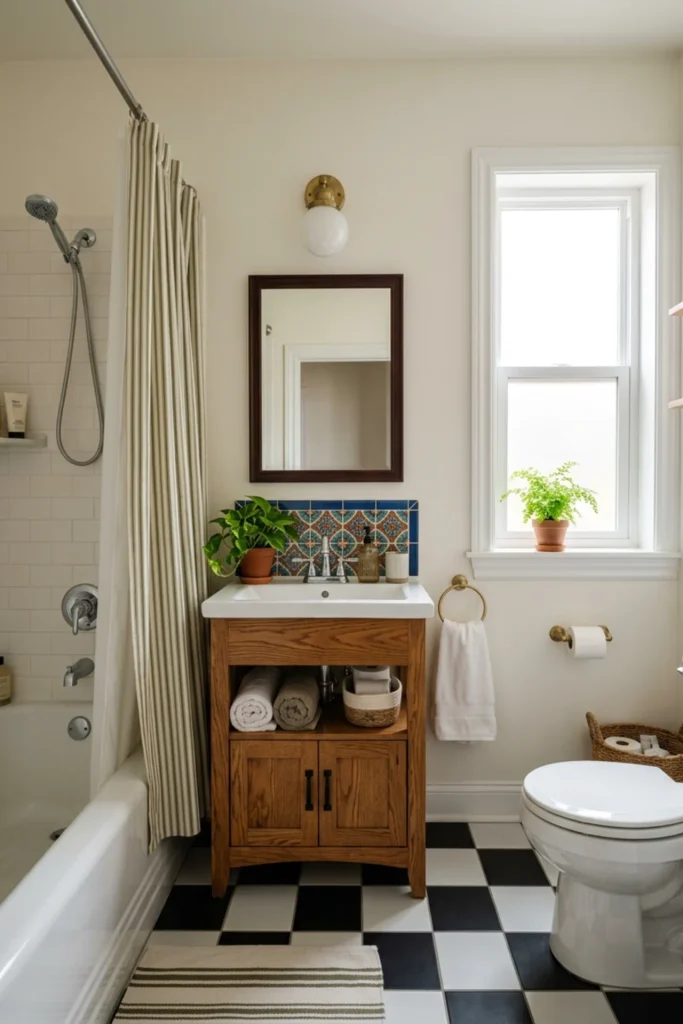
A shower curtain can support the retro palette without competing with the tile.
Try a subtle stripe, tiny check, or plain fabric in one of the room’s quieter colors.
Size and requirements: Standard shower curtains are often around 72 by 72 inches, but measure your actual tub or shower. Keep fabric from pooling on the floor.
Method and cost: Pull one quiet color from the tile and use it on the curtain. A good shower curtain and washable liner may cost $40–$180.
Pros: Easy renter-friendly update; inexpensive; softens hard tile.
Cons: Fabric needs regular washing; strong patterns become visually busy; liners need replacement over time.
11. Use a Narrow Wood Shelf Above the Toilet
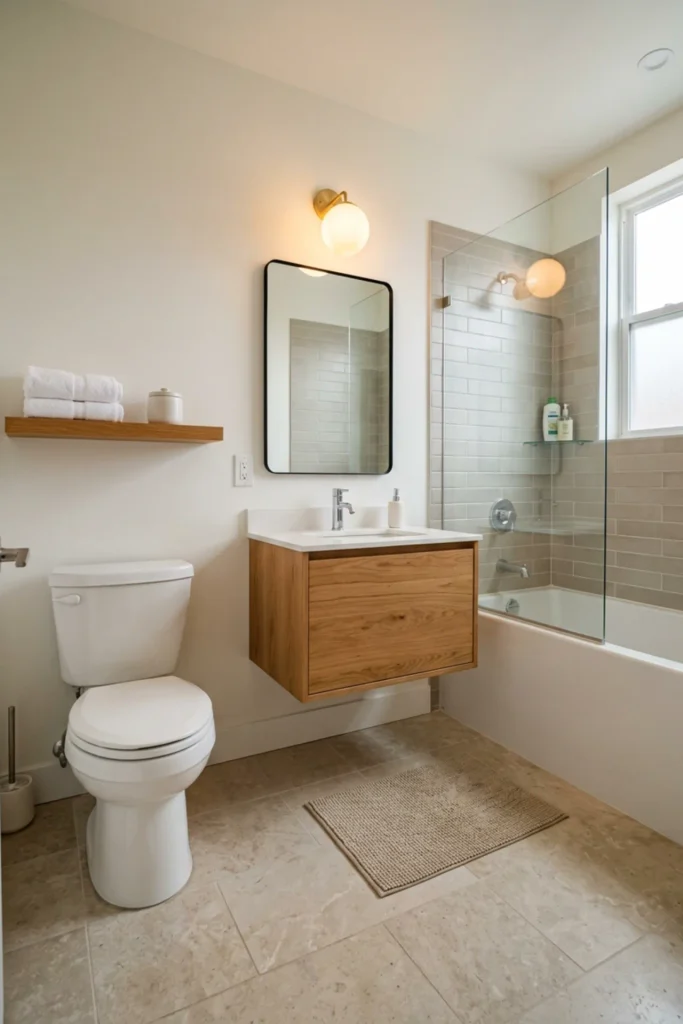
A shallow wood shelf can repeat the vanity wood without adding a full storage cabinet.
Use it for folded hand towels or one small container, not a shelf full of decor.
Size and requirements: A shelf around 6–8 inches deep is enough for light bathroom items. Keep the width proportionate to the toilet wall and avoid interfering with plumbing access or fixtures.
Method and cost: Use wall fixings appropriate for the wall and expected load. A simple shelf may cost $40–$200 DIY or $150–$500+ installed.
Pros: Repeats warm wood; adds useful storage; little floor space.
Cons: Open storage collects dust; wood needs a suitable finish; poorly installed shelves are unsafe.
For more practical storage options, see 17 Bathroom Organization Ideas.
12. Add a Small Retro Color Through Towels Instead of More Tile
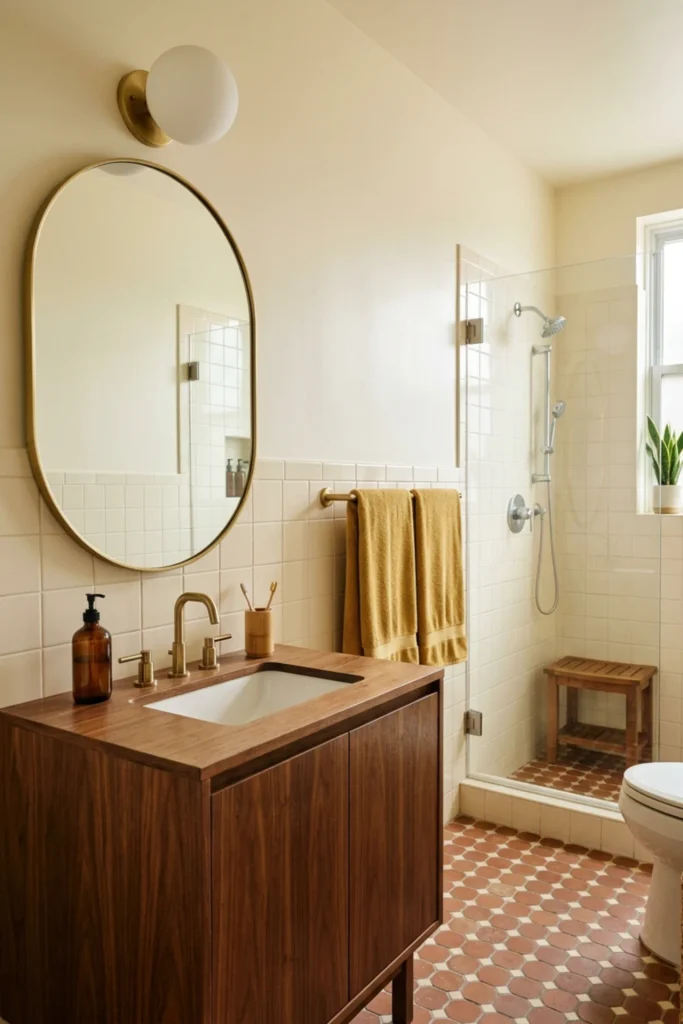
Towels are the easiest place to test mustard, rust, teal, berry, or green.
This is useful when the bathroom already has permanent neutral tile.
Size and requirements: Standard bath towels are often around 27–30 inches wide and 52–58 inches long. Check whether the existing towel bar is wide enough for the way you fold them.
Method and cost: Buy two towels in the new color before replacing the full set. A small towel refresh may cost $40–$150.
Pros: Very low commitment; renter-friendly; easy seasonal change.
Cons: Saturated colors can fade; towels add visual clutter when too many are displayed; does not change the room as much as permanent finishes.
13. Use a Warm Wood-Framed Mirror for an Easy Rental Update
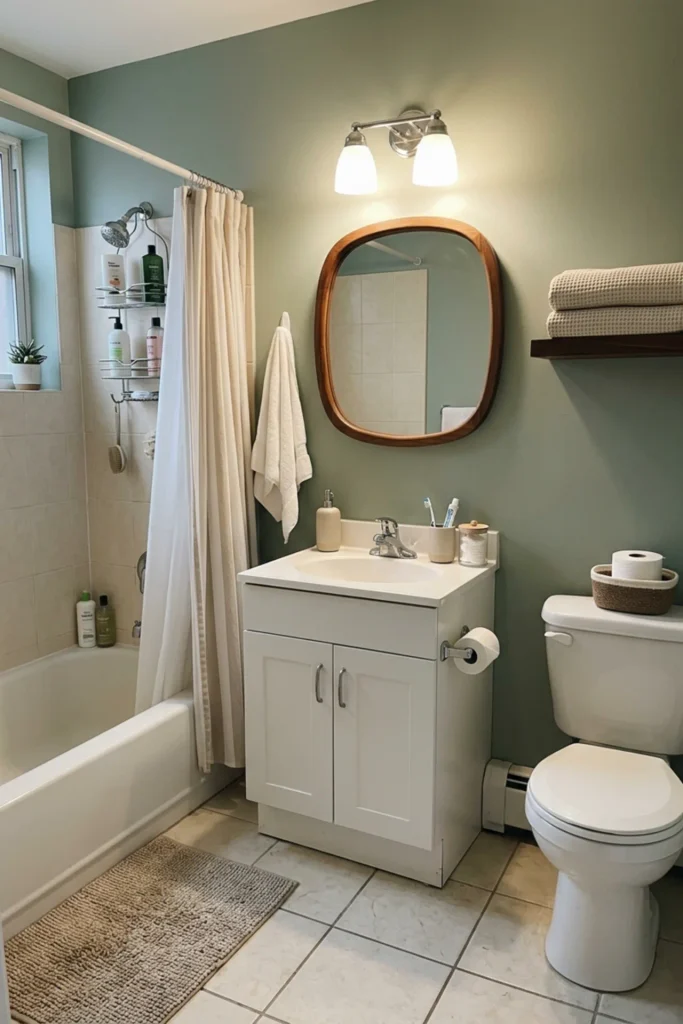
If you cannot change the vanity, a wood-framed mirror can bring the warm material into the room.
Oak, walnut, or teak-look finishes all work.
Size and requirements: Keep the mirror slightly narrower than the vanity. A 20–30-inch-wide mirror works in many small bathrooms. Check wall material and mirror weight.
Method and cost: Tape the mirror size on the wall before ordering. Use appropriate mounting hardware. A wood-framed mirror may cost $100–$600+.
Pros: Adds warmth without plumbing work; rental-friendly if mounting is allowed; easy visual upgrade.
Cons: Heavy mirrors need proper fixing; wood or veneer must tolerate bathroom humidity; the frame can feel bulky in a tiny room.
14. Paint the Ceiling a Very Soft Retro Tint
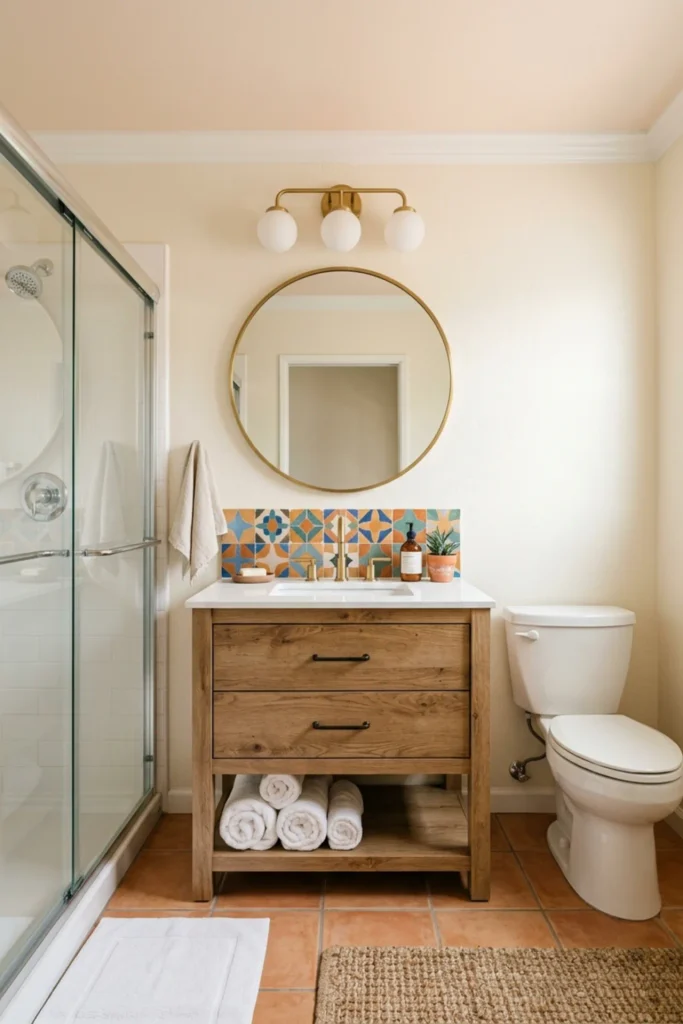
A small bathroom ceiling can handle a soft color when the walls remain light.
Pale peach, warm cream, muted blue, or soft green can make the room feel more finished.
Size and requirements: Test a large paint sample because ceiling color changes with artificial light. Use a paint product suitable for the bathroom environment and follow the manufacturer’s surface-prep instructions.
Method and cost: Clean and prep the ceiling carefully. DIY paint and supplies may cost $50–$150. Professional painting may cost $250–$700+ depending on ceiling condition and local labor.
Pros: Adds retro color without using wall space; low cost; visually interesting.
Cons: Dark ceiling colors can lower the room visually; bathroom ceilings need good prep; color shifts strongly under warm bulbs.
15. Add a Small Wooden Stool Only If the Floor Space Allows It
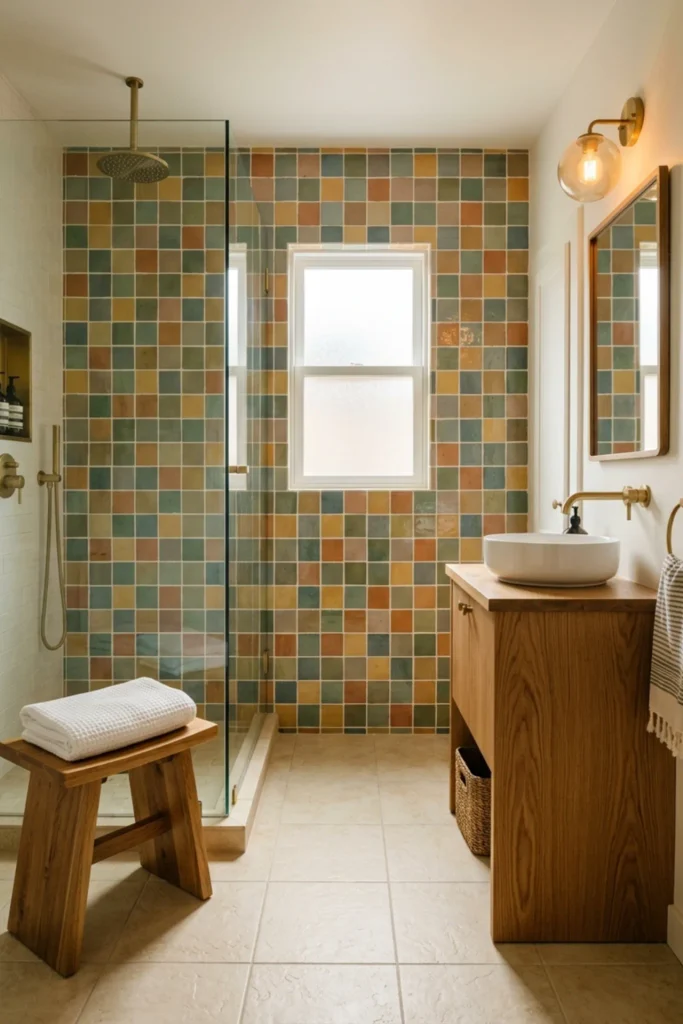
A small wood stool can hold a folded towel or provide a temporary surface.
It also repeats the vanity wood.
Size and requirements: A compact stool around 12–16 inches wide is enough. Keep it out of the main route and away from door swings.
Method and cost: Tape the stool footprint on the floor for a few days before buying. A simple wood stool may cost $50–$250.
Pros: Adds warmth; movable; useful temporary surface.
Cons: Uses floor space; can become clutter; some wood products are not suitable for damp areas.
16. Use Reeded Glass or Fluted Details Sparingly
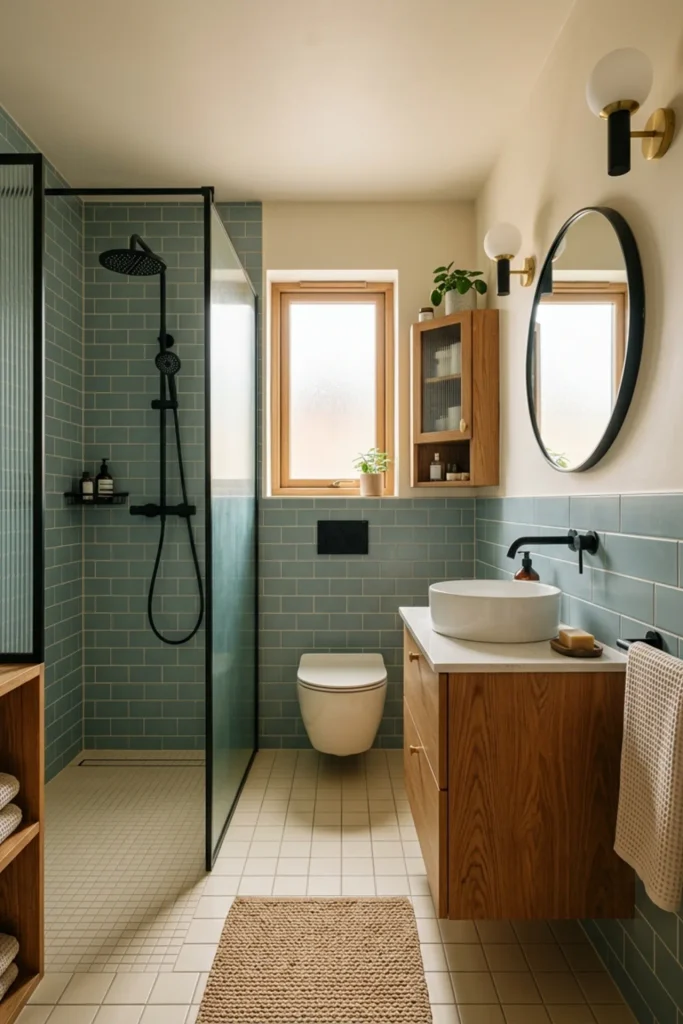
Reeded glass can add a retro texture without adding another color.
Use it on a small cabinet door, shower panel where suitable, or decorative wall cabinet.
Size and requirements: Make sure any glass used in a shower or other required safety location meets applicable product and code requirements. For storage cabinets, check door swing and the amount of visual concealment you actually want.
Method and cost: Start with one small reeded-glass element. A cabinet with textured glass may cost $300–$1,200+. Shower glazing can cost significantly more.
Pros: Adds vintage texture; softens visible storage; works with wood and color tile.
Cons: Textured glass takes more cleaning; custom glazing is expensive; unsuitable glass in safety locations is a serious problem.
17. Use Retro Color on the Vanity Instead of the Tile
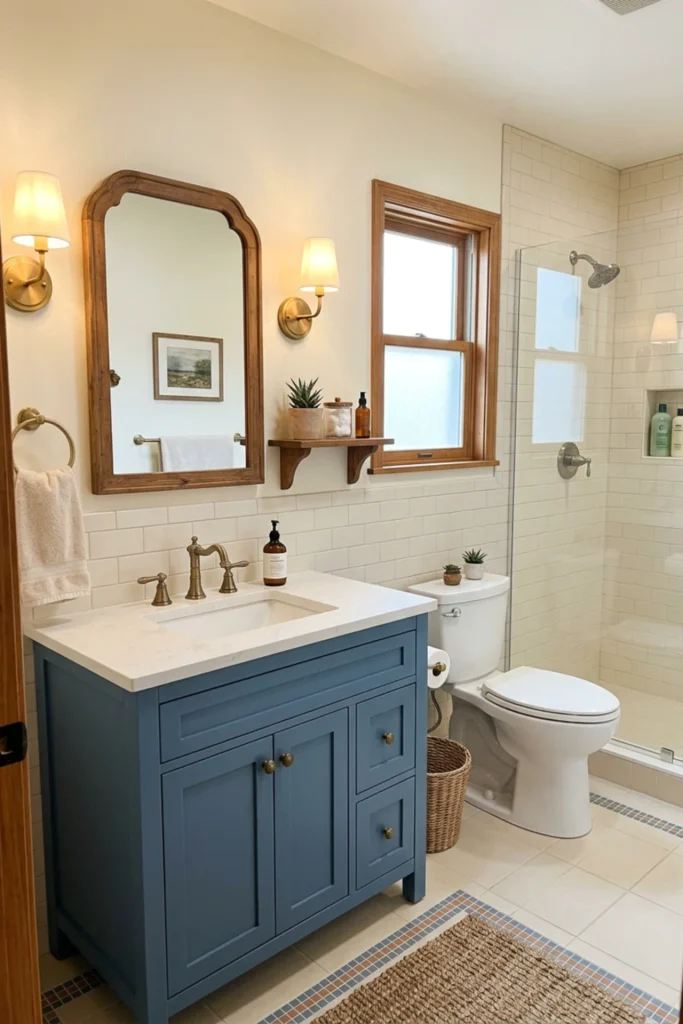
If changing tile is too expensive, paint the vanity.
Muted burgundy, olive, dusty blue, ochre, or smoky green can give you the color story while existing tile stays neutral.
Size and requirements: Check the vanity material before painting. Laminate, thermofoil, wood, and previously painted surfaces require different preparation. Keep painted surfaces away from standing water and follow the coating manufacturer’s directions.
Method and cost: Clean, degloss or sand as required, prime appropriately, then apply a durable cabinet coating. DIY materials may cost $80–$250. Professional vanity refinishing may cost $300–$1,000+.
Pros: Much cheaper than retile work; strong color impact; good for partial renovations.
Cons: Poor prep causes peeling; painted cabinets need cure time; strong color may date faster than wood.
18. Keep the Counter Mostly Clear
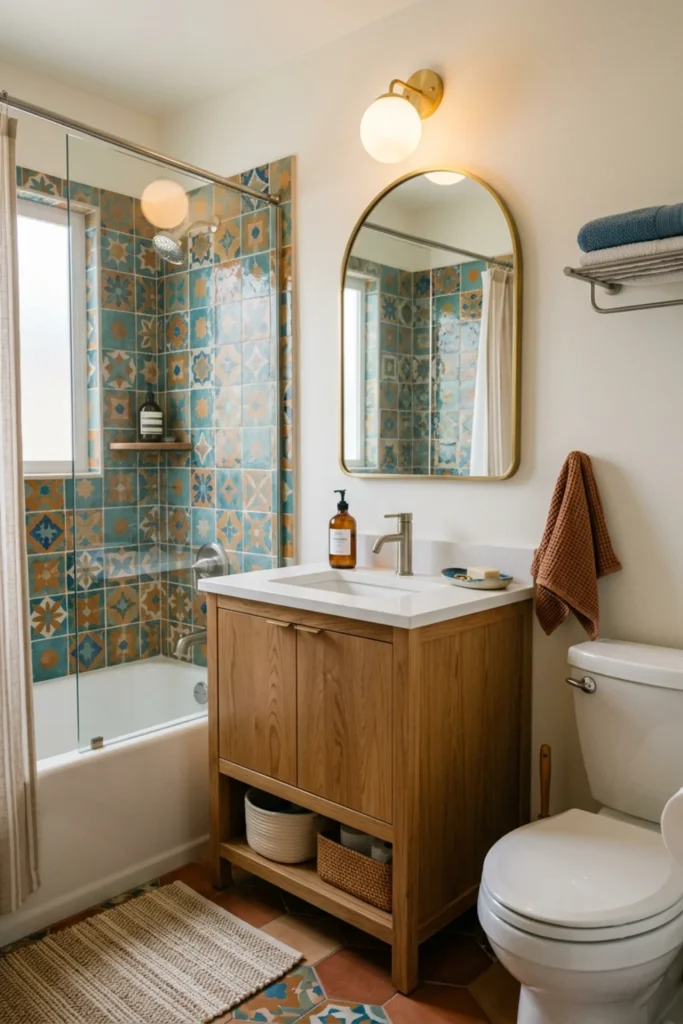
A retro bathroom already has visual interest through tile, wood, hardware, and lighting.
The counter does not need trays full of bottles, perfume, jars, flowers, and decorative objects.
Size and requirements: Try to leave around 40%–50% of the vanity counter visually clear. Store backups and occasional items in drawers or cabinets.
Method and cost: Remove everything from the counter, group items by daily use, and return only the essentials. This costs $0.
Pros: Makes the bathroom feel larger; easier cleaning; lets tile and wood stand out.
Cons: Requires enough hidden storage; minimal counters can feel plain if the rest of the room has no texture.
19. Edit the Retro Details Until the Bathroom Feels Collected
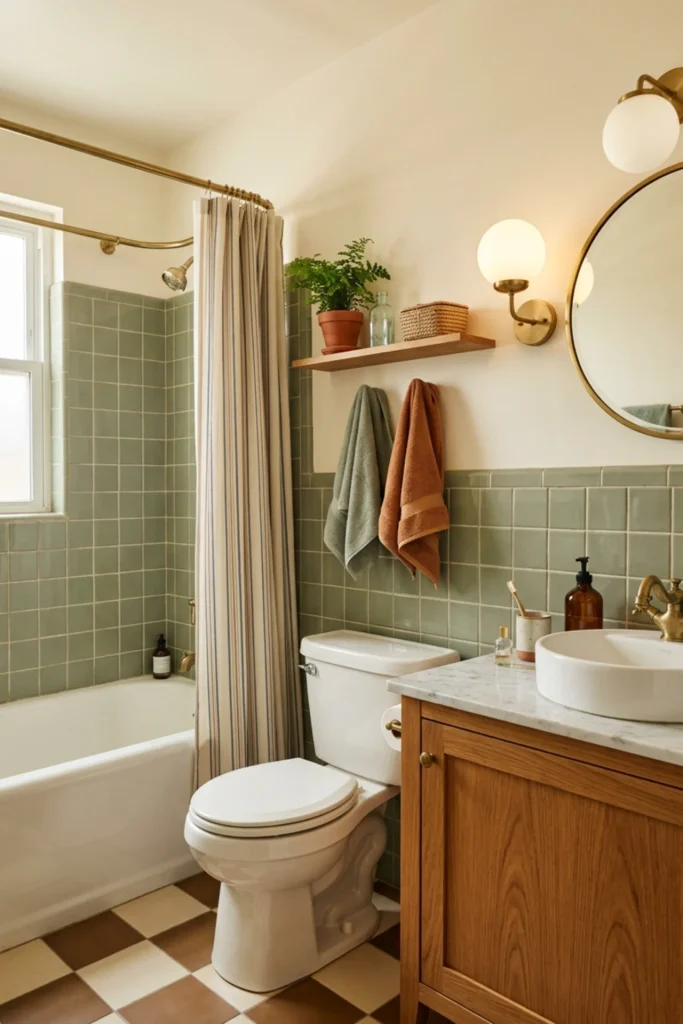
The final step is to stop adding.
If the room already has green tile, checker flooring, a wood vanity, brass hardware, globe lights, a colored ceiling, patterned towels, a wood stool, and vintage art, another retro detail probably will not improve it.
Size and requirements: Keep at least one large surface visually quiet. That may be the upper wall, shower curtain, floor, or vanity counter. Preserve clear access around the toilet, vanity, and tub or shower.
Method and cost: Remove all loose decor from the bathroom, then add back only what is useful or genuinely improves the room. Cost: $0.
Pros: Makes a small bathroom feel larger; easier to clean; protects the retro look from becoming gimmicky.
Cons: Minimal styling cannot fix poor ventilation or layout; collectors may need storage elsewhere.
A Practical 10-Step Retro Apartment Bathroom Plan
If I were starting with a plain apartment bathroom, I would use this order:
- Measure the vanity, toilet, tub or shower, and main clear floor area.
- Check ventilation and moisture issues first.
- Choose one main retro color.
- Choose one warm wood tone.
- Decide whether the main color will appear through tile, paint, vanity, or textiles.
- Choose the vanity or mirror before buying small decor.
- Add useful lighting.
- Solve storage and counter clutter.
- Add one or two smaller retro details.
- Remove anything that makes the room feel crowded.
This order keeps the bathroom practical before the decorative theme takes over.
Approximate Budget by Update Level
You can create a retro bathroom without a full renovation.
Low-cost refresh: $150–$800
- Towels
- Shower curtain
- Paint
- Mirror
- Hardware
- Small wood shelf
- New light bulbs
Mid-range update: $1,000–$5,000
- Vanity
- Faucet
- Lighting
- Small tile backsplash
- Medicine cabinet
- Flooring
- Professional painting
Full small-bathroom renovation: $8,000–$25,000+
- New vanity
- Shower or tub tile
- Flooring
- Plumbing fixtures
- Lighting
- Ventilation
- Waterproofing
- Electrical work
- Professional installation
Moving plumbing, structural repair, custom cabinetry, premium tile, permits, waterproofing failures, and local labor can move the total well beyond these ranges.
What I Would Spend More On
I would spend more on waterproofing, ventilation, the vanity, flooring, and useful lighting.
Those things affect the bathroom every day.
I would spend less on decorative retro accessories.
A well-installed colorful backsplash with a good wood vanity will usually give the room more character than several small novelty pieces.
If the budget is tight, start with paint, lighting, a mirror, towels, and hardware. Then live with the room before committing to tile.
Common Mistakes I Would Avoid
The first mistake is using too many retro colors at once.
The second is buying a vanity before measuring doors, drawers, plumbing, and toilet clearance.
Another mistake is choosing beautiful tile without considering grout cleaning, slip performance, or bathroom moisture.
I would also avoid putting unfinished or unsuitable wood in wet areas just because the tone looks good in a photo.
Poor ventilation can ruin an otherwise beautiful bathroom. The EPA recommends controlling bathroom moisture through ventilation and drying damp surfaces.
Another mistake is using decorative lighting as the only grooming light. A pretty globe can create atmosphere, but the mirror still needs enough usable illumination.
Finally, do not assume online inspiration images show code-compliant spacing. NKBA planning resources are helpful for understanding bathroom clearances and planning, but your own local requirements and product instructions still matter.
Final Thoughts
Retro apartment bathroom ideas work best when color and wood do most of the decorating.
Choose one tile color, one warm vanity or wood accent, and one small retro shape such as a globe light or rounded mirror.
Then keep the counter, storage, and remaining walls quieter.
The practical side matters even more in a bathroom than in most rooms. Ventilation, waterproofing, slip resistance, fixture clearance, electrical safety, and easy cleaning need to come before the decorative look.
When those basics work, colorful tile and warm wood can make even a small apartment bathroom feel playful, warm, and far more personal without making it feel cramped.
Disclosure: Some visuals are AI-assisted design concepts created for inspiration. Always confirm measurements, waterproofing requirements, flooring suitability, slip resistance, ventilation, plumbing, electrical requirements, fixture clearances, wall fixings, product ratings, manufacturer instructions, local codes, and installation requirements before making changes in your bathroom. Cost ranges are approximate U.S. planning figures and vary by location, labor, materials, permits, shipping, and project conditions.
About the Author
Ali Hamza — Founder & Editor
Hi, I’m Ali Hamza, and Styled Room Living is my personal home decor project. I don’t have a formal background in interior design. I started this website because home makeovers are something I genuinely enjoy looking at and learning about.
Most of the ideas shared here are not projects I have personally built. When I put a guide together, I try to separate an idea that only looks good in a photograph from one that could actually be useful in a normal home. Will it fit? Is it easy to clean? Does it require drilling? Can it be adjusted for a smaller budget? These are the questions I keep in mind while working on an article.
Some images on the website are AI-assisted design concepts used to explain an idea more clearly. They are meant for inspiration, not as exact construction plans. Please check measurements, materials, prices, waterproofing, electrical details, fixture clearances, and installation requirements before trying anything in your own home.
I’m still learning as the website grows, and I know every home works differently. My purpose with Styled Room Living is simply to collect useful home ideas, explain them in plain language, and help readers find something they can adapt to their own space.
Read more about Ali Hamza →