Hidden storage ideas for small apartments work best when the storage disappears into the room instead of becoming another visible object.
That is the real difference between a cabinet that simply holds things and one that looks built-in.
A built-in look usually comes from three details: the storage fits the wall properly, the finish relates to the wall or surrounding furniture, and the gaps around it are controlled. You do not always need custom carpentry to get that effect.
In a rental, I would be especially careful with permanent work. Floor-to-ceiling cabinetry, trim, drilling, and fixed shelving can look beautiful, but you may not be allowed to install them. The better approach is often to use freestanding pieces that visually connect to the architecture without becoming permanent.
This guide includes practical measurements, rough U.S. planning costs, setup methods, pros, cons, renter-friendly alternatives, safety notes, and image prompts for every idea. I have also included storage ideas for living rooms, bedrooms, entryways, dining zones, TV walls, under-bed areas, and awkward corners.
If you are still working on the overall apartment layout, start with Small Apartment Decor Ideas because storage works best when furniture scale and walkways are already under control.
What Makes Storage Look Built-In?
A built-in look is usually more about proportion than construction.
Storage starts to feel integrated when the top nearly reaches the ceiling, the side gaps are small and intentional, the color matches or closely relates to the wall, the hardware is quiet, the cabinet depth fits the room, and exposed clutter is kept behind doors.
I would not force every storage unit to disappear completely. Sometimes a warm wood cabinet looks better than a wall-matched one. The important part is that it looks like it belongs there.
Benjamin Moore’s color overview is useful when comparing wall and cabinet colors if you want freestanding storage to blend into the room.
Before You Buy Storage, Measure the Gaps
Built-in-looking storage is unforgiving if the dimensions are wrong.
Measure floor-to-ceiling height, baseboard depth, wall width, outlet positions, door swings, window trim, thermostat locations, radiator or vent clearances, furniture depth, and the main walkway.
In many small apartments, storage around 12–16 inches deep feels much lighter than a full 20–24-inch-deep cabinet.
For a main walkway, try to preserve around 24–30 inches of clear space where possible.
Always check the real wall with a level too. Apartment walls and floors are not always perfectly straight.
If you are adding tall storage, the U.S. Consumer Product Safety Commission’s Anchor It! guidance is worth reading. Tall furniture with shelves, drawers, or doors may need appropriate anchoring.
1. Use Wall-Matched Cabinets Beside the TV
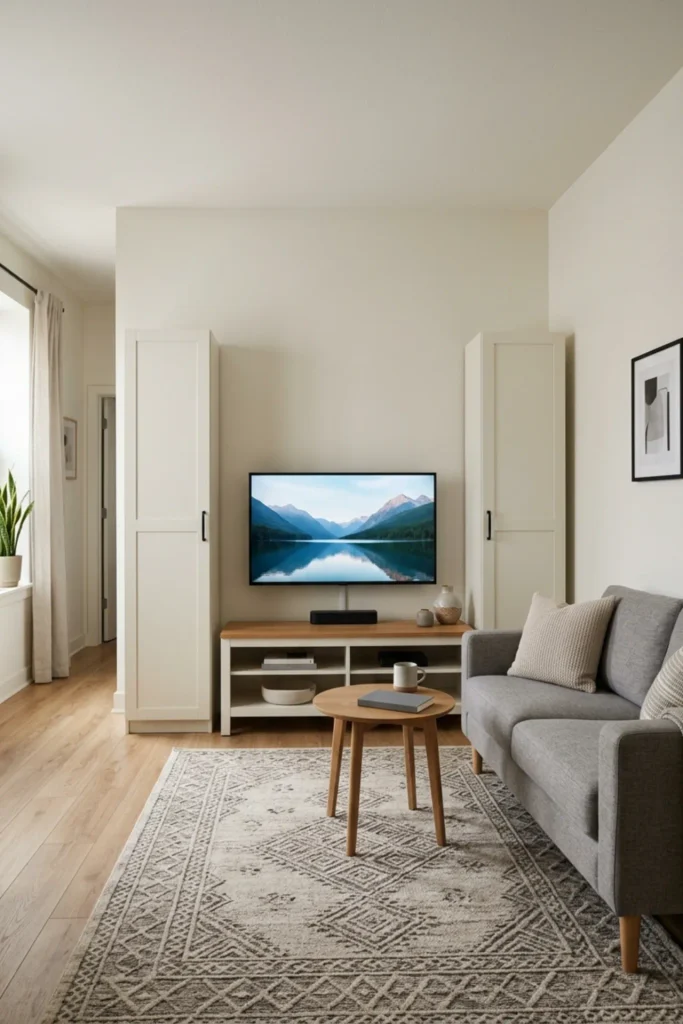
The TV wall is one of the easiest places to create a built-in look.
Use two narrow cabinets on either side of the media console, then keep the center low and open. If the cabinet color matches the wall closely, the whole arrangement can feel architectural instead of like separate furniture.
Size and requirements: Side cabinets around 18–30 inches wide and 12–16 inches deep work in many small living rooms. Keep enough clearance around the TV and media equipment. Check outlet and cable access before pushing cabinets tight to the wall.
Method and cost: Measure the full TV wall first. Choose cabinets that come close to the ceiling without forcing a tight fit. Paint or wrap the visible cabinet finish to relate to the wall if the lease allows. A pair of ready-made cabinets may cost $400–$1,500+.
Pros: Hides electronics and clutter; creates a built-in visual; makes the TV wall feel more intentional.
Cons: Tall cabinets can make a narrow room feel heavy; color matching takes effort; anchoring may be required.
For more TV-wall planning, see TV Wall Design Ideas.
2. Add a Floor-to-Ceiling Wardrobe Look in the Bedroom
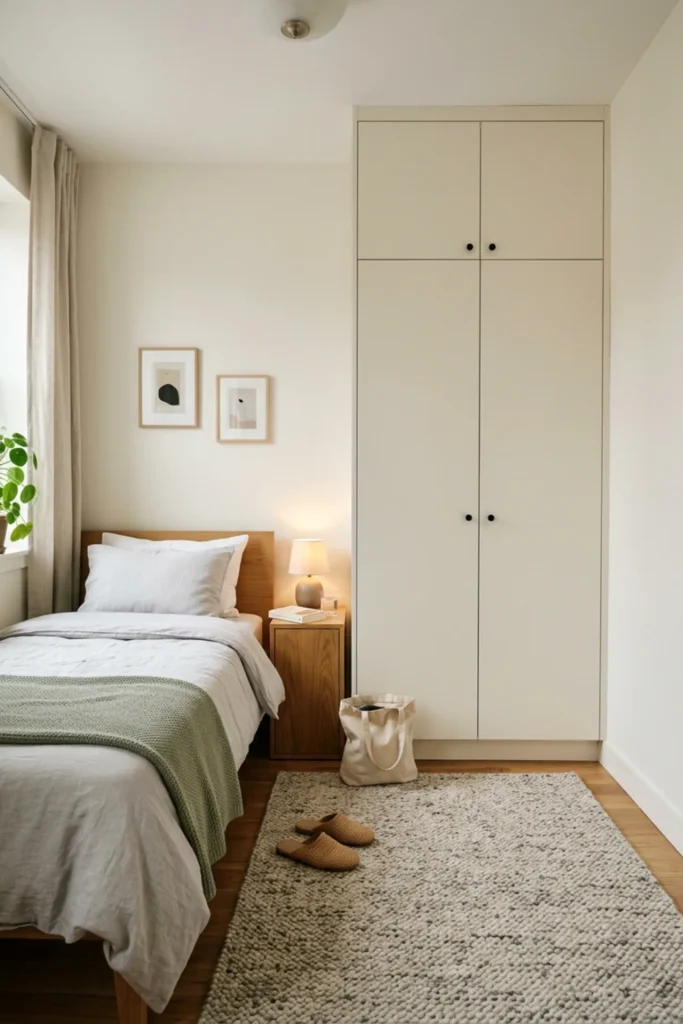
A wardrobe that nearly reaches the ceiling looks more custom than a short freestanding cabinet.
This is especially useful in bedrooms with little closet space. I would keep the doors simple and the hardware small.
Size and requirements: Typical wardrobe depth is around 22–24 inches, but shallow wardrobe systems around 16–20 inches deep can work for folded clothing or front-facing hangers. Leave enough room for doors to open and for the bed walkway to stay usable.
Method and cost: Tape the full wardrobe footprint and door swing on the floor. If the unit stops short of the ceiling, a removable top filler or matching storage box can visually close the gap. A wardrobe setup may cost $600–$2,500+.
Pros: Adds major storage; visually clean; can replace several smaller furniture pieces.
Cons: Deep wardrobes take floor space; tall units need safety consideration; moving them later can be difficult.
For bedroom-specific layouts, Small Apartment Bedroom Ideas has more guidance on bed and storage placement.
3. Use a Storage Bed With Flush Drawers
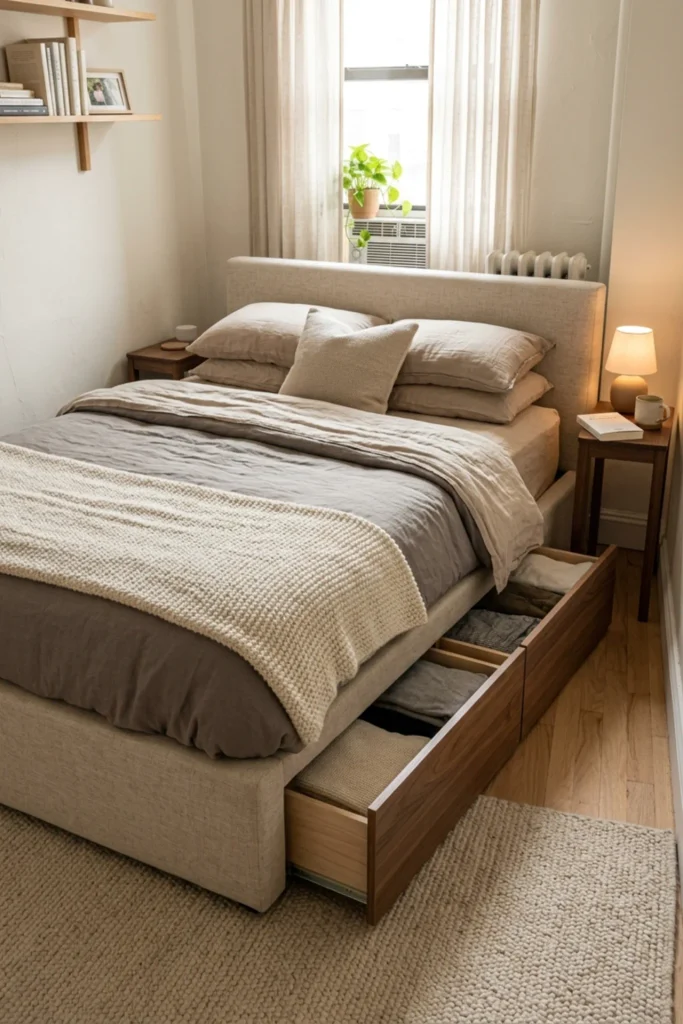
Under-bed storage is one of the least visible storage zones in an apartment.
A storage bed with flush drawers looks cleaner than exposed rolling bins. It also keeps seasonal items out of sight.
Size and requirements: Check drawer pull-out clearance on both sides of the bed. Some storage drawers need around 18–24 inches of open floor to extend fully. If one side is tight, choose lift-up storage or drawers only on the accessible side.
Method and cost: Measure the room with drawers open before buying the frame. Storage beds may cost around $600–$2,500+.
Pros: Uses space you already need for the bed; hides clutter completely; can reduce the need for another dresser.
Cons: Heavy frames are harder to move; drawers need floor clearance; lift-up mechanisms add moving parts.
4. Build a Built-In Look Around a Window With Matching Low Cabinets
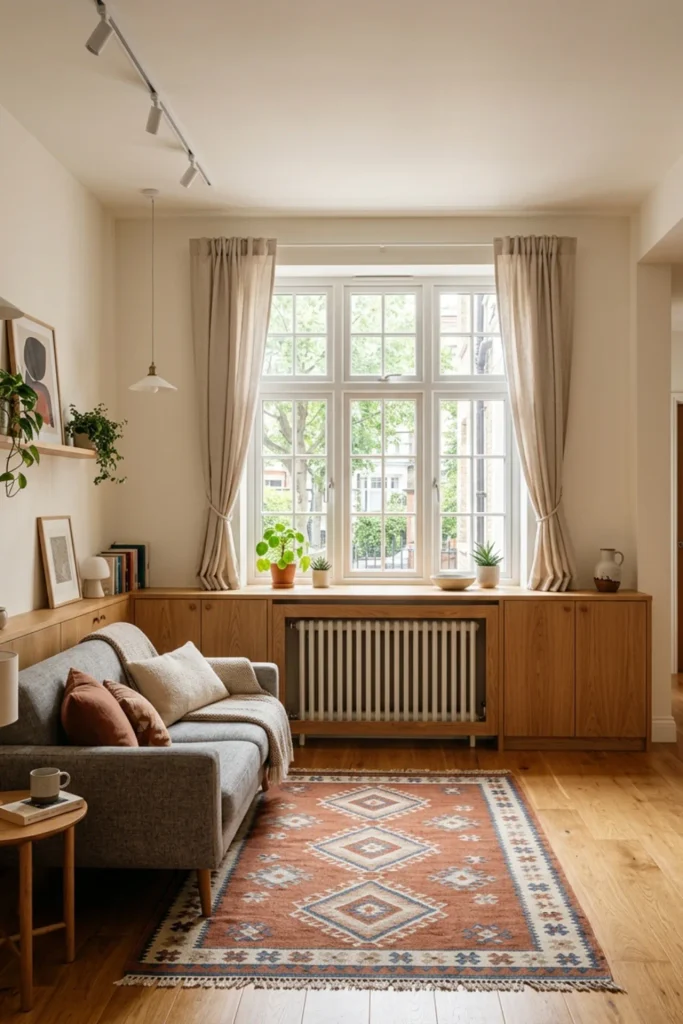
Low cabinets under or beside a window can make a plain wall feel intentional.
They are useful for blankets, books, games, or dining supplies. Keep the top simple so the window still feels open.
Size and requirements: Low cabinets around 14–18 inches deep and 24–30 inches high work well in many living rooms. Keep the cabinet below the sill and clear of heaters, vents, or radiator airflow.
Method and cost: Measure the sill height and wall width. Use two or three identical low cabinets side by side to create one continuous run. A setup may cost $300–$1,200+.
Pros: Adds hidden storage; visually widens the room; can double as display or seating-height surface if designed for it.
Cons: Can block heating or ventilation; seams between cabinets may remain visible; seating use requires proper structural support.
5. Use a Bench With Hidden Storage in the Entry
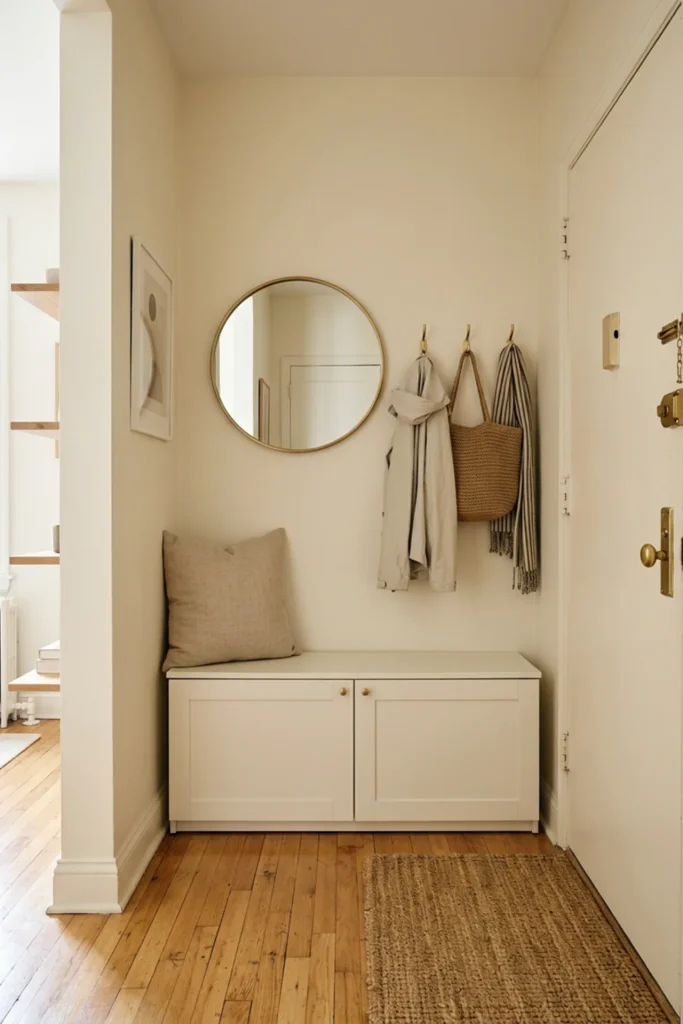
A storage bench can make a small apartment entry feel more organized without adding a separate shoe cabinet.
Choose a simple bench with lift-up storage or closed doors below. If the finish matches the wall or nearby console, it can look almost built-in.
Size and requirements: A bench around 36–48 inches wide, 14–18 inches deep, and 17–19 inches high works in many small entries. Preserve the main path and door swing.
Method and cost: Tape the footprint before buying. Keep the top mostly clear so it reads as a bench rather than a storage pile. Ready-made benches may cost $180–$700+.
Pros: Hides shoes and bags; adds seating; makes the entry feel more finished.
Cons: Deep benches reduce walkway space; lift-up lids need clearance; the top can become a clutter zone.
6. Use a Narrow Shoe Cabinet That Looks Like Wall Paneling
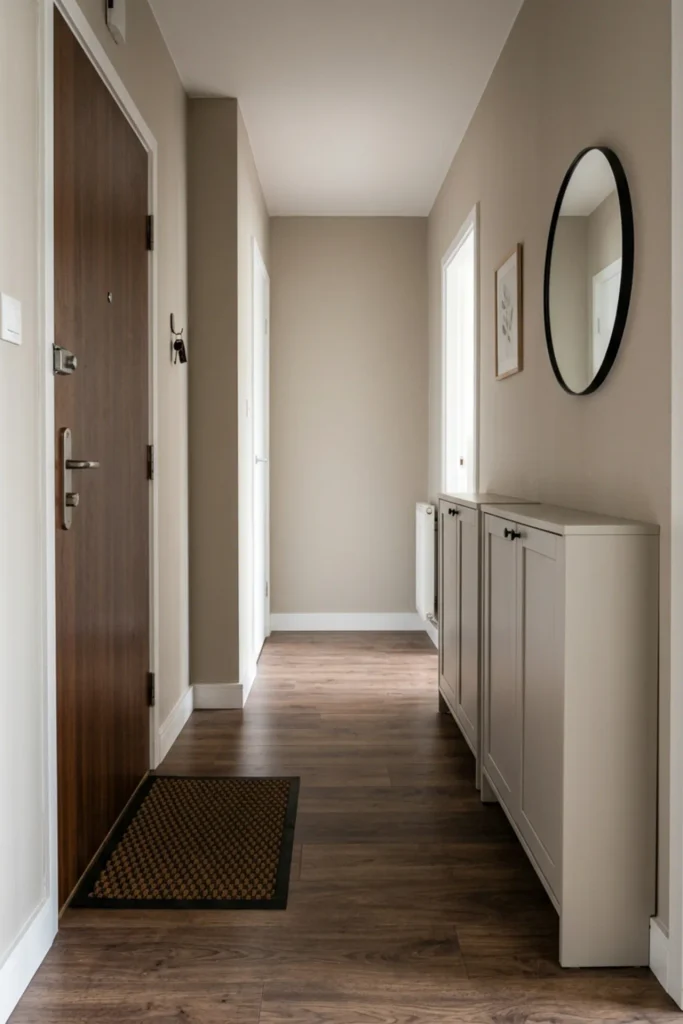
Very shallow shoe cabinets are useful in small entries because they store vertically rather than deeply.
When painted close to the wall color, they can almost disappear. A series of identical slim doors can even resemble wall paneling.
Size and requirements: Many tilt-out shoe cabinets are around 6–10 inches deep. Check the actual shoe size and door opening clearance before buying.
Method and cost: Place one or two cabinets side by side and align the tops carefully. Use a wall-matched finish if allowed. A slim setup may cost $150–$600+.
Pros: Extremely shallow; hides shoes; keeps the entry visually clean.
Cons: Not all shoes fit; tall boots need another solution; wall anchoring may be required.
7. Use a Sideboard as a Built-In-Looking Dining Storage Wall
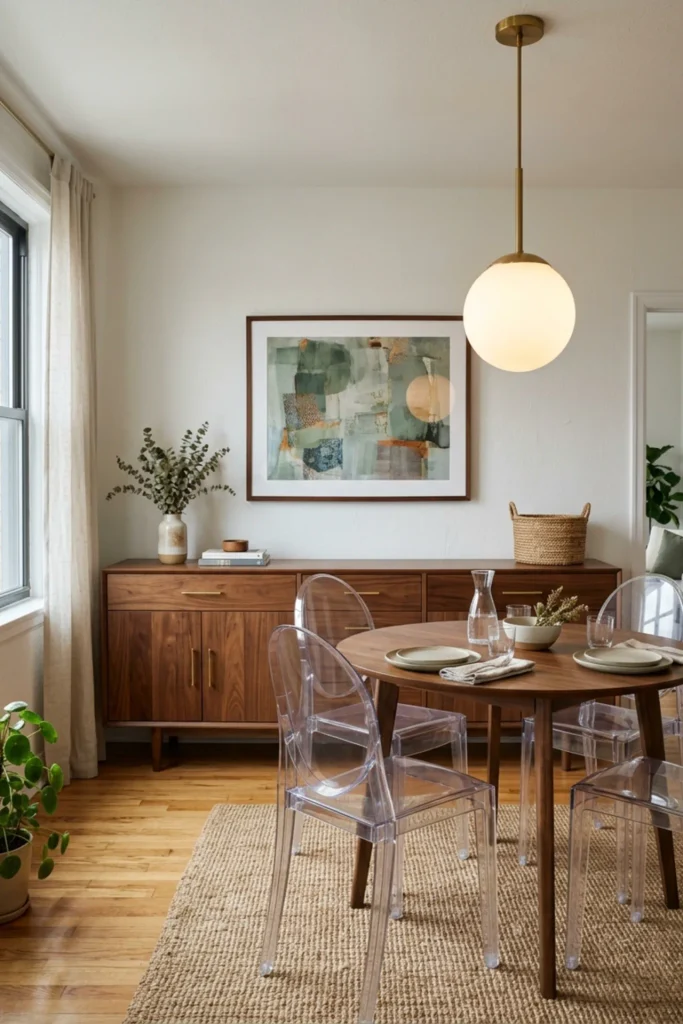
A low sideboard can look built-in when it fills most of a dining wall and matches the room palette.
Use it for dishes, linens, serving pieces, or occasional appliances. Keep the top styling minimal.
Size and requirements: Sideboards around 60–72 inches wide and 14–18 inches deep work in many small dining areas. Leave enough chair pull-out space.
Method and cost: Center the sideboard on the wall or align it with the dining table. Add one large artwork above it rather than several small objects. A sideboard may cost $400–$1,800+.
Pros: Adds a lot of closed storage; anchors the dining area; can look custom when scaled well.
Cons: Takes a full wall; wide units are hard to move; shallow drawers may not hold bulky kitchen items.
8. Add a Shallow Pantry Cabinet to an Empty Kitchen Wall
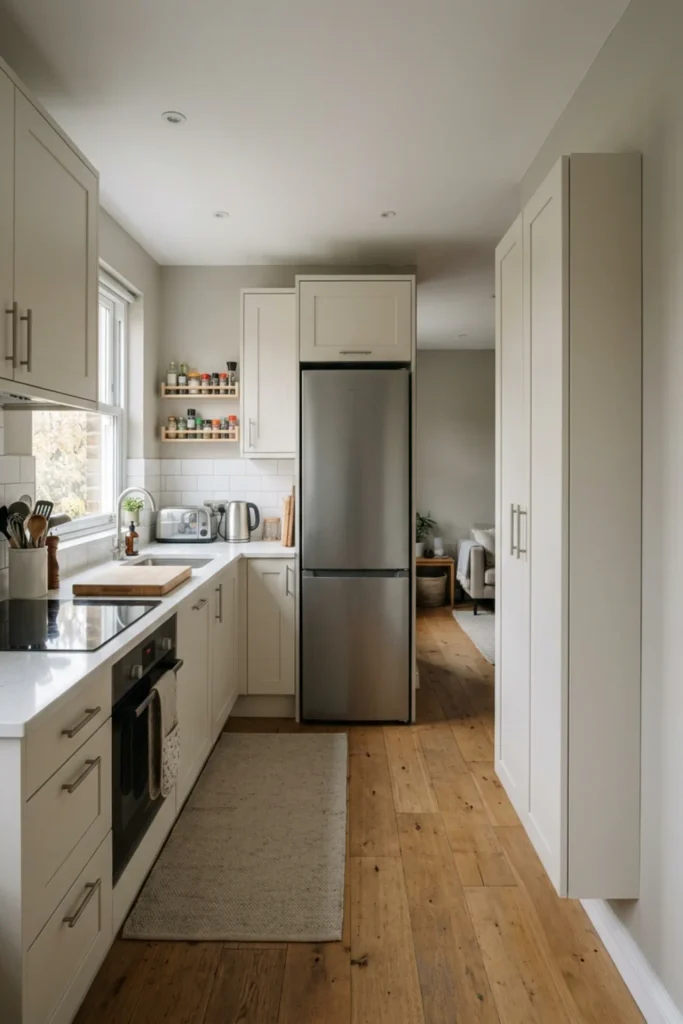
A small apartment kitchen often has one wall that is too narrow for standard cabinetry but wide enough for shallow storage.
A tall cabinet around 12–16 inches deep can hold pantry goods without feeling bulky. If it matches the cabinet color, it can look built-in.
Size and requirements: Measure door swing, refrigerator clearance, and the main walkway. Keep the pantry shallow enough that it does not pinch the room.
Method and cost: Use a tall cabinet with adjustable shelves. Add matching handles or paint only if the material and lease allow. A shallow pantry cabinet may cost $300–$1,200+.
Pros: Adds major food storage; uses vertical space; can free counters and upper cabinets.
Cons: Tall cabinets may need anchoring; narrow shelves can limit large appliances; wrong depth can make the kitchen feel tight.
For more compact-kitchen ideas, see Small Apartment Kitchen Ideas.
9. Hide Cleaning Supplies in a Slim Utility Cabinet
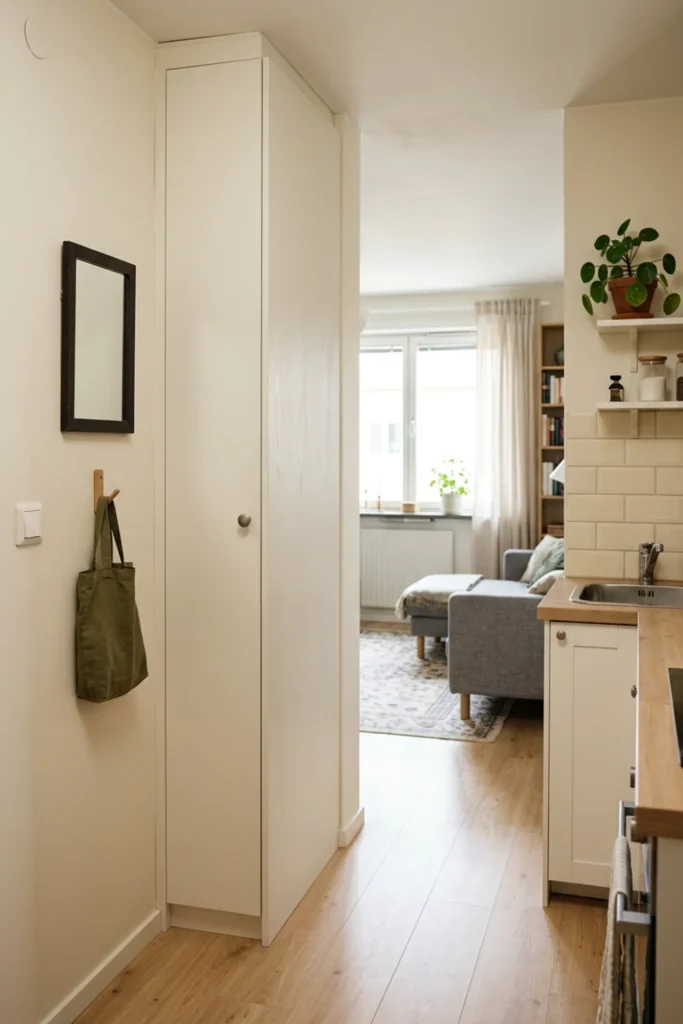
Brooms, vacuums, mops, and cleaning products are awkward because they are tall.
A slim utility cabinet can make them disappear. This works especially well near a kitchen, laundry closet, or entry.
Size and requirements: A utility cabinet around 12–18 inches wide and 14–20 inches deep can hold many cleaning tools. Measure the vacuum height and handle length first.
Method and cost: Use hooks or clips inside the cabinet so tools do not fall forward. A simple cabinet may cost $250–$900+.
Pros: Hides bulky cleaning tools; keeps them upright; frees random corners.
Cons: Interior organization is important; narrow cabinets tip more easily if not secured; vacuum charging may need outlet access.
10. Use a Wall-Matched Bookcase With Doors on the Bottom
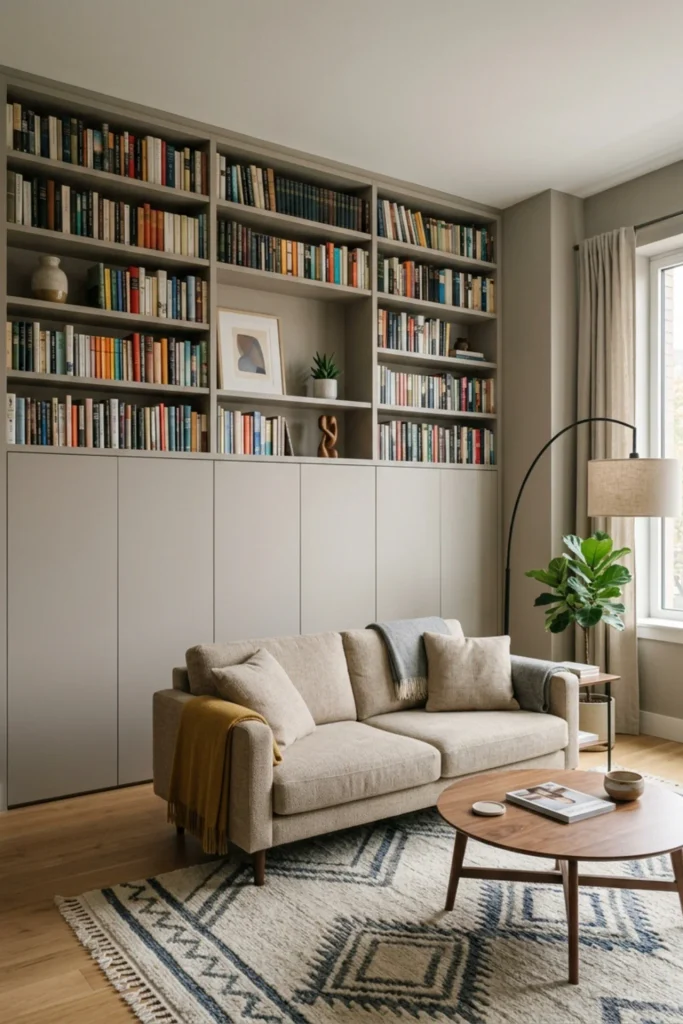
Open shelves feel lighter when the lower half is closed.
Use the upper shelves for books and a few objects, while the lower doors hide cables, games, paperwork, and household clutter. Matching the case to the wall helps it feel more integrated.
Size and requirements: A bookcase around 10–12 inches deep is enough for many books. Lower cabinets may be slightly deeper if needed. Keep enough room for doors to open.
Method and cost: Choose one tall unit or two identical units side by side. Keep the top shelves visually lighter than the bottom. Expect around $300–$1,500+.
Pros: Good balance of display and hidden storage; uses vertical space; can visually raise the ceiling.
Cons: Open shelves still need dusting; tall units may need anchoring; mismatched filler gaps reduce the built-in effect.
11. Use a Sofa With Hidden Storage in the Chaise
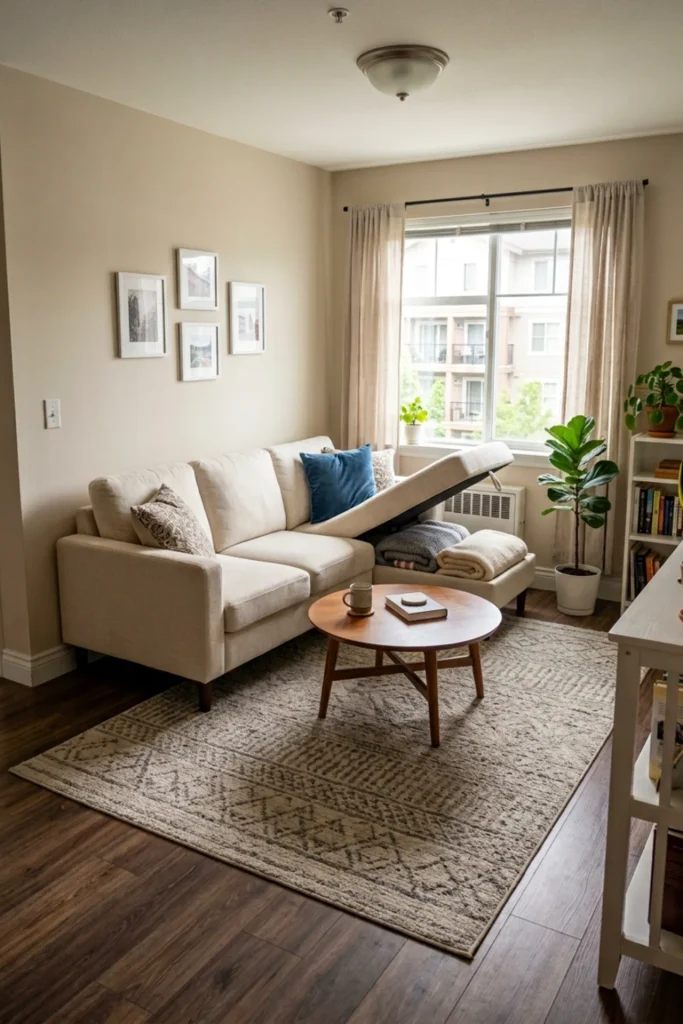
If your living room already needs a sofa, hidden storage inside the chaise can replace a separate blanket basket or storage ottoman.
This is especially useful in studio apartments. I would choose a sofa that still fits the room first.
Size and requirements: Measure the full chaise depth and the walkway beside it. Many apartment sectionals are around 80–95 inches wide, but smaller models exist. The chaise should not block the main route.
Method and cost: Tape the sofa footprint and storage-lid swing before buying. Storage sectionals may cost $900–$3,000+.
Pros: Uses furniture volume efficiently; hides bulky blankets; reduces extra storage pieces.
Cons: Sectionals are less flexible than standard sofas; chaise depth can crowd the room; storage hinges add moving parts.
12. Use a Window Seat With Lift-Up Storage Only Where Structure Allows
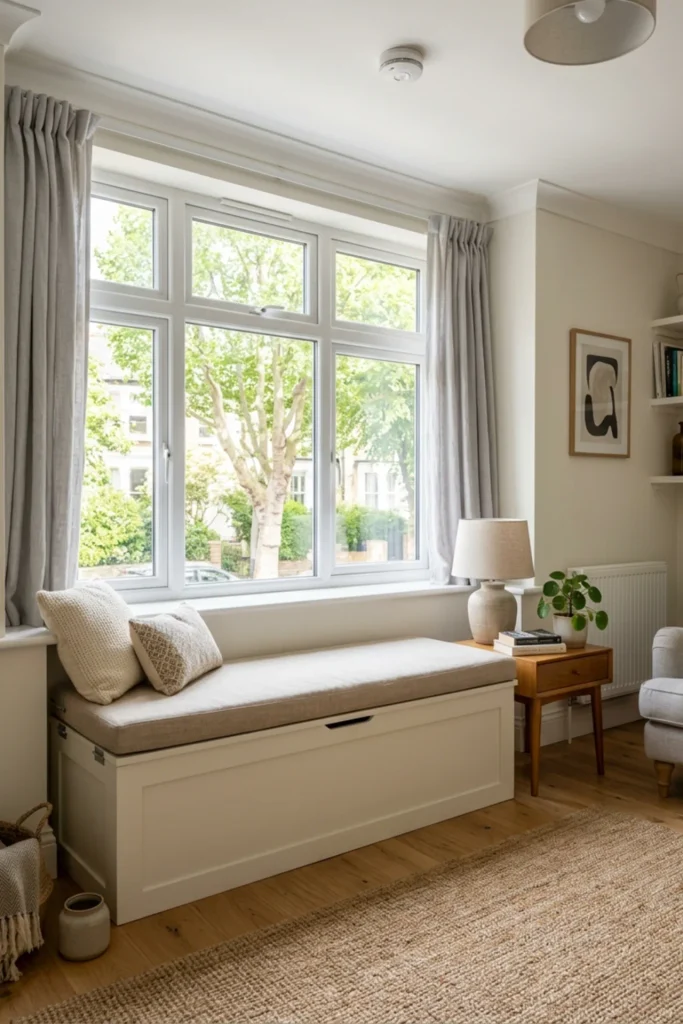
A window seat can look truly built-in, but it needs to be planned properly.
If you are renting, I would usually choose a freestanding bench that fits tightly under the window rather than permanently attaching one.
Size and requirements: Seating height around 17–19 inches and depth around 16–20 inches is comfortable for many people. Keep the seat below the sill and away from vents or radiators.
Method and cost: Use a freestanding storage bench with a fitted cushion for a renter-friendly version. Expect around $250–$1,000+. True custom built-ins cost much more.
Pros: Adds storage and seating; makes a window feel intentional; can create a cozy nook.
Cons: Permanent versions are not rental-friendly; lift-up seats need clearance; heating systems can conflict with placement.
13. Hide a Home Office Inside a Cabinet
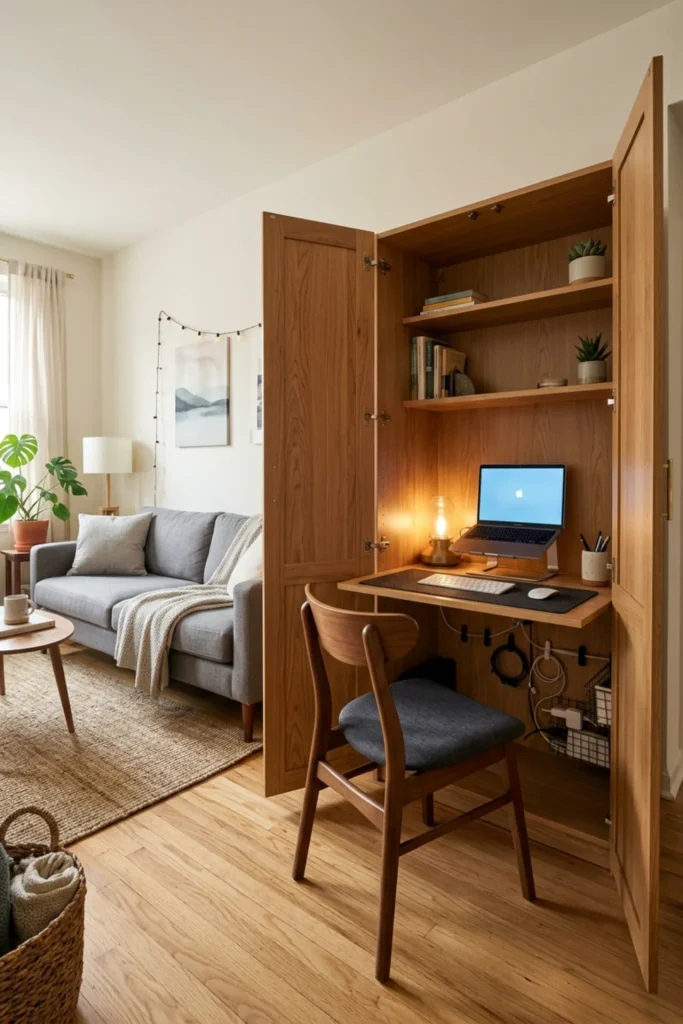
A shallow cabinet with a fold-down or pull-out work surface can hide a small office at the end of the day.
This works well in a living room where a desk would otherwise stay visible all the time.
Size and requirements: A work surface around 18–22 inches deep can be enough for laptop work. Aim for a worktop height around 28–30 inches if using a standard chair. Check legroom and chair storage.
Method and cost: Choose a cabinet designed for desk use or adapt a stable piece carefully. A ready-made hideaway desk may cost $400–$1,500+.
Pros: Hides work clutter; useful in studios; living room looks calmer after work.
Cons: Shallow desks are not ideal for large monitors; cable management is important; cheaper fold-down hardware may feel unstable.
For more compact workstation ideas, see Small Home Office Ideas.
14. Use a Storage Ottoman That Matches the Sofa
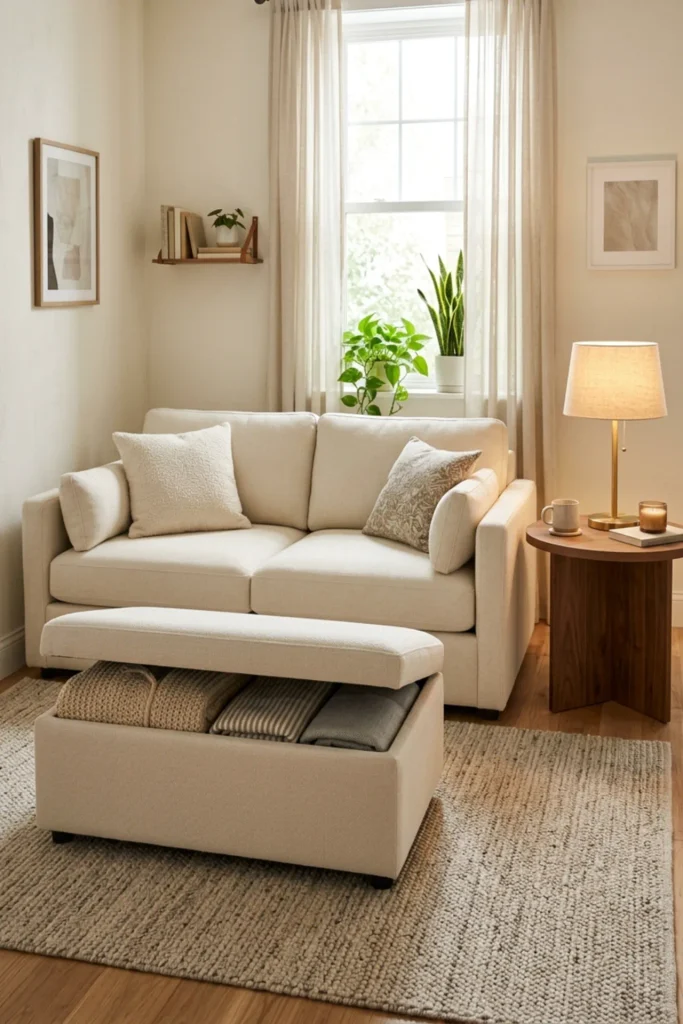
A storage ottoman can disappear visually when the upholstery matches or closely relates to the sofa.
Use it for blankets, games, or extra cushions. The key is avoiding a large contrast piece that looks like another box in the room.
Size and requirements: A compact ottoman around 24–36 inches wide works in many small living rooms. Leave enough room to open the lid and walk around it.
Method and cost: Match the sofa tone or use a quiet neutral. Storage ottomans may cost $120–$600+.
Pros: Hidden storage plus footrest; easy to move; no installation.
Cons: Takes floor space; lid clearance matters; can replace a coffee table but may not provide a hard surface.
15. Use Full-Height Curtains to Hide Open Storage
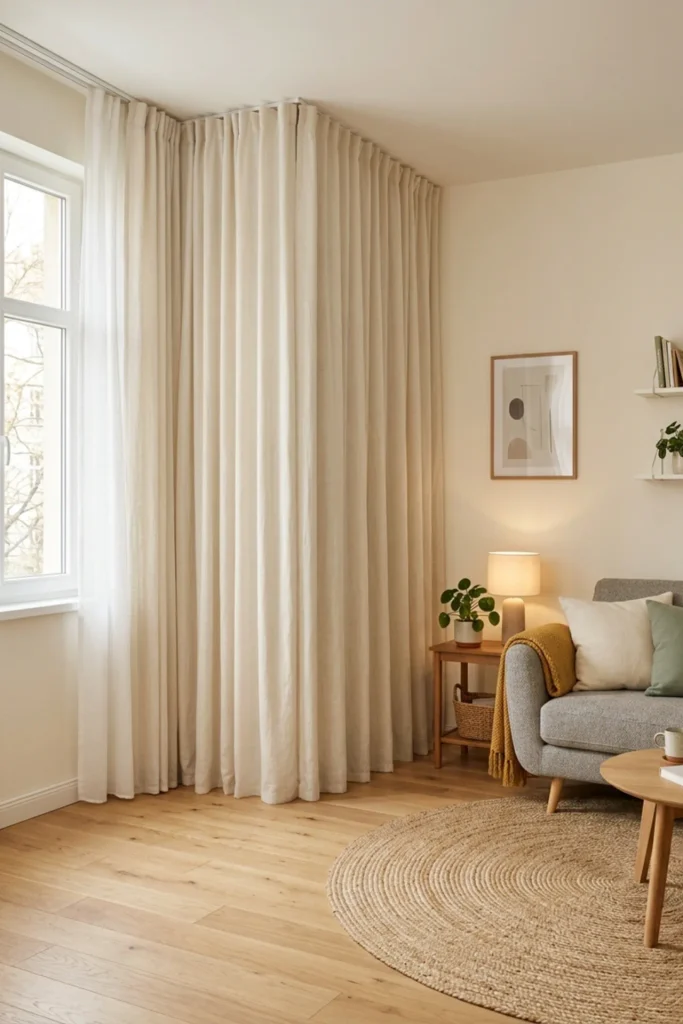
Curtains can hide shelving, a wardrobe rail, or an awkward alcove without installing cabinet doors.
When the curtain color matches the wall, the whole storage zone can visually disappear. This works particularly well in rentals.
Size and requirements: Mount the track or rod high enough to hide the full storage height. Allow enough curtain fullness so the fabric does not look stretched. Check that the stored items do not push into the curtain.
Method and cost: Use a ceiling or wall track only if the lease allows it. Otherwise use a freestanding tension solution where appropriate. A curtain-storage setup may cost $100–$500+.
Pros: Hides large storage zones cheaply; softens the room; renter-friendly in some situations.
Cons: Fabric gathers dust; curtains do not block sound or smells; poorly hung fabric can look temporary rather than built-in.
16. Use Matching Top Boxes to Close the Gap Above Cabinets
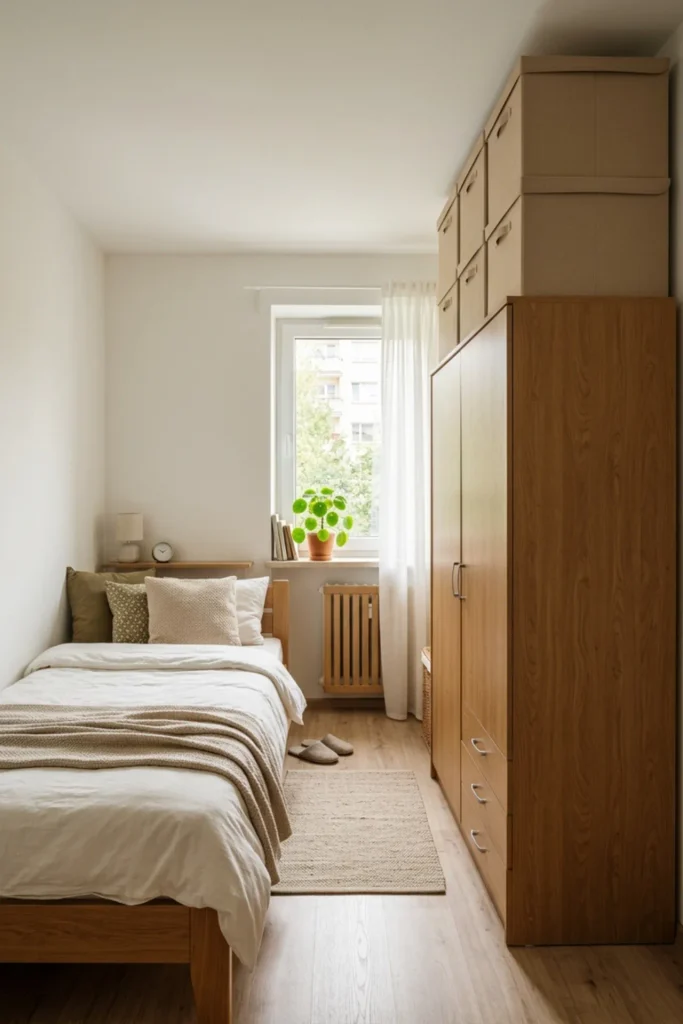
The gap above wardrobes and cabinets often makes freestanding storage look obviously freestanding.
Matching boxes or closed bins can visually extend the unit upward.
Size and requirements: Measure the gap between the cabinet and ceiling. Leave enough clearance to remove boxes safely. Do not stack heavy items overhead.
Method and cost: Use lightweight closed boxes in a matching tone. Label the underside or back rather than the front if you want a cleaner look. Cost may be $40–$200.
Pros: Uses otherwise wasted space; strengthens the built-in look; good for seasonal items.
Cons: High storage is inconvenient; boxes collect dust; heavy items should not be stored overhead.
17. Edit the Storage Wall Until It Looks Architectural
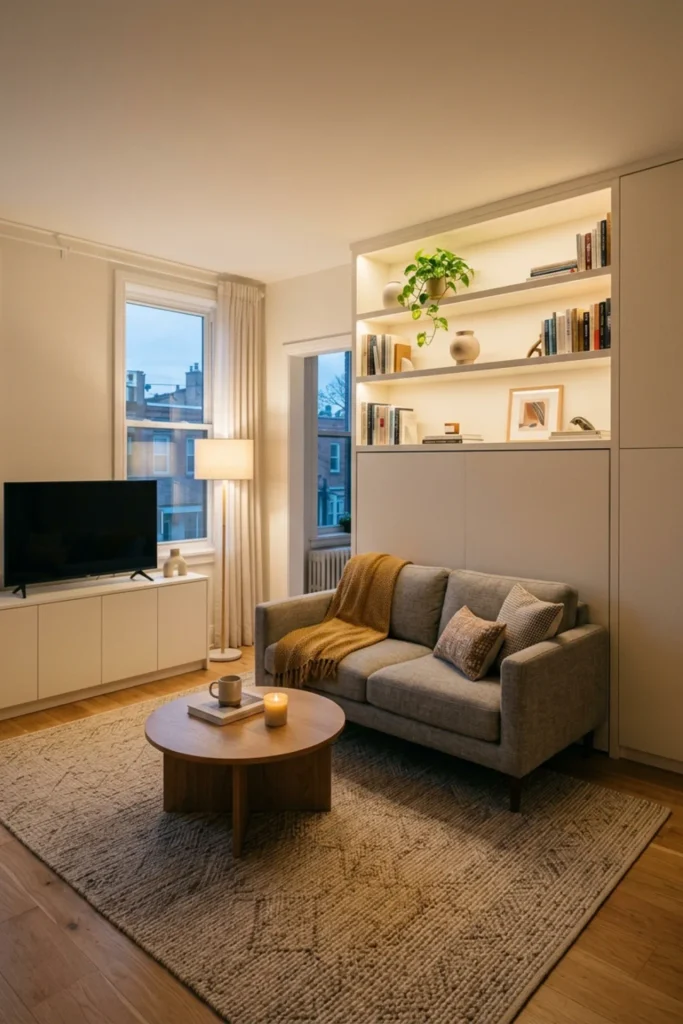
The last step is not adding another cabinet.
It is making the storage composition look calm. Built-ins usually feel expensive because the lines are clean and the surfaces are quiet.
Size and requirements: Keep around 30%–40% of visible shelf space open. Use closed doors for the messiest categories. Keep cabinet tops and adjacent floor clear.
Method and cost: Remove everything from the storage wall, then add back only what needs to be visible. Group books upright and keep decor limited. Cost: $0.
Pros: Makes inexpensive storage look more custom; easier cleaning; makes the apartment feel calmer.
Cons: Open shelves still require maintenance; editing does not fix bad proportions or oversized cabinets.
A Practical 10-Step Hidden Storage Plan
If I were trying to make a small apartment look more built-in without custom carpentry, I would use this order:
- Measure the room and main walkway.
- Identify the largest visible clutter category.
- Decide whether the storage should be tall, low, or under furniture.
- Choose one wall or zone instead of scattering storage everywhere.
- Keep cabinet depth as shallow as the items allow.
- Match or coordinate the finish with the wall.
- Hide the messiest categories behind doors.
- Use top boxes or fillers only if they look intentional.
- Anchor tall furniture where appropriate.
- Edit the open surfaces until the unit feels architectural.
That usually creates a more expensive result than buying several unrelated storage pieces.
Approximate Budget by Storage Level
You can get a built-in look without paying for custom cabinetry.
Low-cost refresh: $100–$600
- Matching storage boxes
- Slim shoe cabinet
- Storage ottoman
- Curtain-covered storage
- Paint or removable finish where allowed
Mid-range setup: $700–$3,000
- Tall wardrobe
- Sideboard
- Media storage
- Storage bed
- Shallow pantry cabinet
- Entry bench
Full apartment storage upgrade: $3,000–$10,000+
- Multiple coordinated cabinets
- Premium wardrobe system
- Storage bed
- Media wall
- Dining sideboard
- Office cabinet
- Professional anchoring or installation
True custom built-ins can go far beyond these ranges.
What I Would Spend More On
I would spend more on the pieces that hold the most clutter.
That usually means the wardrobe, media storage, storage bed, or pantry.
I would spend less on open baskets and decorative boxes.
If the budget is limited, solve one category completely instead of adding partial storage in every room.
A good wardrobe that hides clothing properly is usually more useful than three small baskets and a narrow shelf that still leave things visible.
Common Mistakes I Would Avoid
The first mistake is using cabinets that are too deep for the room.
The second is spreading storage across every wall.
Another mistake is buying tall furniture without checking ceiling height, baseboards, outlets, or anchoring requirements.
I would also avoid trying to fake a built-in look with trim or permanent filler pieces in a rental without landlord approval.
Do not store very heavy items in high boxes.
Do not block vents, heaters, windows, electrical panels, or required access points.
Tall storage furniture should be secured appropriately. CPSC’s Anchor It! guidance specifically addresses furniture tip-over hazards and is worth checking before installing tall units.
Finally, built-in-looking storage still needs to function. If the doors are hard to open, the drawers hit the bed, or the cabinet blocks the walkway, the visual effect is not worth it.
Final Thoughts
Hidden storage ideas for small apartments work best when the storage becomes part of the architecture.
That does not always mean custom carpentry.
A wall-matched cabinet, a wardrobe that nearly reaches the ceiling, a storage bed, a low sideboard, or a slim pantry can all look surprisingly built-in when the scale is right.
The key is to use fewer, larger storage zones instead of many small pieces.
Keep the fronts simple. Hide the messiest categories. Match the room palette. Leave enough walking space.
When the storage looks intentional and the visible surfaces stay calm, a small apartment can feel much more organized, more spacious, and more expensive without becoming permanently renovated.
Disclosure: Some visuals are AI-assisted design concepts created for inspiration. Always confirm furniture dimensions, weight limits, wall-fixing requirements, rental restrictions, outlet access, ventilation clearances, product stability, manufacturer instructions, and installation requirements before adding storage to your apartment. Cost ranges are approximate U.S. planning figures and vary by location, labor, materials, shipping, and product quality.
About the Author
Ali Hamza — Founder & Editor
Hi, I’m Ali Hamza, and Styled Room Living is my personal home decor project. I don’t have a formal background in interior design. I started this website because home makeovers and organization ideas are something I genuinely enjoy looking at and learning about.
Most of the ideas shared here are not projects I have personally built. When I put a guide together, I try to separate an idea that only looks good in a photograph from one that could actually be useful in a normal home. Will it fit? Is it easy to clean? Does it require drilling? Can it be adjusted for a smaller budget? These are the questions I keep in mind while working on an article.
Some images on the website are AI-assisted design concepts used to explain an idea more clearly. They are meant for inspiration, not as exact construction plans. Please check dimensions, wall conditions, weight limits, furniture stability, rental requirements, and manufacturer instructions before trying anything in your own home.
I’m still learning as the website grows, and I know every home works differently. My purpose with Styled Room Living is simply to collect useful home ideas, explain them in plain language, and help readers find something they can adapt to their own space.
Read more about Ali Hamza →