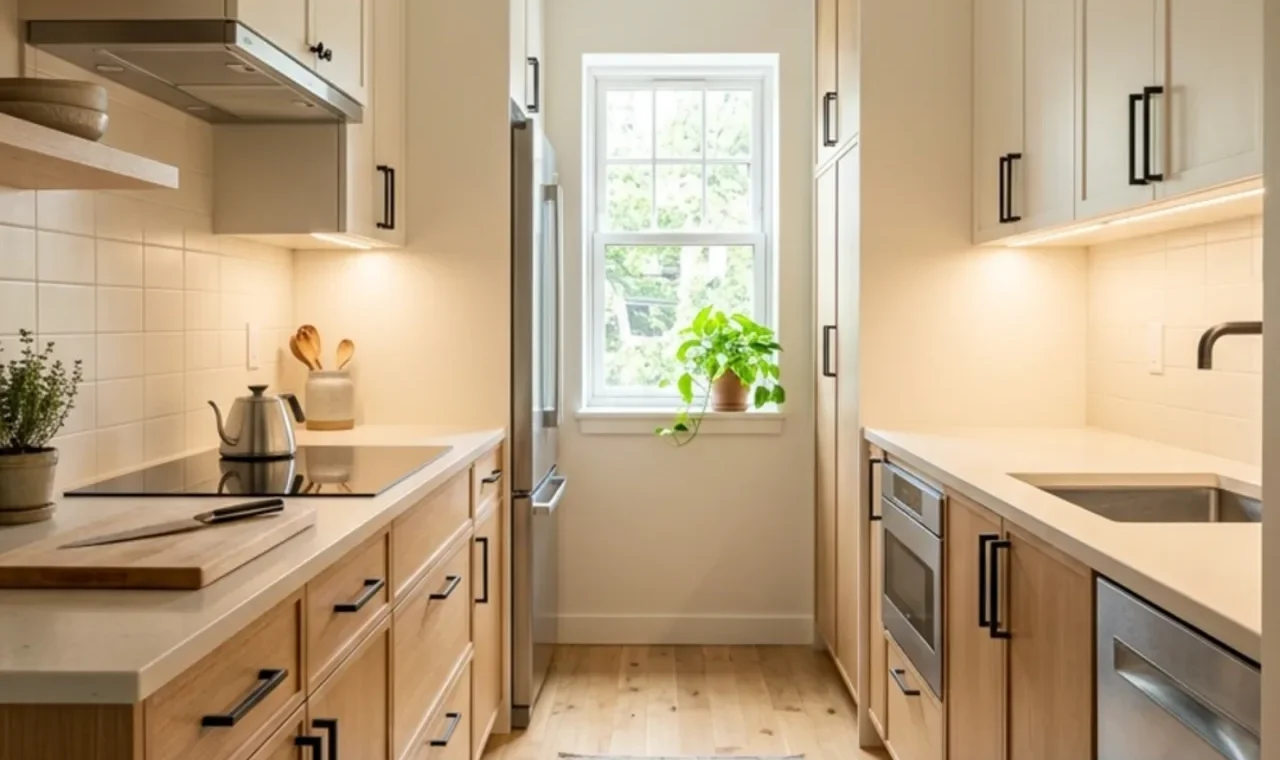
Small galley kitchen ideas work best when the room feels easy to move through.
That sounds obvious, but narrow kitchens get crowded very quickly. Deep cabinets, dark finishes, bulky stools, open shelves, small appliances, and too many contrasting materials can make the passage feel tighter than it really is.
I would start with the walkway.
Then I would look at the cabinet color, lighting, floor direction, backsplash, and counter clutter.
A galley kitchen does not need to be all white. Warm oak, pale gray, muted green, soft cream, and black details can all work. The important part is controlling where the visual weight sits.
This guide includes practical measurements, rough U.S. cost ranges, setup methods, pros, cons, ventilation notes, and realistic image prompts for every idea.
The goal is not to make the kitchen look huge in a photograph. It is to make a real narrow kitchen feel brighter, calmer, and easier to use.
If your kitchen is part of a compact apartment, Small Apartment Kitchen Ideas is a useful companion guide for broader storage and layout planning.
What Makes a Galley Kitchen Feel Wider?
A narrow kitchen feels wider when the eye can move through it without stopping at heavy visual blocks.
That usually means:
- lighter upper cabinets
- controlled contrast
- fewer items on the counters
- long visual lines
- good task lighting
- shallow details on the walls
- simple hardware
- one consistent flooring direction
- enough clear passage between cabinet runs
- fewer bulky objects at the end of the kitchen
I would also avoid making both sides equally dark.
If one side uses deeper color or wood, keep the opposite side lighter.
That creates depth without closing in the room.
For color planning, Benjamin Moore’s color overview is useful when comparing warm whites, pale neutrals, muted greens, and darker accent colors under your actual kitchen lighting.
Before You Decorate, Measure the Clear Aisle
The aisle matters more than the decor.
Measure the distance between cabinet fronts, appliance handles, and anything that projects into the passage.
A practical galley aisle often feels better around 42–48 inches wide where the room allows it, especially when two people cook at the same time.
In tighter apartments, the aisle may be smaller, so appliance-door swing becomes even more important.
Measure:
- refrigerator door swing
- oven door depth
- dishwasher door depth
- cabinet drawer pull-out
- pantry doors
- trash pull-out
- handle projection
- opposite counter depth
Do not place a rolling cart, stool, or decorative basket in a route that already feels narrow.
The National Kitchen & Bath Association’s planning guidelines are useful for broader kitchen-clearance and planning considerations.
1. Use Light Upper Cabinets and Warmer Lower Cabinets
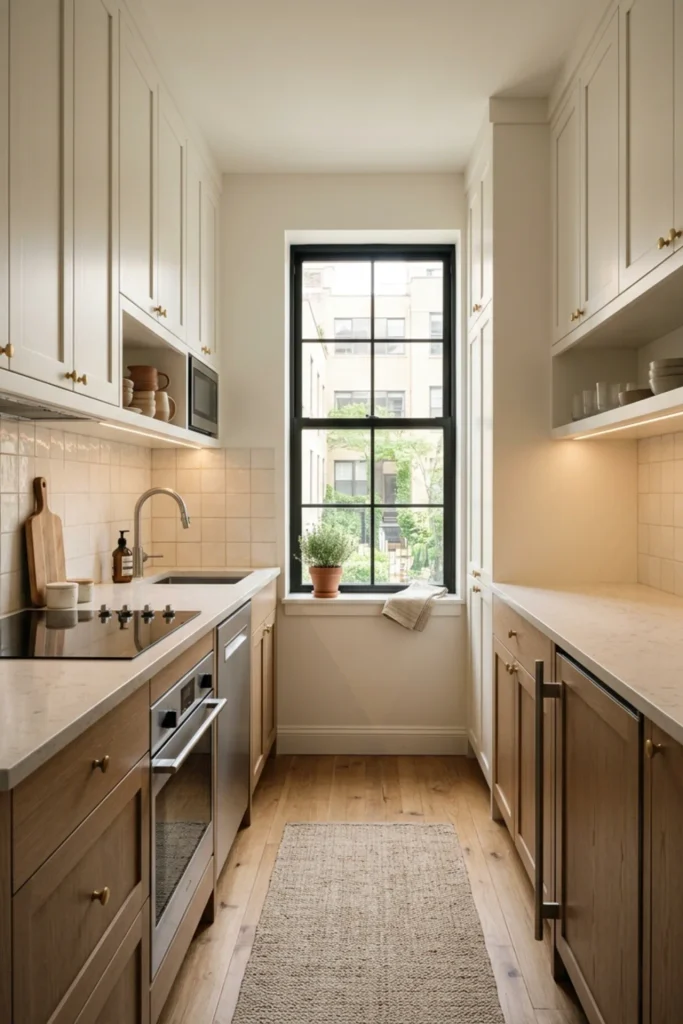
One of the easiest ways to make a galley kitchen feel less boxed in is to keep the visual weight low.
Use warm white, cream, or pale greige on the upper cabinets.
Then use warm oak, olive, taupe, or a deeper neutral on the lower cabinets.
Size and requirements: Keep standard upper-cabinet depth around 12 inches unless your kitchen system is designed differently. Make sure upper doors do not conflict with lights, trim, or adjacent walls.
Method and cost: If replacing cabinets is not practical, repainting only the uppers can still change the room. DIY cabinet painting may cost $150–$500 in materials. Professional refinishing can cost $1,500–$4,000+ depending on size and condition.
Pros: Makes the upper half feel lighter; adds warmth without darkening the whole room; works with modern and traditional kitchens.
Cons: Two-tone cabinets need careful color matching; poor paint prep can fail; some lower-cabinet colors show dust and fingerprints.
2. Use Warm White on Both Walls and Ceiling
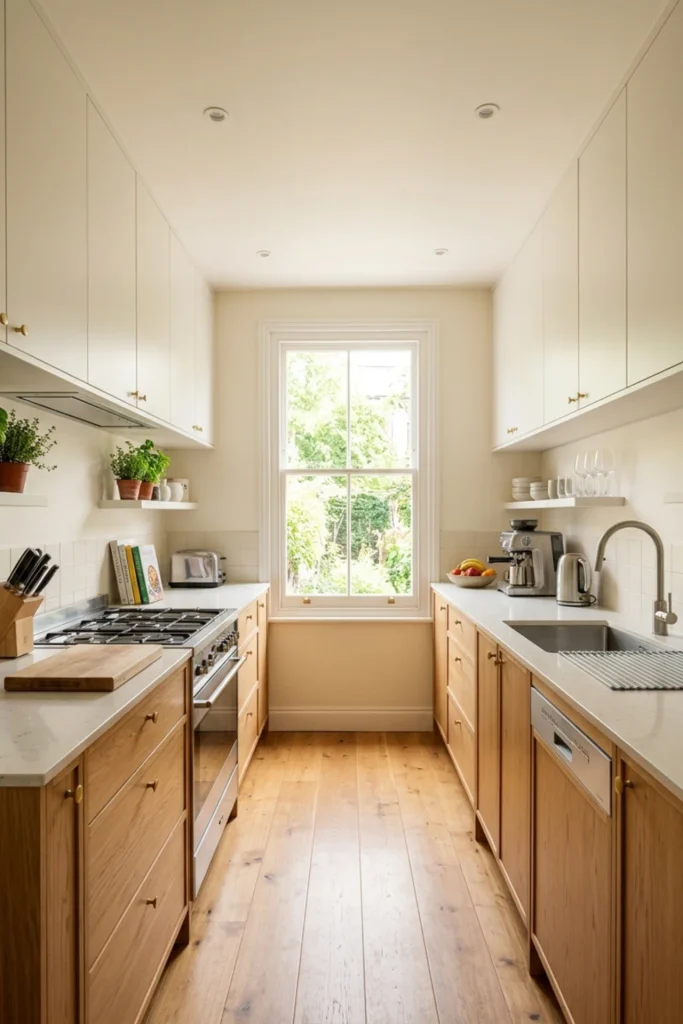
A narrow kitchen benefits from continuity.
When the walls and ceiling are close in color, the eye is less likely to stop at hard boundaries.
Warm white usually feels softer than bright blue-white.
Size and requirements: Test the color on both walls and ceiling because overhead light changes the undertone. Avoid making the ceiling noticeably darker than the walls in a low, narrow kitchen.
Method and cost: Paint the walls first, then decide whether the ceiling should match exactly or use a slightly lighter version. DIY materials may cost $80–$250. Professional work may cost $500–$1,500+.
Pros: Makes the room feel more continuous; reflects light; works with wood and colored cabinetry.
Cons: Warm white can look yellow under some bulbs; rental permission may be required; stains show easily near cooking areas.
3. Run the Flooring Lengthwise Through the Kitchen
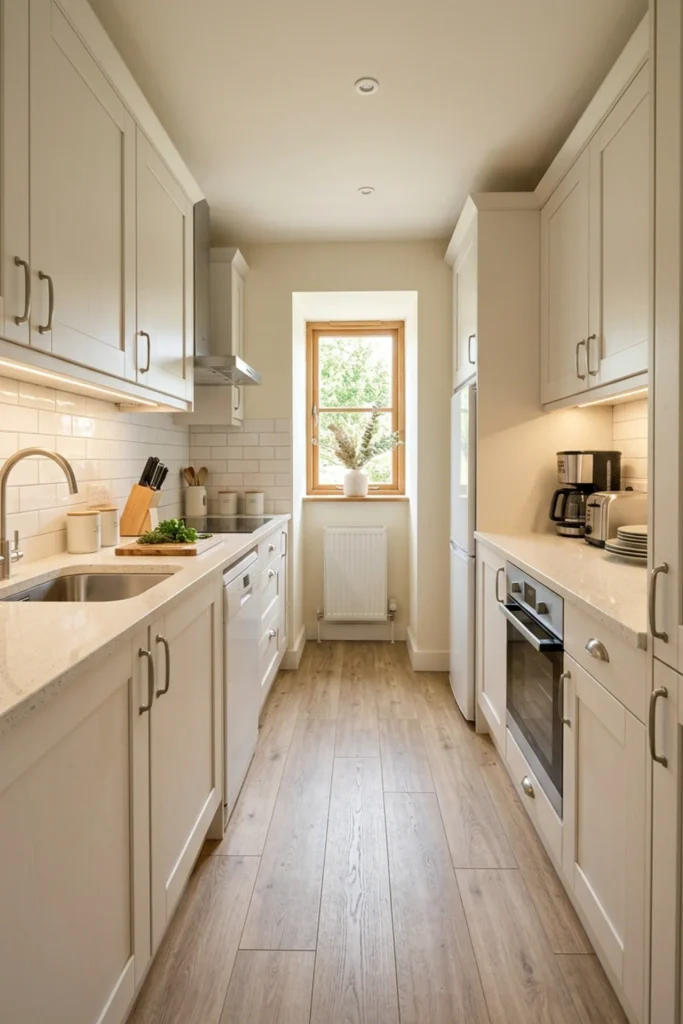
Floor direction can change how a narrow kitchen reads.
When planks or rectangular tiles run along the long axis of the galley, the eye follows the room instead of stopping across it.
I would keep the pattern simple.
Size and requirements: Use the existing subfloor and manufacturer requirements to determine suitable plank or tile size. Keep grout or plank contrast low if visual width is the goal.
Method and cost: If replacing flooring is not planned, use a long runner rug to create the same visual direction. A runner may cost $60–$300. New flooring can cost $1,500–$5,000+ in a small kitchen depending on material and prep.
Pros: Strengthens the long sightline; can make the kitchen feel more orderly; works with modern galley layouts.
Cons: Flooring installation is not renter-friendly; strong plank contrast can emphasize narrowness; wet-area suitability matters.
4. Use One Continuous Backsplash Instead of Several Materials
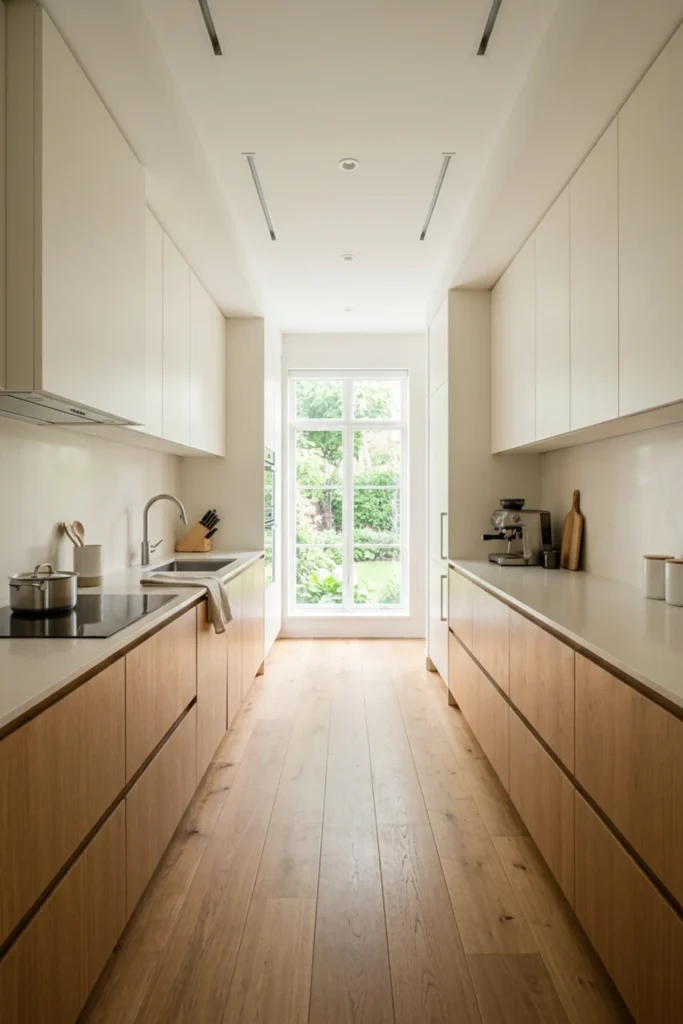
A continuous backsplash creates a cleaner horizontal line.
That can make a galley kitchen feel calmer than a mix of mosaic tile, painted wall, metal panels, and decorative inserts.
I would choose one simple tile or slab-look material.
Size and requirements: Standard backsplash height is often around 18 inches between the counter and upper cabinets, but measure your actual space. Keep outlet and switch locations in mind.
Method and cost: Choose a low-contrast tile such as warm white, soft cream, pale green, or light stone-look. A backsplash may cost around $800–$2,500+ installed depending on tile and labor.
Pros: Creates visual continuity; easier to coordinate; makes narrow walls feel less busy.
Cons: Large-area tile still requires grout care; high-gloss surfaces show splashes; premium slab materials cost more.
5. Add Strong Under-Cabinet Task Lighting
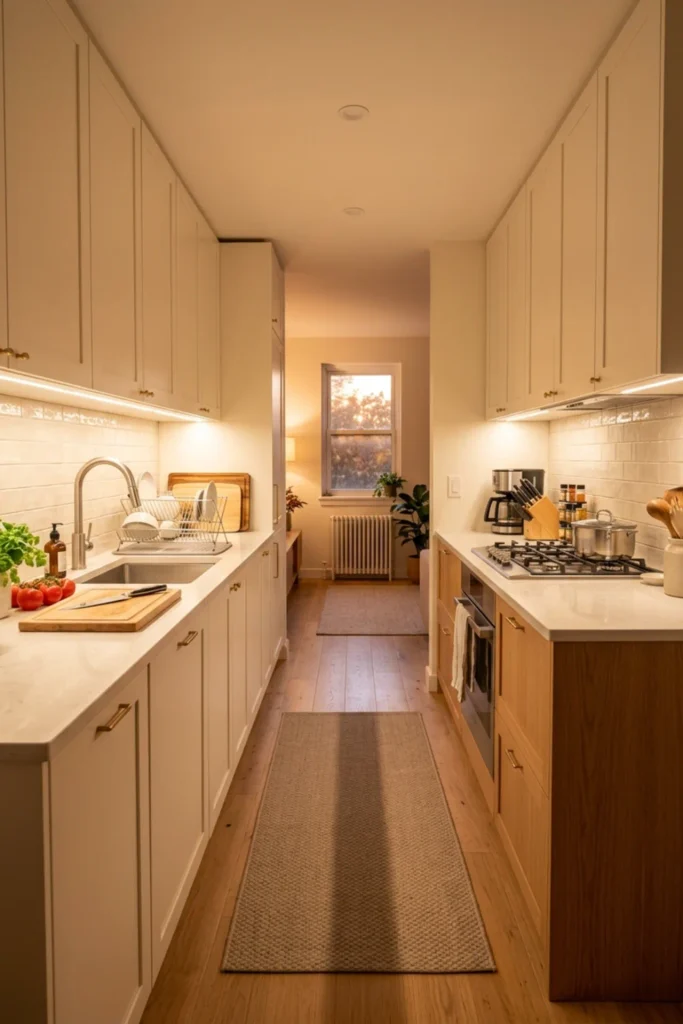
Dark counters make a narrow kitchen feel tighter.
Under-cabinet lighting helps by brightening the work surface and the wall plane below the cabinets.
I would use warm-to-neutral light that still shows food color clearly.
Size and requirements: Position light near the front underside of the cabinet rather than tight against the wall. Use fixtures rated for the location and compatible with the electrical setup.
Method and cost: Plug-in or low-voltage LED strips can cost $40–$200. Hardwired systems with professional installation may cost $300–$1,200+.
Pros: Brightens the narrowest part of the room; improves task visibility; adds depth at night.
Cons: Visible LED dots look cheap; cords need management; hardwired systems cost more.
6. Use Reflective Tile or Satin Surfaces Carefully
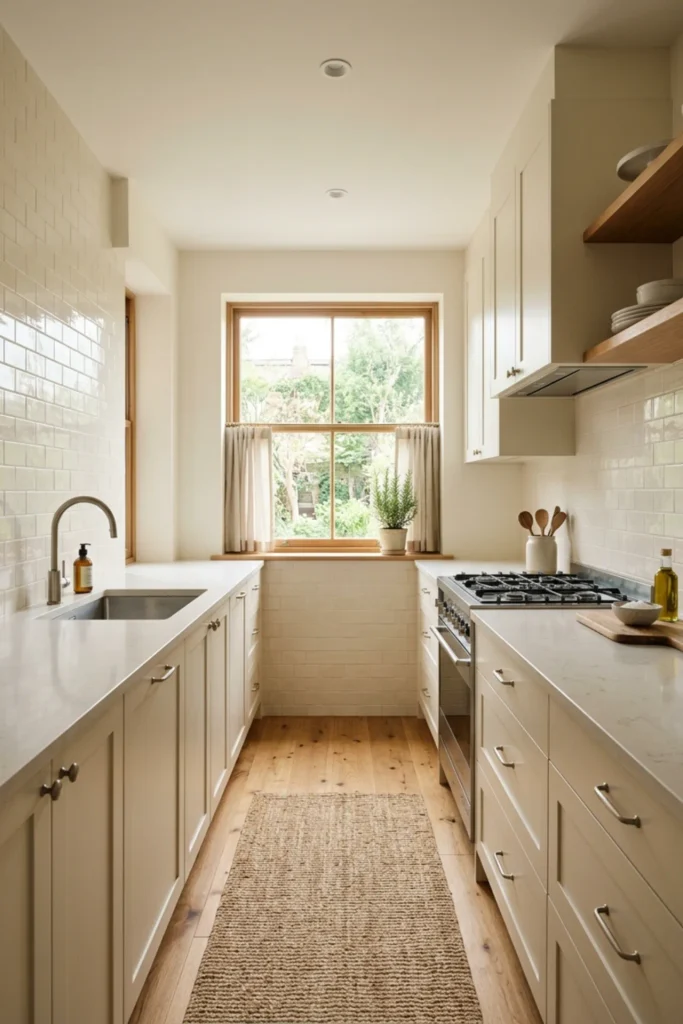
A small amount of reflection can help bounce light across a narrow kitchen.
That does not mean everything should be glossy.
A satin backsplash, lightly reflective tile, or subtle glass detail can add brightness without creating a showroom look.
Size and requirements: Use reflective material on one main vertical surface. Keep highly reflective finishes away from areas where glare becomes uncomfortable.
Method and cost: Test a full-size tile sample under daylight and evening light. Reflective backsplash materials may cost $10–$40+ per square foot before installation.
Pros: Bounces light; adds depth; works well with pale cabinetry.
Cons: Shows water spots and grease; strong reflections can feel busy; glossy tile can exaggerate uneven walls.
7. Choose Slim Hardware With Low Projection
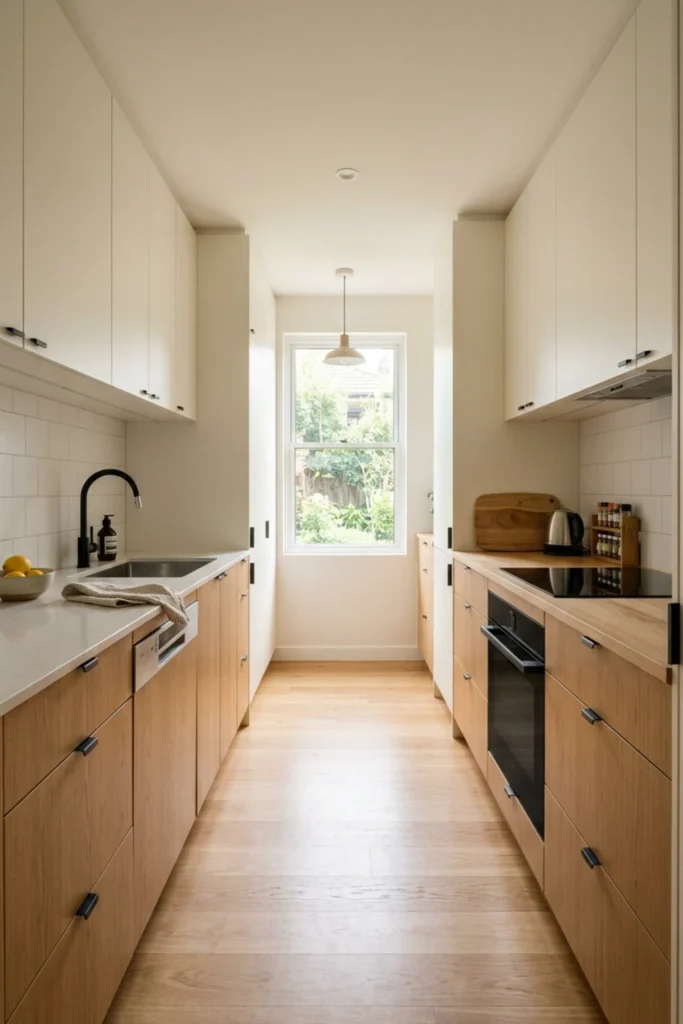
Large handles can make a tight aisle feel even tighter.
Slim pulls or small knobs keep the cabinet fronts cleaner and reduce visual interruption.
I would avoid oversized bar pulls in a very narrow kitchen.
Size and requirements: Check handle projection from the cabinet face. Low-profile pulls around 1–1.5 inches of projection are easier to live with in tight aisles.
Method and cost: Match existing hole spacing where possible. A hardware refresh may cost $60–$300.
Pros: Cleaner cabinet lines; fewer snags in a tight aisle; inexpensive update.
Cons: Very small pulls can be less comfortable; mismatched hole spacing creates extra work; cheap finishes wear quickly.
8. Keep One Counter Run Almost Clear
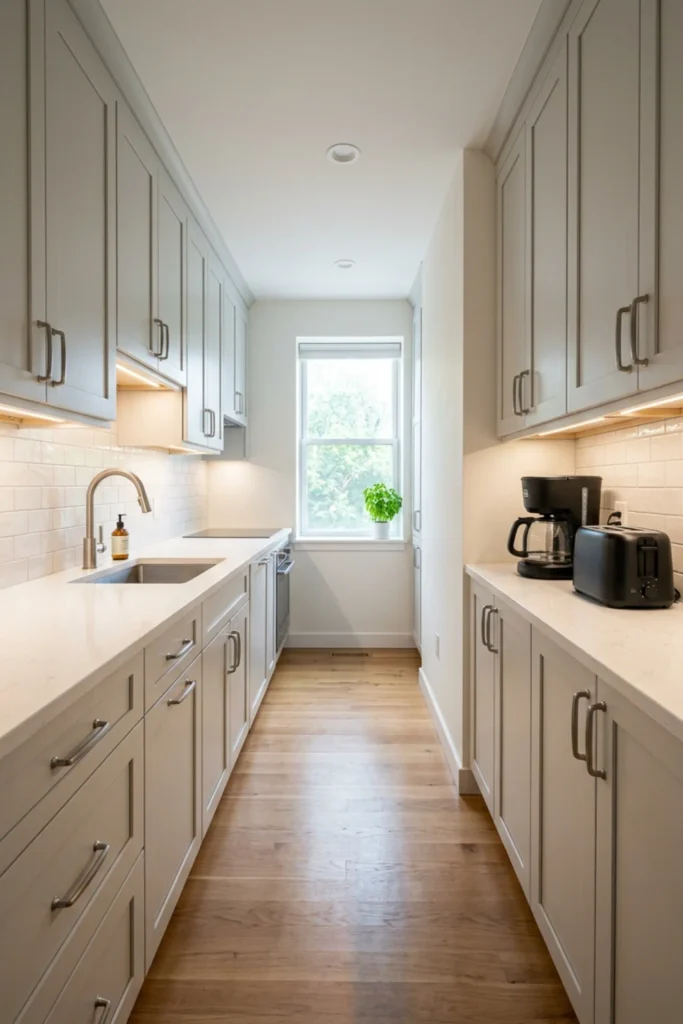
Counter clutter has more impact in a galley kitchen because both work surfaces are constantly in view.
I would keep one side as the main active counter and let the other side stay mostly clear.
That gives the room visual breathing space.
Size and requirements: Try to keep around 30%–40% of total usable counter space visually clear. Do not block outlets, vents, or appliance clearances.
Method and cost: Remove everything, then return only daily-use appliances. Store the rest in cabinets, pantry storage, or wall organization. Cost: $0–$200.
Pros: Makes the kitchen feel wider; easier cleaning; creates better prep space.
Cons: Requires enough hidden storage; small appliances may need daily moving; very minimal counters can feel plain.
For additional storage ideas, DIY Kitchen Wall Organizer Ideas can help move lightweight everyday items off the counter.
9. Use Shallow Open Shelves on Only One Side
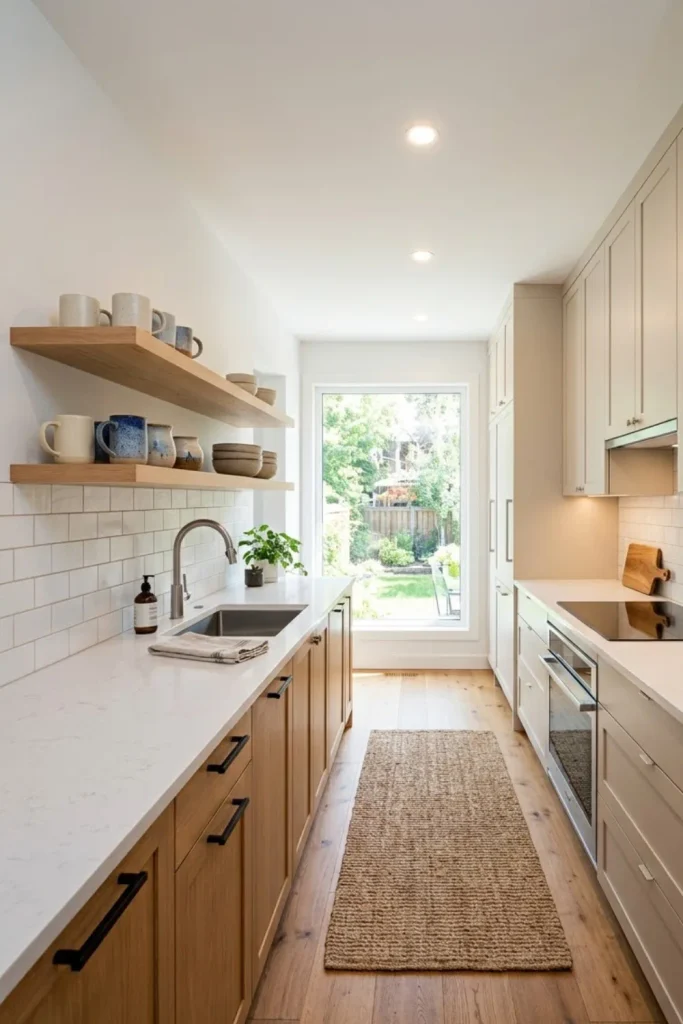
Open shelves can make a galley kitchen feel lighter, but too many of them create visual clutter.
I would use one short run on one wall, not both sides.
Keep the shelf shallow and practical.
Size and requirements: A shelf around 6–9 inches deep is enough for mugs, bowls, or small jars. Keep it clear of the range, sink splash zone, and any area where stored items would be exposed to heat or grease.
Method and cost: Install one or two shelves above a clear counter zone. Use proper wall fixings for the expected load. A simple shelf setup may cost $100–$500+ depending on material and installation.
Pros: Reduces upper-cabinet bulk; adds quick-access storage; creates an airier wall.
Cons: Items collect dust and grease; too many objects look cluttered; wall fixing needs care.
10. Use a Light Countertop With a Small Edge Profile
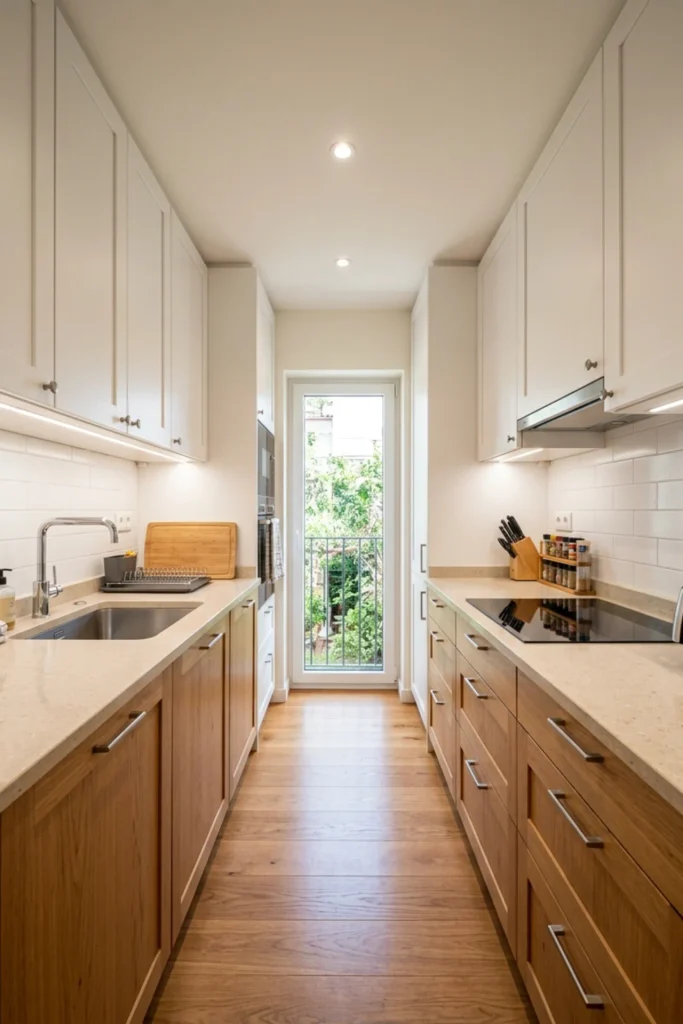
A thick dark countertop can make both cabinet runs feel heavier.
A lighter surface with a simple edge usually keeps the room visually calmer.
Warm white, pale quartz-look, cream stone-look, or light terrazzo can work.
Size and requirements: Standard kitchen counters are often around 24–25 inches deep. In a galley kitchen, avoid decorative overhangs that project farther into the aisle unless they are needed for a specific function.
Method and cost: If replacing counters, bring cabinet, backsplash, and flooring samples together before ordering. Laminate may cost around $800–$2,500 installed in a small kitchen, while quartz or similar surfaces can cost $2,000–$5,000+.
Pros: Reflects more light; keeps both sides visually lighter; easy to coordinate with wood and colored cabinets.
Cons: Pale counters show some stains; replacement is expensive; very bright white can feel cold beside warm wood.
11. Add a Runner Rug With a Long, Quiet Pattern
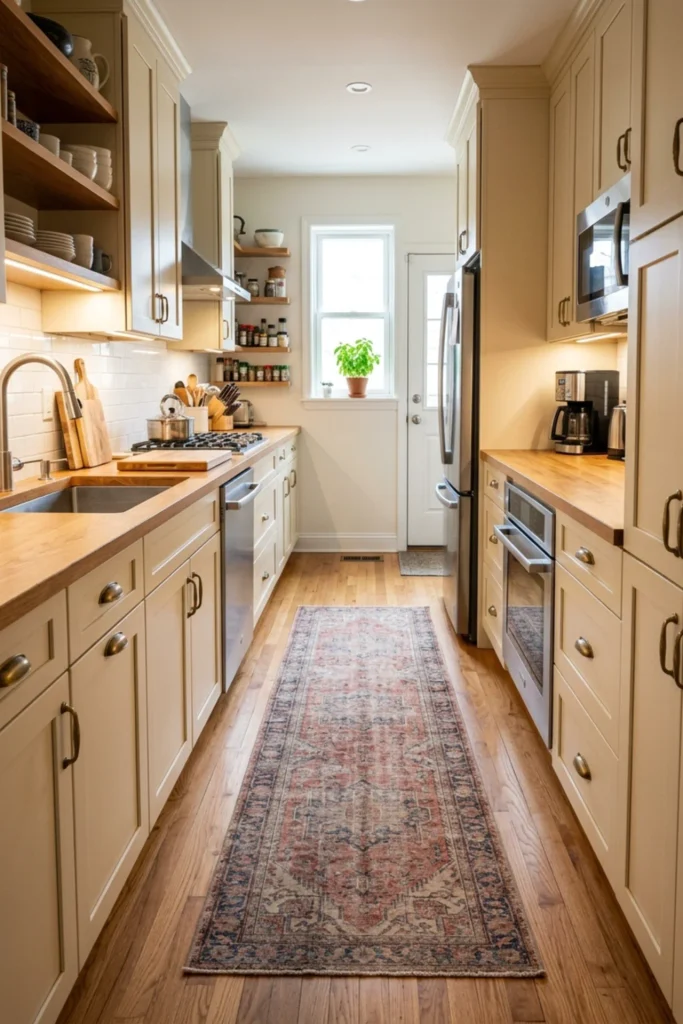
A runner can visually reinforce the long direction of the galley without replacing the floor.
It also softens tile or hard vinyl underfoot.
I would choose a low-pile washable rug with a quiet stripe, faded pattern, or tonal design.
Size and requirements: Many galley runners are around 2–2.5 feet wide and 6–10 feet long. Keep enough hard flooring visible on both sides so the rug does not look wedged into the aisle.
Method and cost: Measure the clear floor after appliance doors are open. Add a non-slip pad if appropriate. A runner may cost $60–$300+.
Pros: Adds warmth; emphasizes the long sightline; easy renter-friendly update.
Cons: Rug edges can become trip points; light rugs stain; thick rugs may interfere with appliances or doors.
12. Keep Tall Cabinets at the End of the Galley
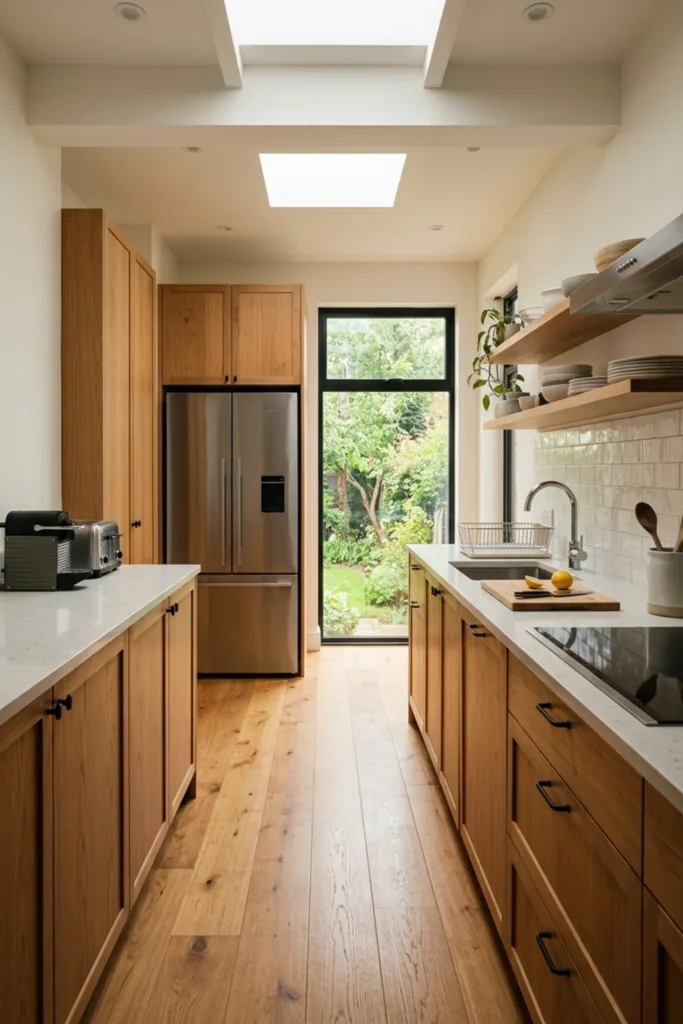
Tall pantry cabinets, refrigerator towers, and utility storage can visually close in the aisle when placed in the middle of a narrow run.
Where the layout allows it, I would group taller elements near one end.
That keeps the central sightline more open.
Size and requirements: Standard tall cabinets may be around 24 inches deep, but shallow pantry units can be 12–18 inches deep. Check appliance ventilation, door swing, and access requirements before altering the layout.
Method and cost: If renovating, group the refrigerator and tall pantry in one end zone rather than scattering tall storage. If not renovating, use one narrow freestanding pantry at the far end. Cost may range from $300–$1,200 for a freestanding unit to several thousand dollars for cabinetry changes.
Pros: Keeps the middle of the galley visually lighter; creates a stronger end zone; adds useful storage.
Cons: Layout changes may require professional work; end walls can still feel heavy; refrigerator location is often limited by existing utilities.
13. Use Glass-Front Cabinets for One Small Section
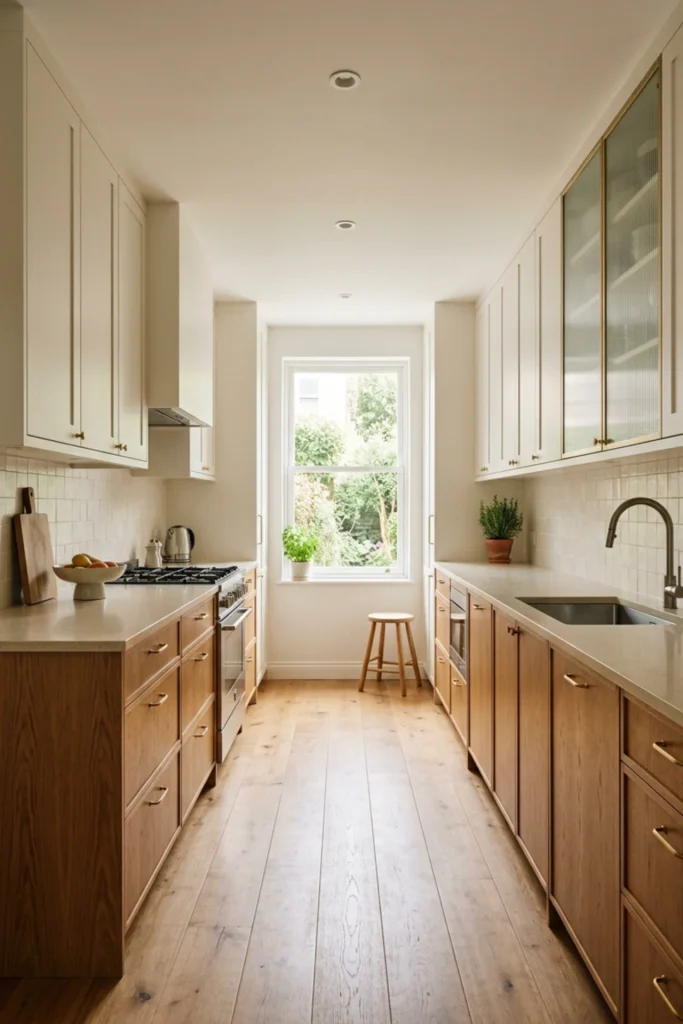
A little glass can break up a long run of solid upper cabinets.
I would limit it to one or two doors.
Clear glass works only if the contents stay tidy, so lightly textured or reeded glass can be more forgiving.
Size and requirements: Use glass only where the cabinet contents are lightweight and easy to organize. Any glass near heat or impact zones must be appropriate for the location and product design.
Method and cost: Replace only one pair of upper doors or choose one glass-front cabinet in a renovation. A small change may cost $300–$1,200+ depending on cabinetry and glazing.
Pros: Breaks up a heavy wall; reflects light; adds depth without full open shelving.
Cons: Contents remain partly visible; glass needs cleaning; custom doors cost more.
14. Use One Dark Accent at the End of the Kitchen
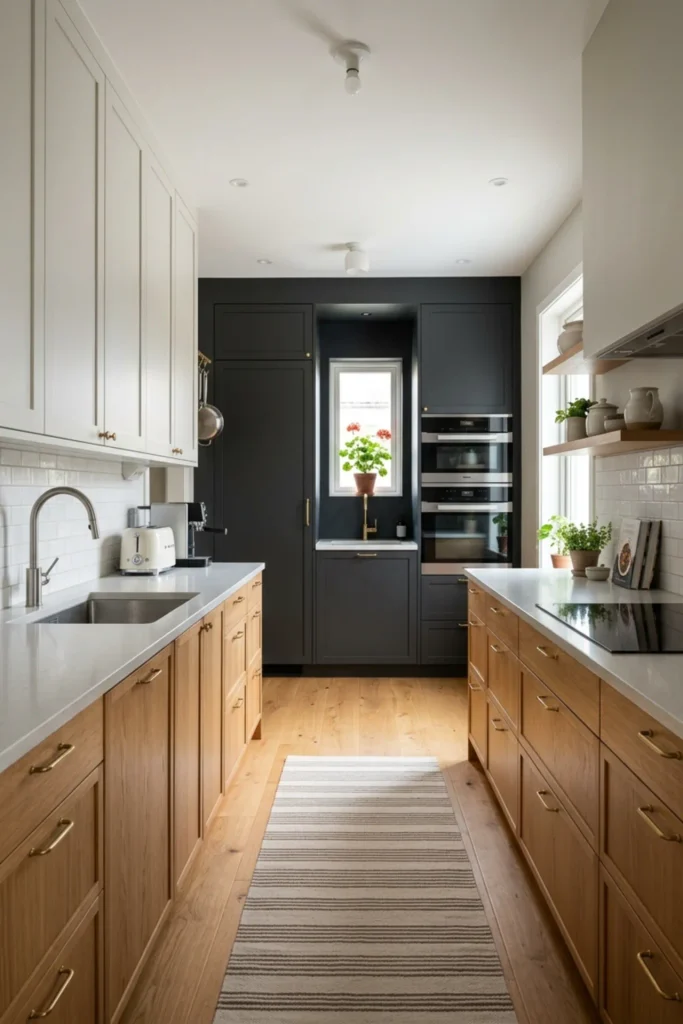
A narrow kitchen can handle a deeper color if it is placed carefully.
One darker end wall, pantry door, or small cabinet zone can create a visual destination without shrinking the whole aisle.
I would use olive, charcoal, deep blue, or chocolate rather than black everywhere.
Size and requirements: Keep the dark area limited to one contained zone, usually less than 20%–25% of the visible kitchen surfaces.
Method and cost: Test a large color sample at the end of the room. Paint is the simplest option if allowed. DIY cost may be $50–$150.
Pros: Adds depth; makes the long kitchen feel intentional; creates contrast for lighter cabinets.
Cons: Can make a windowless end feel darker; strong contrast draws attention to uneven walls; repainting may be needed in rentals.
15. Use a Slim Wall Rail Instead of a Bulky Counter Organizer
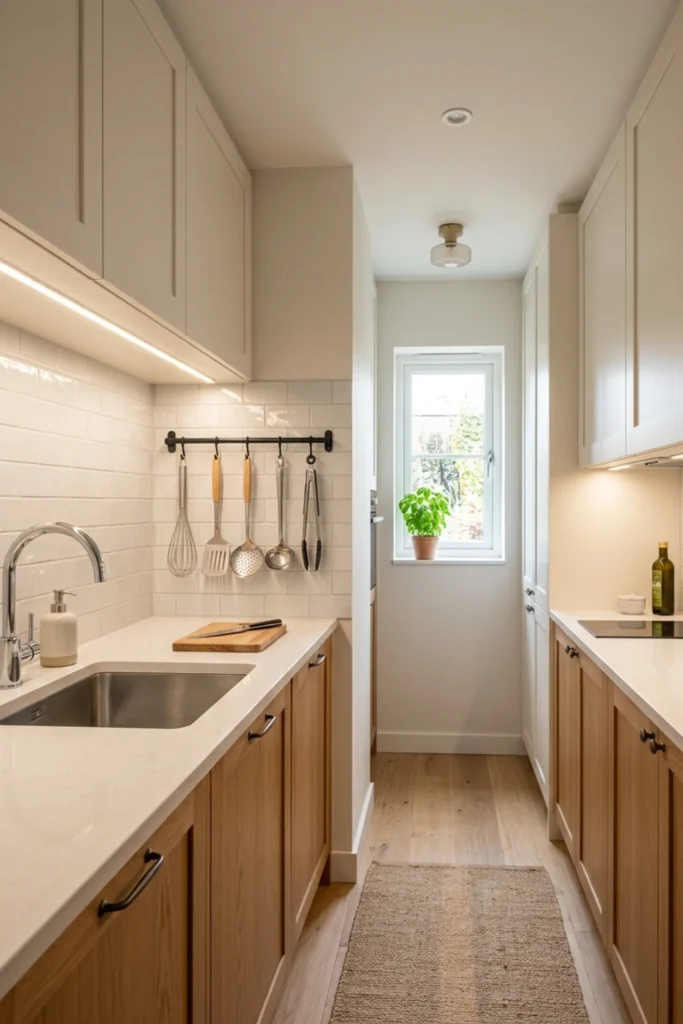
A narrow rail or peg system can hold frequently used tools without taking up counter depth.
I would keep it short and place it where utensils are actually used.
Do not turn the whole wall into exposed storage.
Size and requirements: A rail around 24–36 inches long is enough for several lightweight tools. Keep it outside direct heat zones and install it using appropriate hardware for the wall and expected load.
Method and cost: Decide which five or six items deserve wall space before installing the rail. A simple setup may cost $40–$200.
Pros: Frees counter space; keeps tools easy to reach; very shallow profile.
Cons: Exposed tools collect grease; too many hanging items look messy; drilling may not suit rentals.
16. Edit the End View Until the Kitchen Feels Open
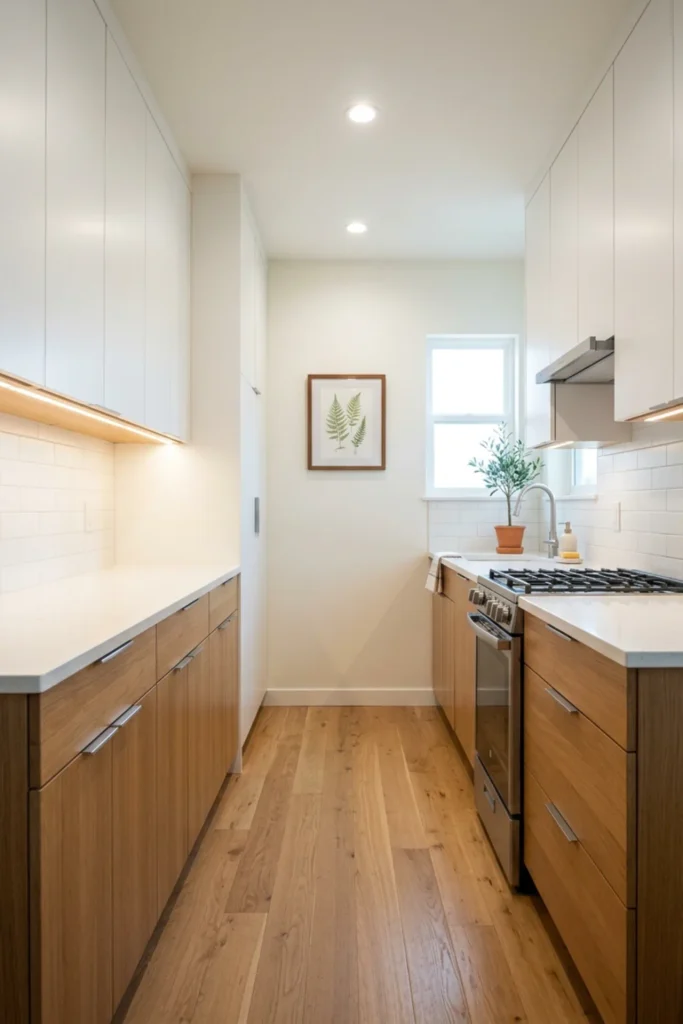
The far end of a galley kitchen matters because you see it every time you look down the aisle.
If that view contains a trash can, stacked boxes, crowded shelves, a heavy cart, and six small appliances, the kitchen will feel tighter.
I would make the end view simple.
Size and requirements: Keep the final 24–36 inches of visual depth as uncluttered as the layout allows. Avoid placing freestanding storage in front of windows, vents, or required access points.
Method and cost: Remove everything from the end zone, then add back only what has a clear function. Use one artwork, one plant, or one narrow storage piece if the area still needs something. Cost: $0–$150.
Pros: Makes the aisle feel longer and calmer; costs little or nothing; improves the first impression of the kitchen.
Cons: Requires storage elsewhere; an empty end wall may feel plain without light or texture.
A Practical 10-Step Small Galley Kitchen Plan
If I were trying to make a narrow kitchen feel wider, I would use this order:
- Measure the clear aisle with appliance doors open.
- Remove anything freestanding that blocks the passage.
- Brighten the upper half of the room.
- Improve under-cabinet task lighting.
- Clear one counter run.
- Simplify the backsplash.
- Use low-profile hardware.
- Add shallow storage only where it solves a real problem.
- Keep tall storage toward an end zone where possible.
- Simplify the far-end view.
That order fixes the visual width before you spend money on decorative details.
Approximate Budget by Update Level
You can improve a galley kitchen without a full remodel.
Low-cost refresh: $100–$700
- warm bulbs
- under-cabinet LEDs
- hardware
- runner rug
- decluttering
- one wall color
- simple rail storage
Mid-range update: $1,000–$5,000
- professional cabinet painting
- backsplash
- better lighting
- shallow pantry storage
- new hardware
- improved counter organization
Full galley renovation: $8,000–$30,000+
- new cabinets
- new counters
- flooring
- backsplash
- lighting
- ventilation
- appliances
- plumbing or electrical work
Moving plumbing, changing appliance locations, premium cabinetry, stone counters, structural work, or custom storage can move the total much higher.
What I Would Spend More On
I would spend more on lighting, cabinet function, countertops, and ventilation.
Those affect how the kitchen works every day.
I would spend less on decorative organizers, open shelving, and trend hardware.
If the budget is limited, improve the lighting and clear the counters first.
A narrow kitchen with simple cabinets and good task light often feels wider than a more expensive kitchen with dark work surfaces and cluttered counters.
Common Mistakes I Would Avoid
The first mistake is making both cabinet runs equally dark.
The second is adding too many open shelves.
Another mistake is placing a rolling cart in an aisle that is already tight.
I would also avoid large handles that project into the passage and thick rugs that interfere with appliance doors.
Do not block ventilation or appliance clearances just to gain storage.
For ranges, cooktops, ventilation, electrical work, and other fixed kitchen systems, follow manufacturer instructions and local requirements. The CPSC’s kitchen range safety information is also useful when thinking about range stability and safety.
Finally, do not assume an inspiration image shows a safe or practical aisle. Measure your own room first.
Final Thoughts
Small galley kitchen ideas work best when they reduce visual weight rather than adding more features.
Keep the upper cabinets lighter.
Brighten the counters.
Use one continuous backsplash.
Choose slim hardware.
Run the floor or rug lengthwise.
Keep one counter mostly clear.
Then edit the far end of the kitchen so the aisle has somewhere for the eye to go.
A narrow kitchen does not need to look empty.
It just needs fewer interruptions.
When the light, storage, and sightlines are working together, even a compact galley kitchen can feel much wider and easier to use.
Disclosure: Some visuals are AI-assisted design concepts created for inspiration. Always confirm measurements, cabinet clearances, appliance ventilation, flooring suitability, electrical requirements, plumbing, wall fixings, range safety, manufacturer instructions, and local codes before making changes in your kitchen. Cost ranges are approximate U.S. planning figures and vary by location, labor, materials, permits, shipping, and project conditions.
About the Author
Ali Hamza — Founder & Editor
Hi, I’m Ali Hamza, and Styled Room Living is my personal home decor project. I don’t have a formal background in interior design. I started this website because home makeovers are something I genuinely enjoy looking at and learning about.
Most of the ideas shared here are not projects I have personally built. When I put a guide together, I try to separate an idea that only looks good in a photograph from one that could actually be useful in a normal home. Will it fit? Is it easy to clean? Does it block the walkway? Can it be adjusted for a smaller budget? These are the questions I keep in mind while working on an article.
Some images on the website are AI-assisted design concepts used to explain an idea more clearly. They are meant for inspiration, not as exact construction plans. Please check measurements, materials, prices, ventilation, electrical details, appliance clearances, and installation requirements before trying anything in your own home.
I’m still learning as the website grows, and I know every home works differently. My purpose with Styled Room Living is simply to collect useful home ideas, explain them in plain language, and help readers find something they can adapt to their own space.
Read more about Ali Hamza →