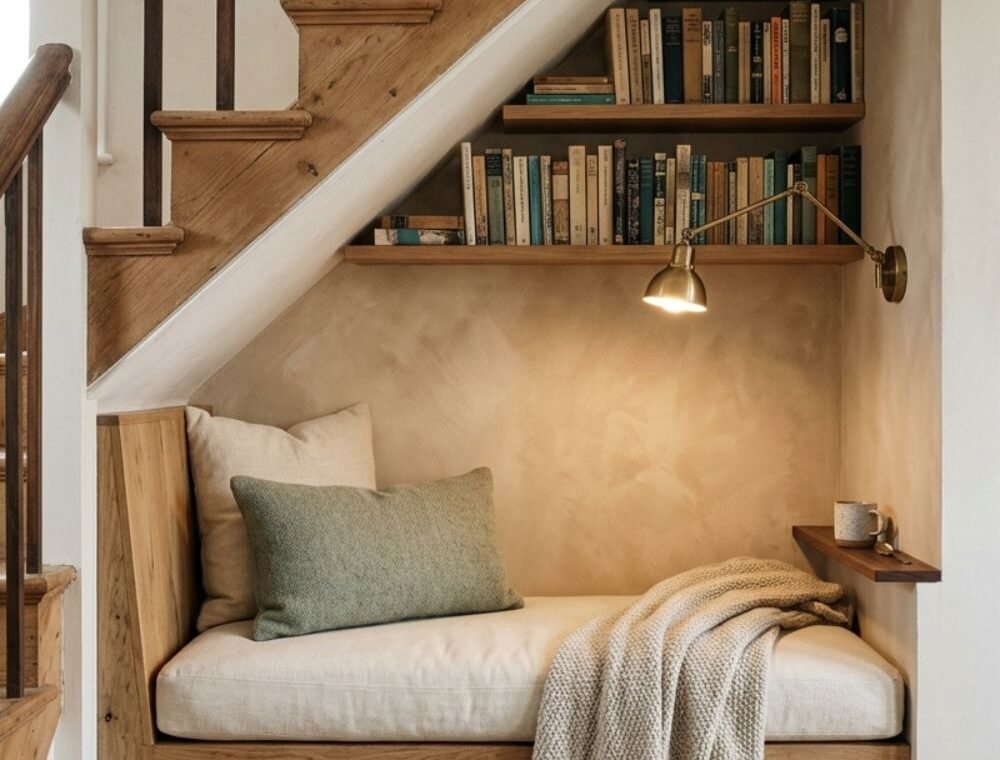
Cozy Under-Stairs Reading Nook Ideas can turn an awkward gap into a place that your family will actually use. The best version is not the one with the most cushions or the fanciest wall. It is the one where you can sit without bumping your head, reach the light easily, and open a book without first moving ten decorations.
Under-stair spaces are rarely simple boxes. The ceiling slopes, the floor may be uneven, and services may hide behind the wall. A wide photo can also make a space look larger than it is.
Plan the body first and the beauty second. Sit there on a sturdy box with the planned cushion height for ten minutes. If your neck bends or your knees feel trapped, styling will not fix it.
These 17 looks are not equally useful. Ideas 1, 2, and 7 are my strongest choices because they improve daily comfort and storage. Ideas 14 and 16 are the weakest because dark paint and very low headroom create real limits.
The measurements below are planning guides, not rules for every body or every home. Costs are rough U.S. estimates as of 2026. Your final price will depend on the stair shape, materials, labor, wiring, wall repair, and local permit rules.
Check the Stair Structure and Headroom First
Before buying wood or fabric, measure the width, floor depth, highest ceiling point, lowest usable point, and clear space in front. Mark the planned bench on the floor with painter’s tape. Then place boxes or a sturdy temporary seat inside that outline.
Include the cushion: a four-inch pad puts your head four inches closer to the stairs. Sit, lean, reach, and stand several times. Ask the tallest regular reader to repeat the test.
Write down these checks before you design anything:
- Seat position: Put the reader at the taller end of the slope.
- Clear entrance: Keep the walking path free from drawer handles and table legs.
- Hidden services: Find vents, pipes, wires, outlets, access panels, and heating equipment.
- Stair support: Never cut a stringer, post, or unknown framing member for extra space.
- Air and moisture: Fix a damp wall, stale air, or blocked vent before adding cushions and books.
- Future access: Do not seal plumbing or electrical parts behind a permanent bench.
Fire protection matters too. The 2024 International Residential Code says an enclosed under-stair space reached through a door or access panel must have its walls, under-stair surface, and soffits protected on the enclosed side with 1/2-inch gypsum board. Local rules can differ, so show the plan to your building department or contractor before closing the area. You can read the wording in ICC Section R302.7.
Photograph the empty space before work begins. The pictures may later help someone locate a cable, pipe, or framing point behind the finish.
A Realistic Budget for the Nook
An under-stair nook may be simple furniture or fitted carpentry. Decide which one you need before a lovely image sells you unnecessary custom panels.
| Project level | What it may include | Rough planning cost |
|---|---|---|
| Simple or rental-friendly | Freestanding bench, loose cushion, rug, lamp, and book cart | $150–$700 |
| Semi-custom | Cut-to-fit bench, better cushion, paint, shelves, and simple storage | $700–$2,000 |
| Fitted built-in | Custom bench, drawers, shelves, trim, upholstery, and professional fitting | $2,000–$7,500+ |
These are not quotes. Angi’s 2026 guide places built-in cabinets at $2,000 to $7,500, with an average near $4,500, and lists a window seat around $1,200. See its built-in cabinet cost guide.
Lighting can sit outside the carpentry total. Angi reports professional wall-sconce installation averaging about $250 per fixture, with many projects between $150 and $550. New wiring, a circuit, wall repair, permits, or a premium fixture can raise that number. Check the 2026 wall-sconce cost guide and get a local quote.
Keep a 10% to 20% buffer for an older home or an unusual stair angle. Crooked walls, hidden cables, patching, trim, and custom drawer fronts are easy to miss in the first estimate.
1. Build a Simple Cushioned Bench
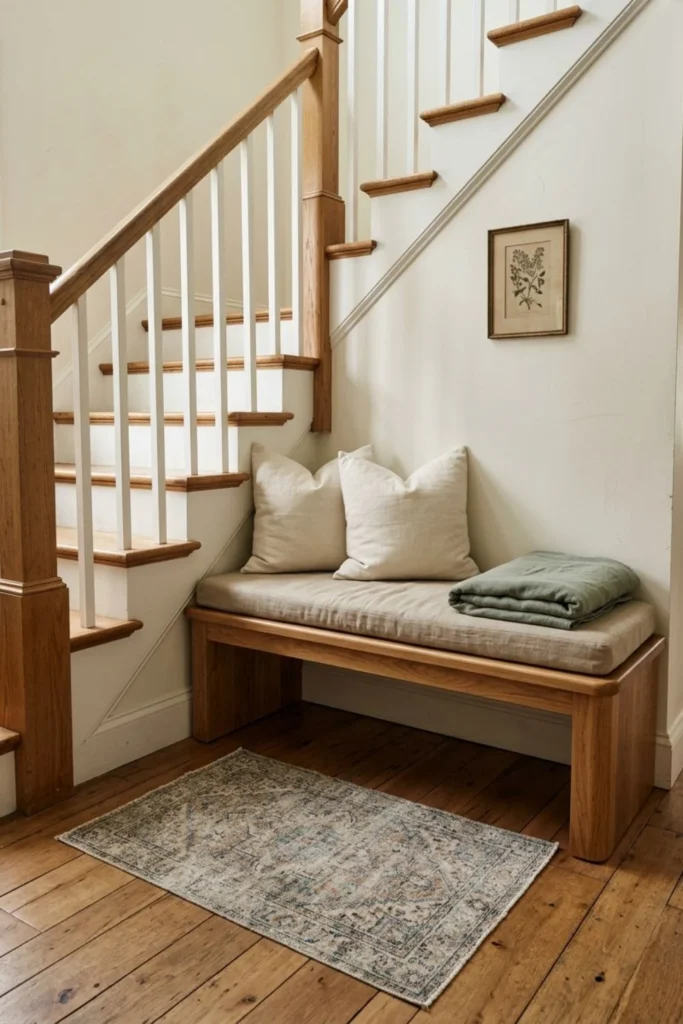
If I could choose only one feature, I would begin with a cushioned bench. It gives the nook a clear job and can accept shelves or drawers later.
As a starting point, the ADA bench standard uses a finished height of 17 to 19 inches, depth of 20 to 24 inches, and minimum length of 42 inches. It does not automatically govern a private nook, but the ADA bench standards provide a useful reference.
Measure the finished seat height, including the cushion. A 17-inch base plus a four-inch cushion may sit too high, so mock up both together before ordering.
A two- to four-inch firm foam cushion often feels better than a very soft, thick pad. Use a removable, washable cover, and add one lumbar pillow rather than a mountain of small cushions. Rounded front corners are kinder in a narrow walkway.
Budget roughly $300 to $1,500 for a simple made-to-fit bench and cushion, depending on material and labor. A fully fitted, trimmed, professionally upholstered version may reach $1,500 to $3,500 or more. Ask the carpenter what load the seat and fixings are designed to carry; do not guess from appearance.
2. Add Drawers Below the Seat
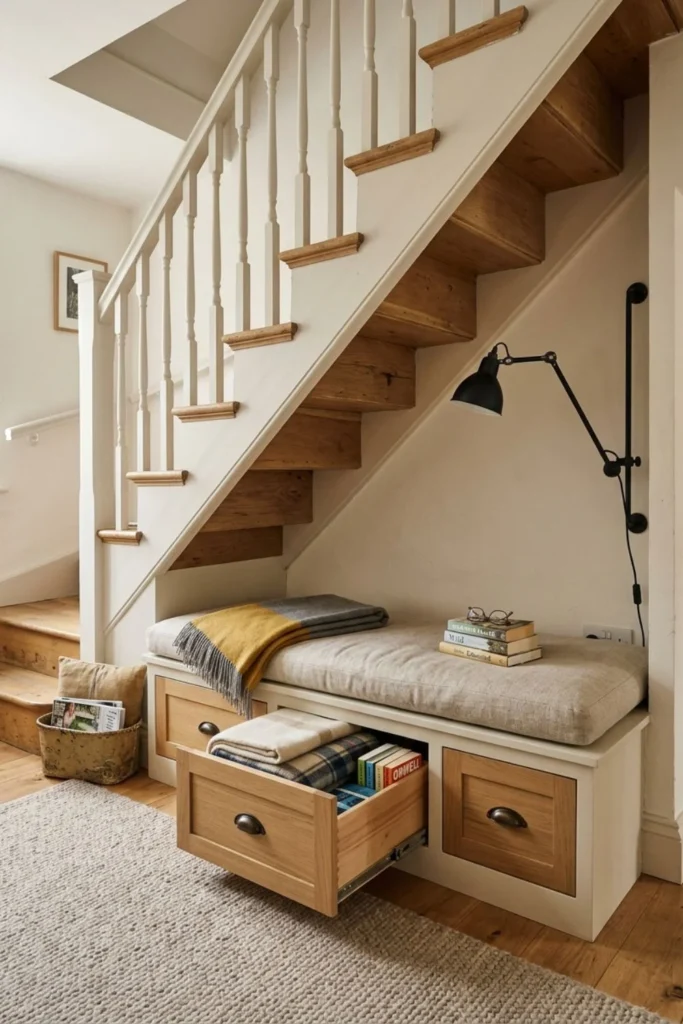
Drawers are my second top choice because they make deep storage easy to reach. A lift-up lid looks tidy, but moving the cushion and pillows for every blanket soon becomes annoying.
Two wide drawers usually feel calmer than six tiny ones. A common practical range is around 18 to 30 inches wide and 18 to 24 inches deep, but the stair framing and bench depth must decide the real size. Use full-extension runners so items at the back do not disappear.
Leave about 30 to 36 inches of clear floor space in front if possible. Test the drawer with the rug, nearby door, coffee table, and walking route in place. Recessed pulls or finger grooves reduce the chance of catching clothing in a tight hall.
Store heavy books low and blankets higher. Soft-close runners help around children, but supervision still matters. Check the runner’s rating with the drawer-box weight included.
Custom drawers can add roughly $1,000 to $3,500 to a fitted project, especially when every front follows a different stair angle. A lower-cost option is a strong open bench with labeled baskets, but measure the basket before building the cubby. “Standard size” is not as standard as it sounds.
3. Frame the Nook with Book Shelves
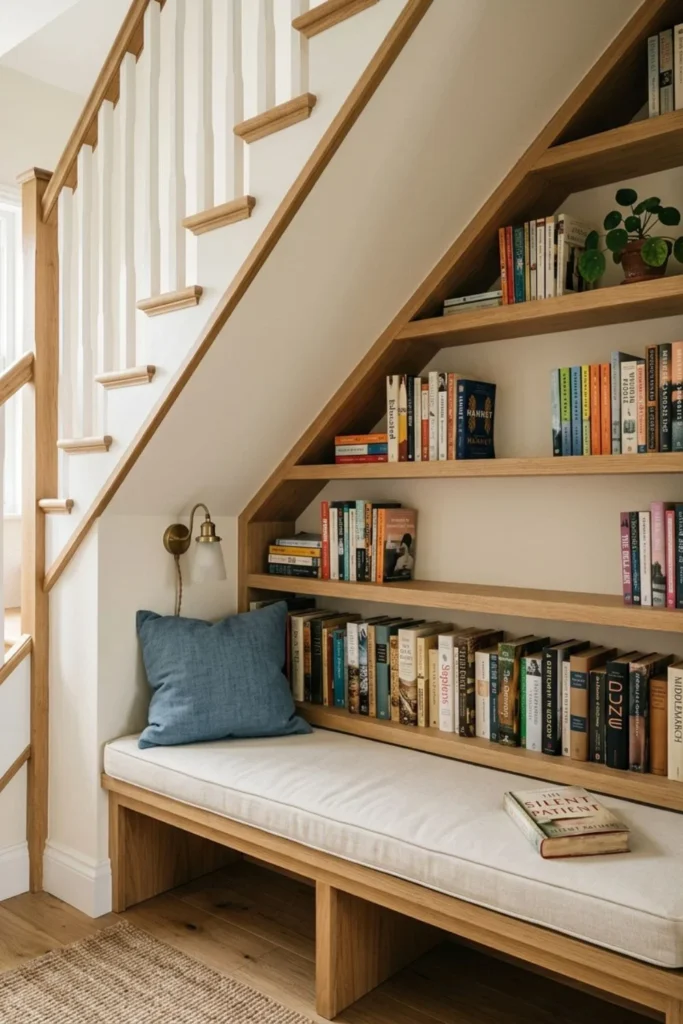
Bookshelves create a tiny library, but they should not steal shoulder room. I prefer them along a side wall or the lower slope.
An 8- to 10-inch depth holds many paperbacks. Larger art or cookbooks may need 10 to 12 inches. Measure your own books before choosing one depth for every shelf, and allow space for fingers to grip the top edge.
Place heavier books on lower shelves. If a bookcase is freestanding or could be climbed, anchor it correctly. The U.S. Consumer Product Safety Commission advises securing bookcases and other furniture to the wall and storing heavy items lower; its Anchor It safety guidance is especially important in homes with children.
Expect around $300 to $1,000 for a small ready-made or semi-custom shelf plan. Fitted shelves that follow the stair line can cost $1,000 to $2,500 or more. Leave some blank wall. A nook can hold books without looking like a shop display.
4. Use Warm Neutral Colors
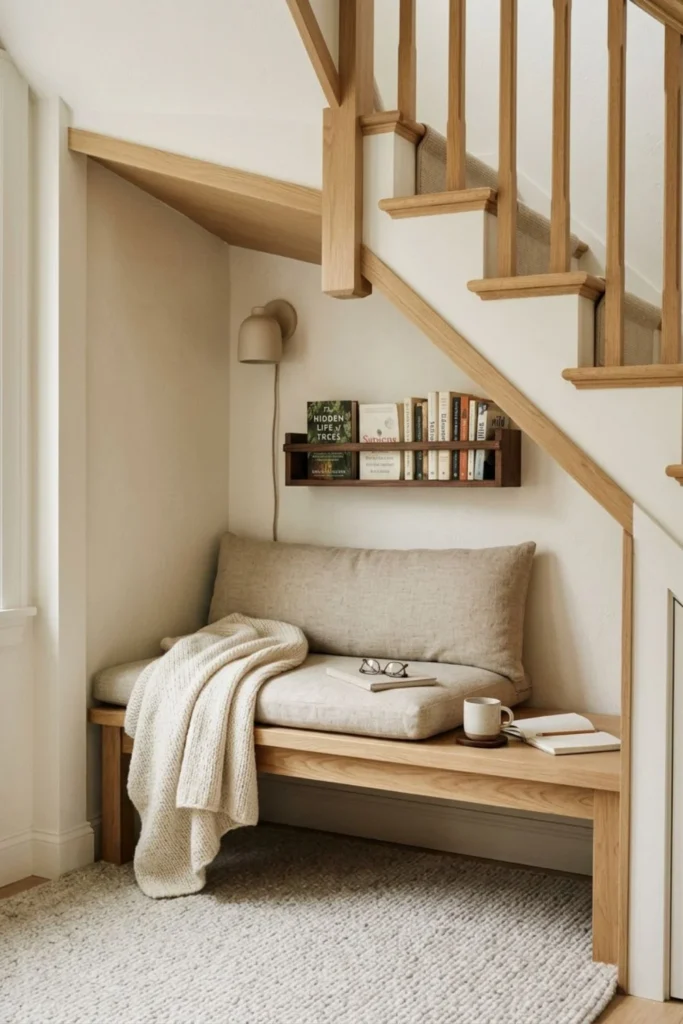
Warm white, oatmeal, pale mushroom, and light beige make a low space feel brighter. They also work with many flooring colors, so the nook feels connected to the room instead of pasted onto it.
Undertone is the difficult part. Test two large sample boards beside the floor in daylight and under the future reading bulb.
I would keep the wall light, then add contrast through oak, walnut, or a muted brown frame. Linen, wool, wood grain, and matte ceramic stop the neutral scheme from feeling flat.
A small DIY paint job may cost about $100 to $300 in paint, primer, tools, and patching supplies. Professional preparation and painting may be closer to $300 to $700, depending on wall condition and location. Spend more effort on preparation than on decorative objects; rough filler lines show clearly under a wall lamp.
5. Paint the Nook Soft Sage Green
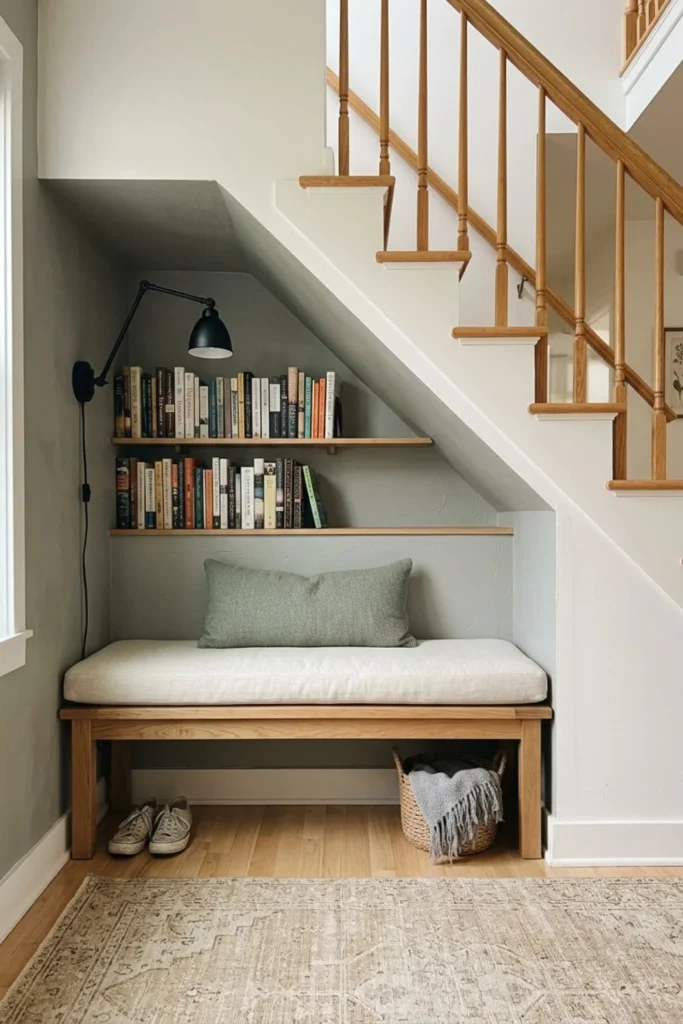
Soft sage is a good choice when you want color without making the stair area loud. I would use a gray-green on the back wall and keep the outer stair wall warm white. That small change gives the nook an edge while the room stays open.
Test the shade under the real bulb. A warm lamp can make sage look olive, while cool daylight can reveal more gray. Put the sample beside the cushion, flooring, and wood before buying the full tin.
Keep the rest simple: cream cushion, oak bench, dark lamp, and faded rug. Do not repeat sage everywhere; related colors look more natural than perfect matches.
The cost is similar to a small neutral paint job, usually around $100 to $700 depending on DIY work, repairs, and labor. If the space already feels dark, choose a lighter sage and spend on good reading light before decorative paneling.
6. Add a Supportive Upholstered Back
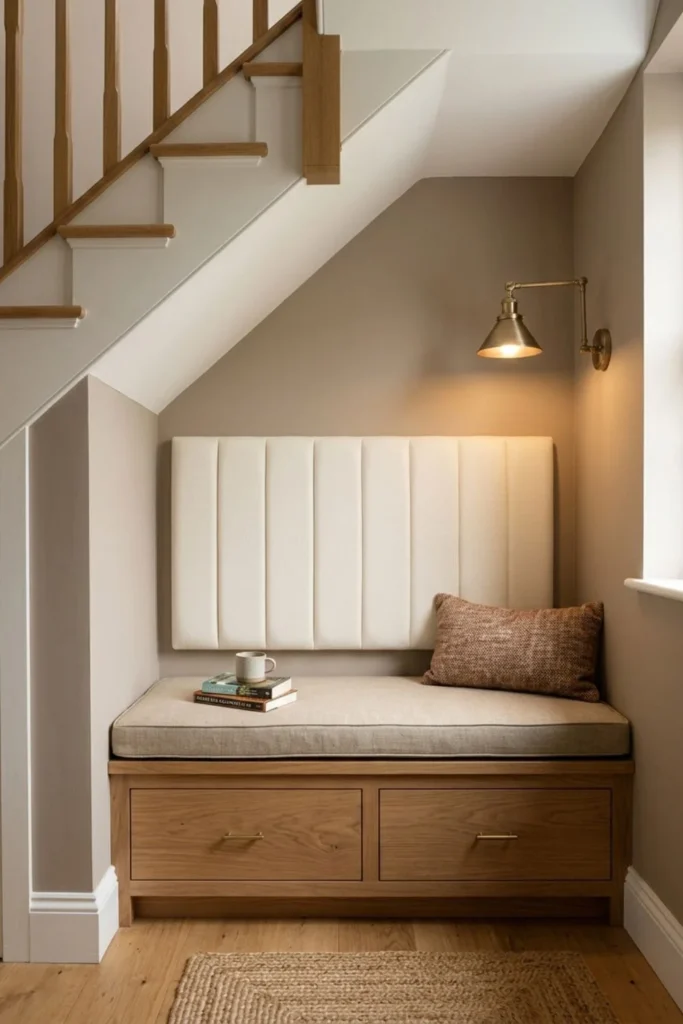
A hard wall becomes uncomfortable, so consider one straight padded panel instead of wrapping the whole slope in fabric.
A back cushion around 2 to 4 inches thick can offer support without taking too much seat depth. A small angle may feel more natural, but build the angle into the mock-up first. A deep padded back can turn a 22-inch seat into a cramped perch.
Choose a durable, cleanable fabric with a visible care label. Cream, warm gray, or muted sage hides less dust than black velvet and fits many rooms. Keep the panel clear of lamps, heaters, vents, and electrical parts.
Roughly allow $300 to $1,500 for a simple custom back and seat cushion, depending on foam, fabric, piping, and installer. Ask for removable covers or access to hidden fasteners. I would rather pay for good foam and washable fabric than decorative channeling that makes cleaning harder.
7. Install a Safe Wall Reading Light
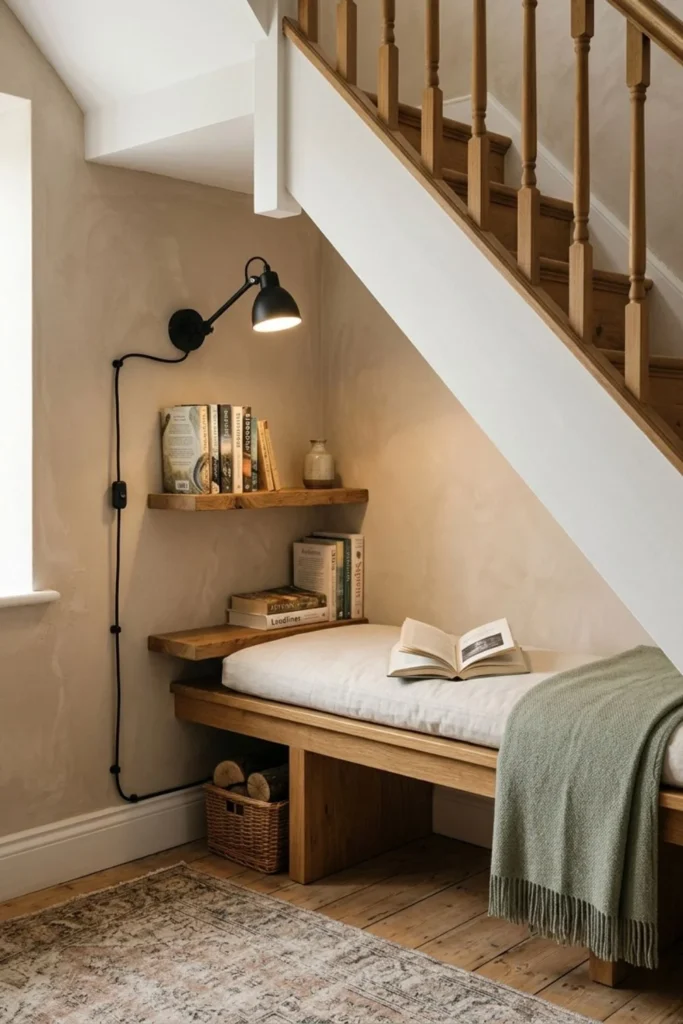
A proper wall reading light is my third top choice. It keeps the bench clear and puts light where the book is. The important word is reading: the fixture must brighten the page, not only produce a pretty glow behind the stairs.
Place the light near the taller end, roughly above the reader’s shoulder. Its center may land 40 to 50 inches above the finished seat, but the reader and fixture decide the final spot. Test a paper outline before drilling.
An adjustable arm or swivel shade helps different readers. The bulb should not shine straight into the eyes. Put the switch where a seated person can reach it without twisting, and where someone entering the nook can find it safely.
Use a qualified electrician for hardwired lighting. The CPSC says extension cords are temporary, not permanent wiring, and warns against overloads and wrong bulb wattage; see its electrical safety advice.
A normal sconce installation often falls near $150 to $550, while new circuits, hard wall access, permits, smart controls, or repairs can push it higher. A battery light is simpler for a rental, but choose a real task light with a secure mount—not a dim decorative puck that leaves the page in shadow.
8. Use Soft Layered Evening Lighting
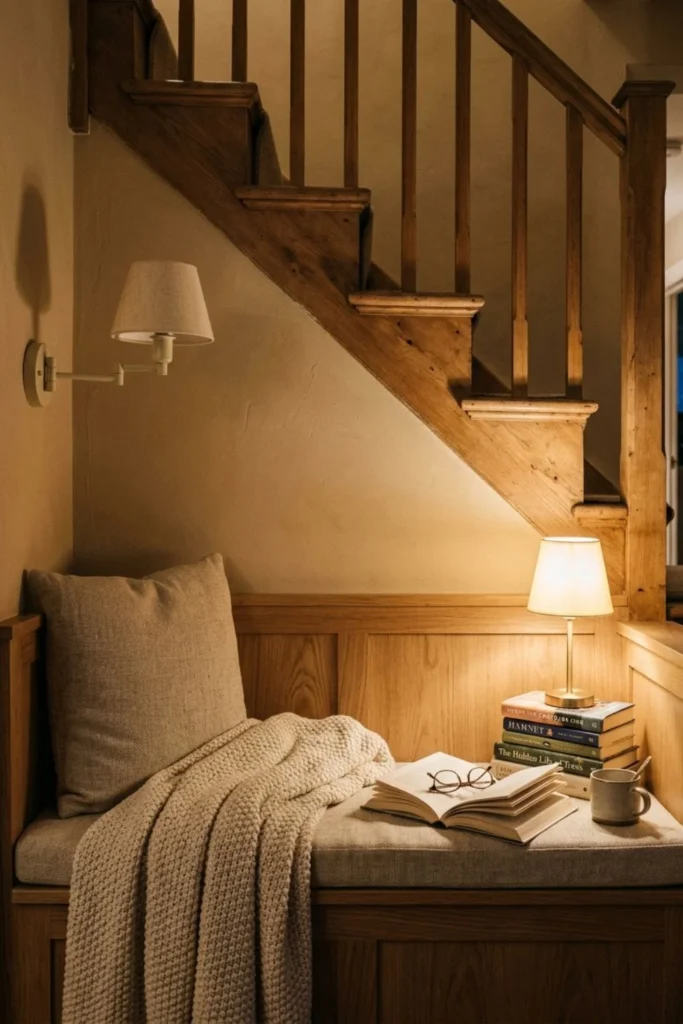
Use one focused task light for reading. A room light can soften dark edges, and a tiny shaded lamp may add atmosphere. Three sources are enough.
Choose bulbs with a similar warm or neutral color so the nook does not look orange on one side and blue on the other. A dimmer is useful for mood, but full brightness must still make small print comfortable.
Avoid LED strips tracing every stair line. They often create glare, show uneven installation, and make a normal corner look like a display. If you use concealed lighting, keep the source hidden, accessible for repair, and away from heat-sensitive fabric.
Plan roughly $150 to $1,200 for layered lighting, depending on plug-in lamps, hardwiring, dimmers, and wall repairs. Turn everything on before final painting. A misplaced light box is much easier to move before the finish coat.
9. Create a Child-Friendly Reading Corner
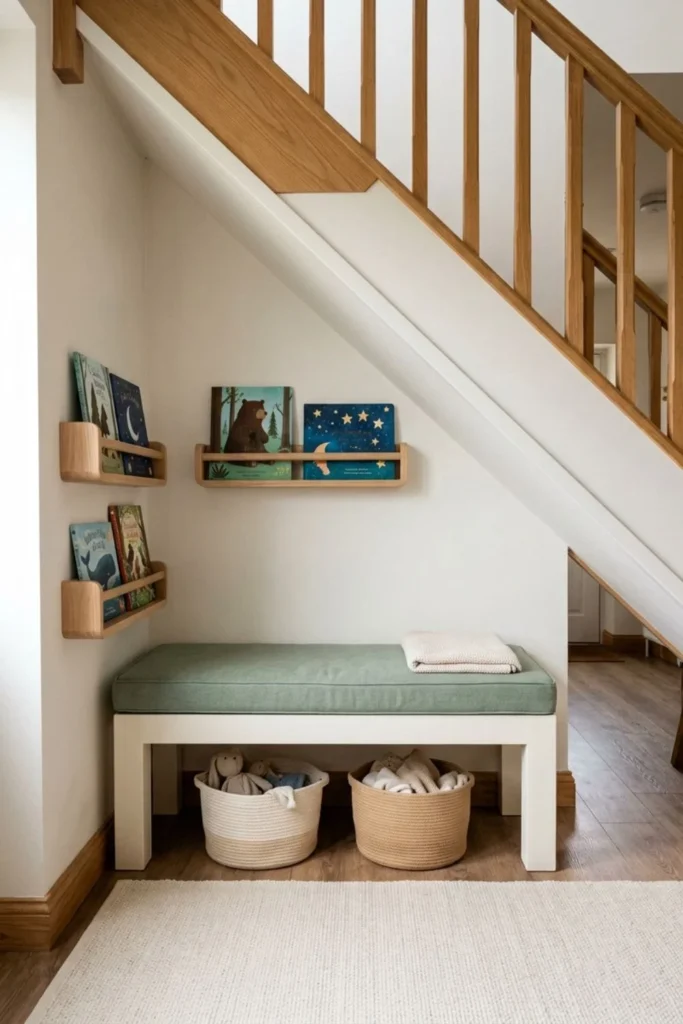
For children, I would keep the nook open, visible, and easy to clean. A low bench or firm floor cushion, front-facing books, and two soft baskets may work better than tall shelves packed with decor.
Children grow, so copy the measurements of a chair already comfortable for them. Support the feet, round exposed corners, and use a flat rug.
Secure furniture to suitable wall structure, keep heavy books low, and remove cords, hot lamps, candles, glass, and climbable displays. Do not turn the corner into a closed tiny room with a door. An adult should be able to see and reach the child quickly.
A basic setup can cost $250 to $700. A fitted rounded bench and anchored shelves may reach $700 to $1,500 or more. Let the child choose a pillow color or book basket; that small choice adds real personality without giving up safe planning.
10. Design a Calm Adult Book Nook
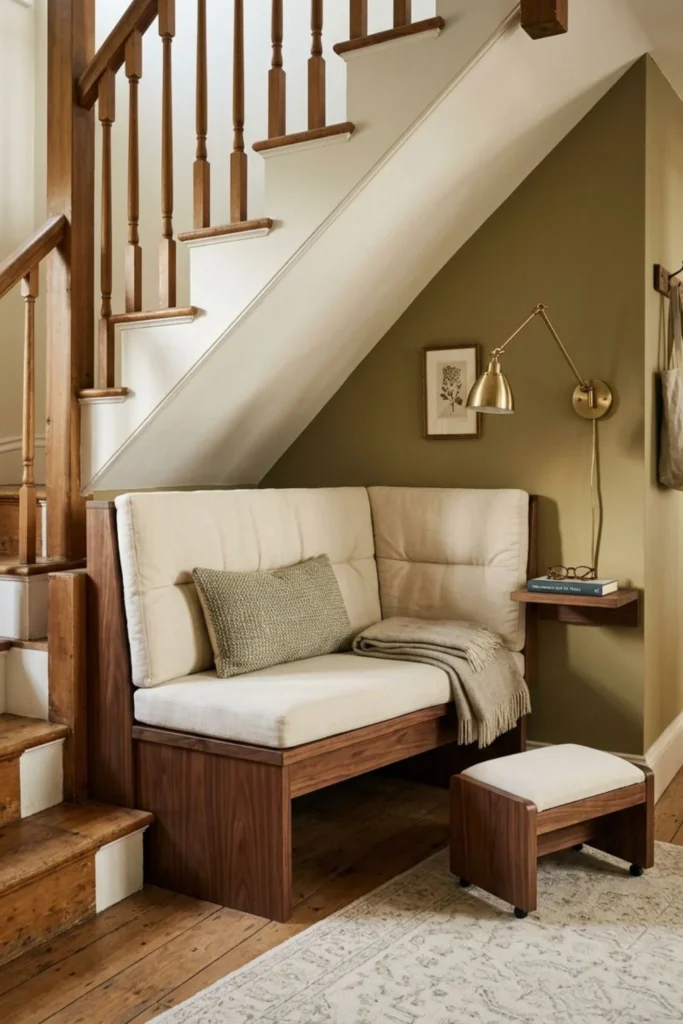
An adult nook needs more than a deep seat. It needs back support, a way to place the feet, and enough headroom to stand without twisting. I would test the mock-up for at least ten minutes, not just sit for one photo.
Start near the 17-to-19-inch height and 20-to-24-inch depth reference, then adjust. A shorter reader may want less depth or a footstool; a taller one needs more room.
Add one lumbar cushion, a reachable ledge for glasses, and a lamp that aims at the book. Keep the entrance wider than the body and avoid a coffee table directly in front.
Depending on whether you use freestanding furniture or fitted carpentry, allow around $500 to $3,000. Walnut, cream linen, and brushed brass can feel grown-up, but correct posture is the real luxury. If the seat hurts after half an hour, the expensive finish does not matter.
11. Add a Small Side Shelf for Drinks
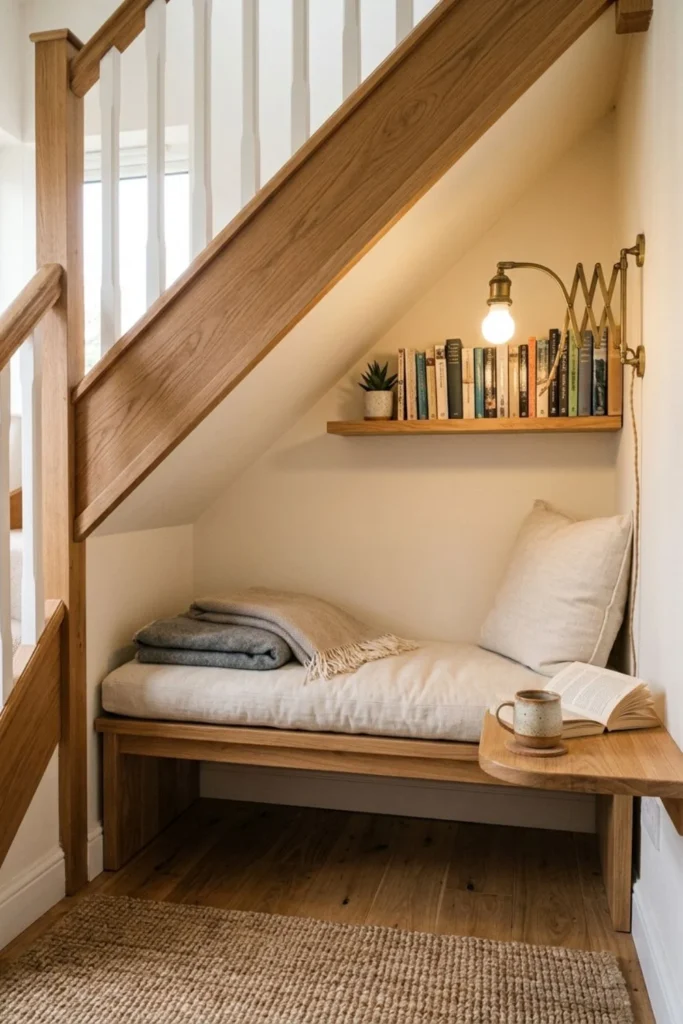
A small side shelf can hold a drink, phone, glasses, or current book. It does not need to be large.
An 8-to-12-inch-deep ledge is often enough for a cup and book while keeping the entrance open. Round the exposed corner and place it at a comfortable reach from the seat. Test the position with your elbow and shoulder, not only a tape measure.
Keep drinks away from outlets, switches, charging points, and book stacks. Use a coaster or wipeable tray. In a child’s nook, skip hot drinks and breakable cups.
A simple fixed ledge or small table may cost $100 to $500, depending on material and fitting. Before mounting it, check the wall type and use hardware designed for that wall. A shelf that holds a decorative cup for a photo may fail when someone leans on it.
12. Style a Natural Boho Reading Nook
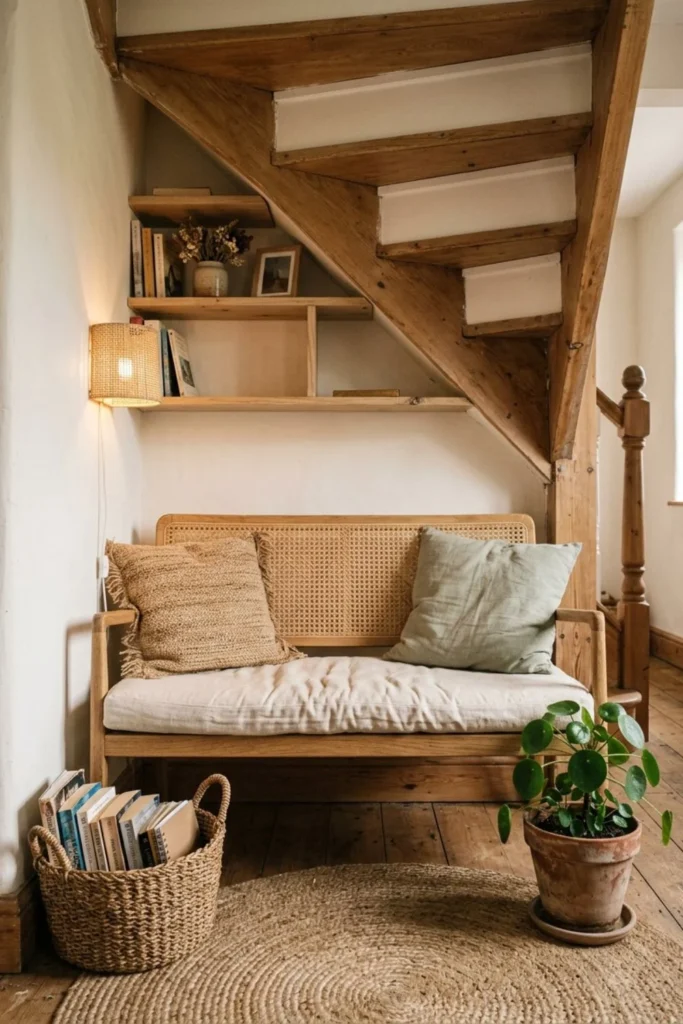
For controlled boho texture, try a cane bench, one woven pillow, a faded rug, a basket, and one plant in a waterproof pot.
I would avoid filling the slope with macrame, pampas grass, hanging baskets, and several trailing plants. Dust collects quickly below stairs, and too many soft items make the area harder to clean.
Keep open flame away from books, dried plants, and fabric. A warm lamp can give you the candle-like feeling without adding a candle to a tight corner. Check that a rattan shade follows the fixture’s heat and bulb requirements.
Plan around $200 to $1,000 for textiles, a lamp, small storage, and a few natural pieces. Buy slowly. A real boho corner looks collected over time; it should not feel like one matching set unpacked for an advertisement.
13. Keep the Look Light and Scandinavian
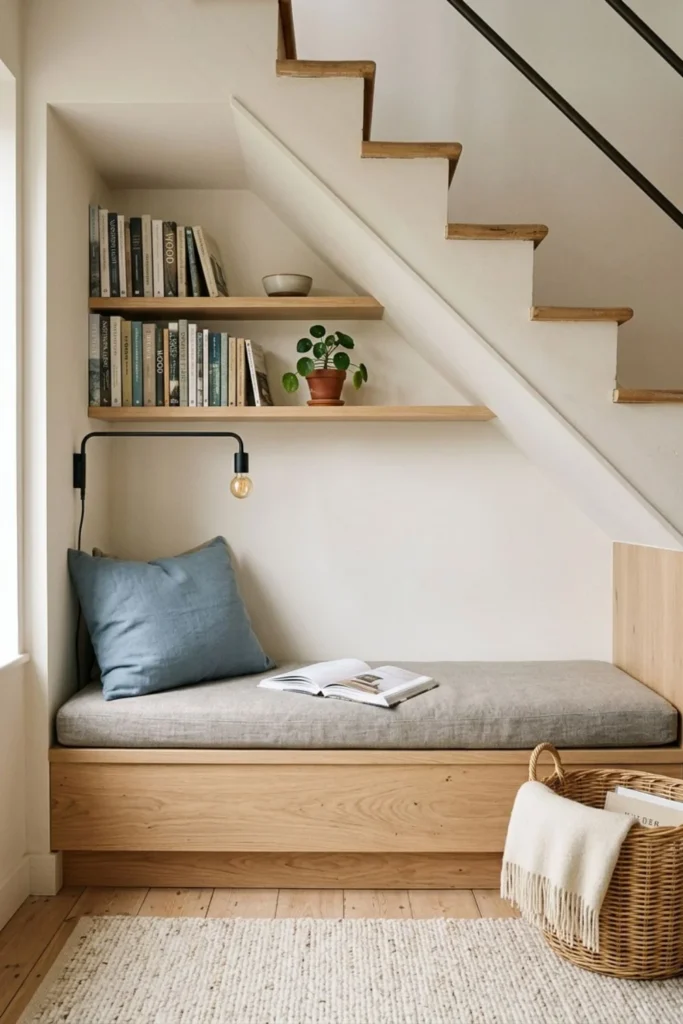
Pale oak, warm-white paint, a gray-beige cushion, and a slim black lamp make a clean starting point. Add one muted blue or sage pillow and a wool throw so the nook does not feel cold.
Scandinavian style does not require removing every personal item. A current book, stored blanket, and relaxed cushion make the space feel ready to use.
Closed drawers help because the light palette shows clutter quickly. Keep open shelves for the books you use and leave some wall visible. Natural daylight should stay clear instead of being blocked by a tall bookcase.
This look can cost about $300 to $2,000, mostly depending on the bench and storage. I would spend on strong joinery and good fabric, then keep the decor inexpensive and limited.
14. Try a Dark and Moody Book Corner
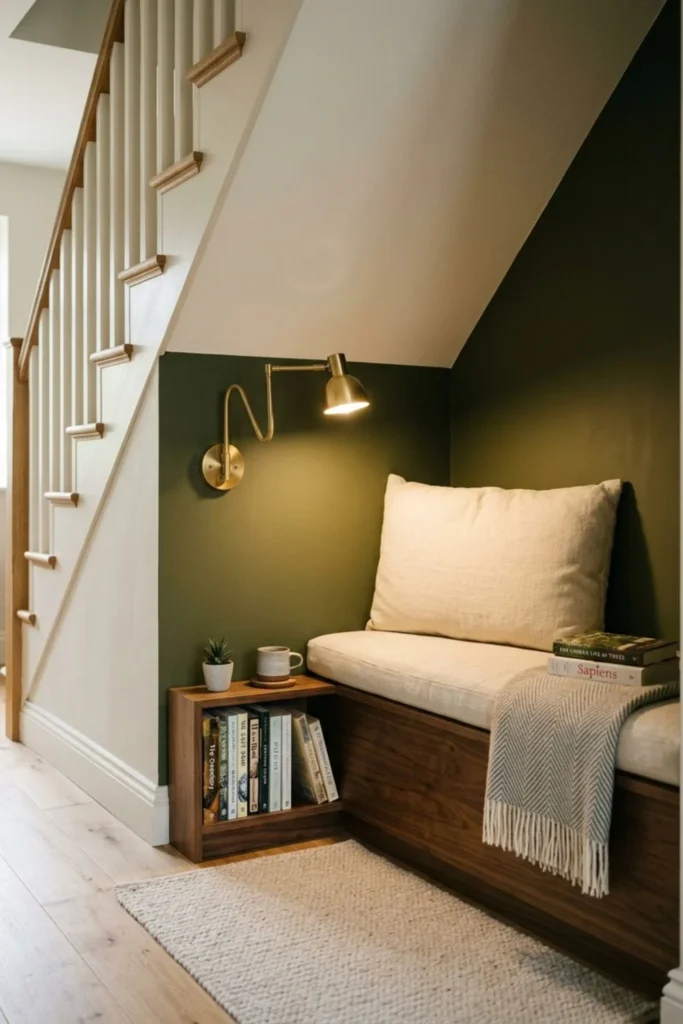
This is a weaker choice under low stairs. Deep colors feel sheltered, but they absorb light, lower the ceiling visually, and show dust and lint.
If you love the look, paint one back wall and keep the outer stair wall, cushion, and rug light. Use a real task light plus softer room light. Test a large painted board for several days before covering the whole nook.
I would not combine a dark wall, dark bench, dark cushion, black shelves, and a weak amber bulb. The result may photograph dramatically while being tiring to read in. A pale seat and warm wood give the eye a place to rest.
Paint may cost around $100 to $500, but improving the lighting can add $150 to $1,200. That extra cost is why this idea is less practical than a light neutral or sage nook. Choose it for a naturally bright, reasonably tall space—not because one viral picture looked cozy.
15. Make a Rental-Friendly Reading Nook
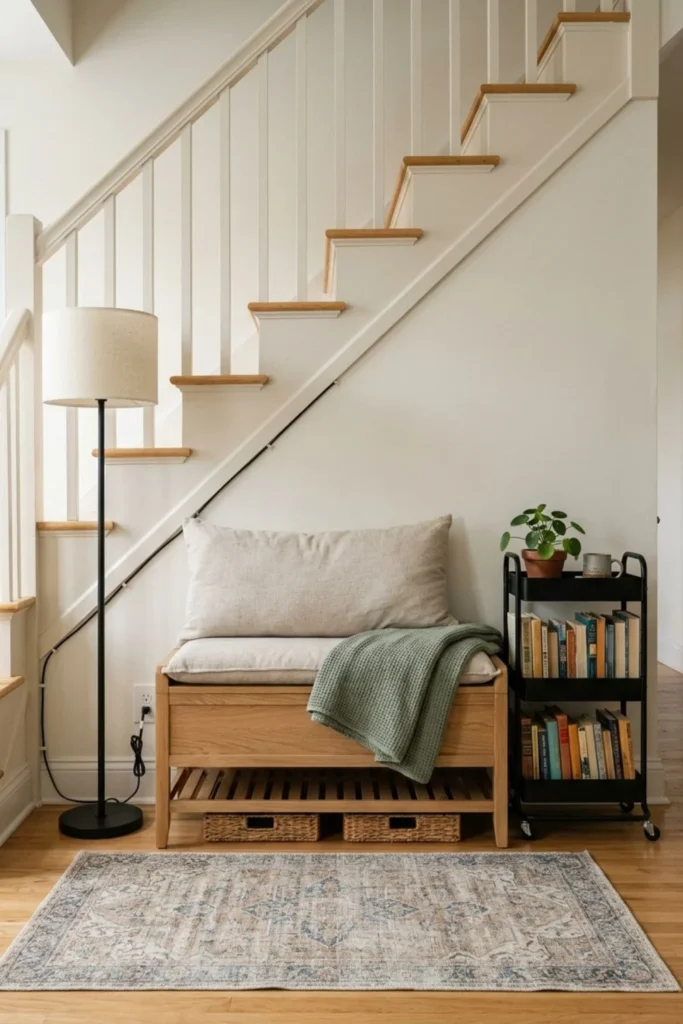
Renters can use a storage bench, loose cushion, book cart, floor lamp, and washable rug without changing the staircase.
Measure the bench around the reader, using the 17-to-19-inch finished-height range only as a starting reference. Make sure the lid or drawers open, and choose furniture that can move to a bedroom or hall later.
Follow the rental agreement before drilling or painting. Removable hooks have load limits and are not suitable for heavy shelves, mirrors, or lights. Secure a lamp cord along the wall without putting it under a rug or across the walking path.
A flexible setup may cost $150 to $900. Put most of the budget into a comfortable cushion and useful light. Matching baskets are optional; being able to read comfortably on the first evening is not.
16. Fit a Nook Beneath a Very Low Staircase
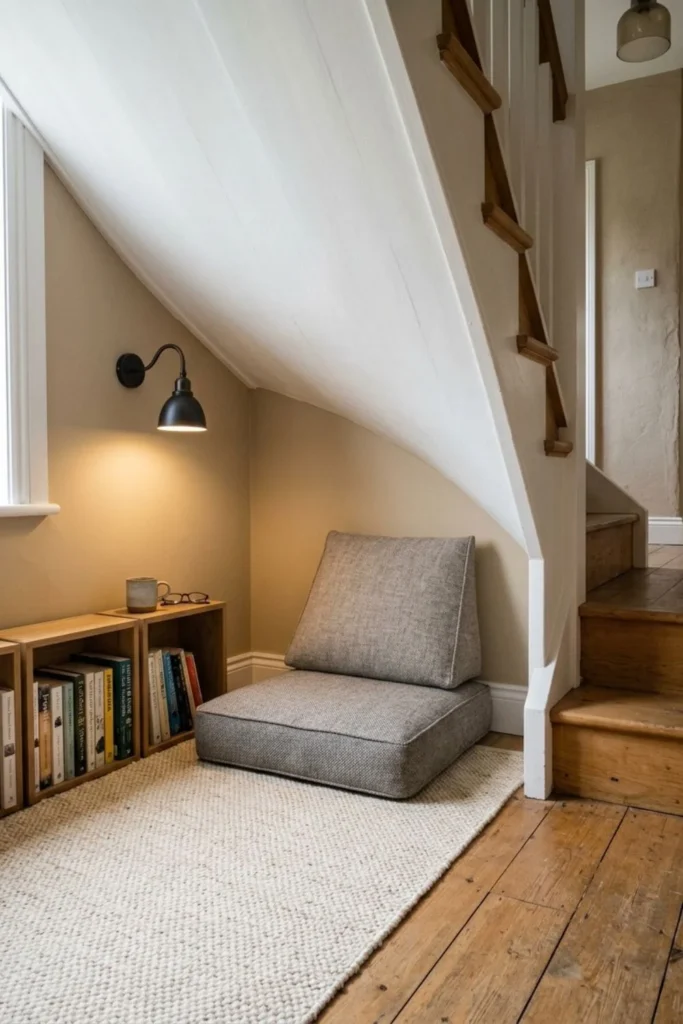
This is the other weak idea. If you must duck while seated, cannot turn normally, or may hit your head when standing, do not force an adult nook into it.
Use the low triangular end for books, drawers, or baskets. Place a proper chair just outside the stairs where the ceiling is safe. A child-sized nook may fit, but it still needs open access, safe lighting, stable furniture, and adult supervision.
A floor cushion is not an automatic answer. Some people find floor seating difficult to enter or leave, and a thick cushion reduces headroom. Test the full movement: sitting down, leaning back, reaching, turning, and standing up.
If the test feels cramped, change the plan without regret. Low storage plus a nearby chair is better than an uncomfortable nook built only for a picture. A storage-only conversion might cost $300 to $2,000, depending on baskets, cubbies, or drawers, and it can be more useful every day.
17. Create an Achievable Luxury Reading Nook
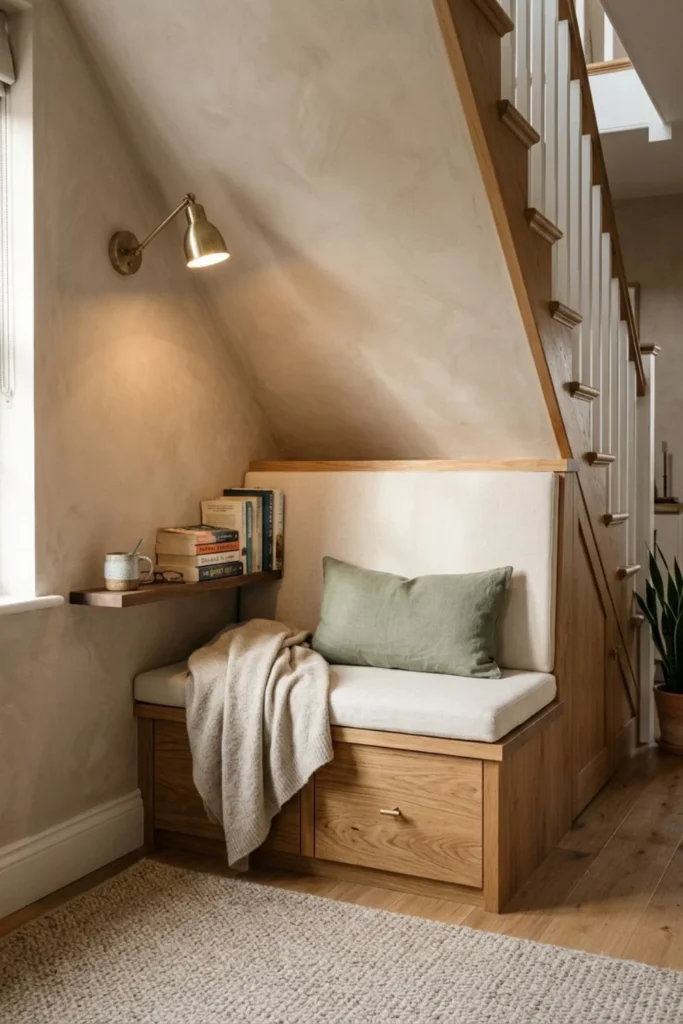
Achievable luxury comes from fit and comfort. I would use an oak bench, two soft-close drawers, a cream back, one brass light, and a walnut ledge—then stop.
Choose one premium feature. It could be custom upholstery, beautiful wood fronts, or a well-made lamp. When every surface tries to be special, the nook becomes expensive and visually busy.
Keep drawer gaps even, align the cushion with the bench, and make wall repairs smooth. These quiet details look more expensive than marble, glowing curves, or wall-to-ceiling padding. Leave enough room to remove the cushion and reach fittings later.
A fitted luxury nook may cost about $3,000 to $8,000 or more, especially with custom drawers, upholstery, wiring, and repair work. Ask for an itemized quote. If the total grows too fast, keep the good bench and light, then delay shelves or decorative panels.
What I Would Build at Three Budget Levels
If the choices still feel overwhelming, this is how I would simplify them.
| Budget | My practical plan | What I would skip |
| Under $700 | Freestanding storage bench, fitted loose cushion, good plug-in or rechargeable task light, rug, and book basket | Custom trim, full wall shelves, decorative LEDs |
| $700–$2,000 | Semi-custom bench, washable cushion, two low shelves, paint, and a professionally placed light if wiring is simple | Complicated drawer angles and padded wall panels |
| $2,000–$7,500+ | Fitted bench, two full-extension drawers, supportive back, anchored shelves, safe hardwired light, and finished trim | Expensive surfaces that do not improve comfort |
At every level, I would keep idea 1, add idea 7, and choose idea 2 if the budget allows. I would only use dark paint after testing it, and I would never force seating below a staircase that fails the movement test.
Ask for separate carpentry, electrical, upholstery, painting, permit, and repair costs. You can then reduce the project without cutting safety work.
Keep the Nook Comfortable and Easy to Clean
A nook stays inviting when use takes less than a minute. Keep one book, blanket, and pillow at the seat; store the rest.
Vacuum the stair edge, rug, cushion seams, shelves, and drawer runners. Low spaces collect dust faster than they appear to. Wash removable covers according to the label and check the wall behind the bench for moisture or marks.
Every few months, inspect these points:
- Bench joints and wall fixings
- Shelf anchors and load
- Drawer runners and stops
- Lamp mount, cord, switch, and bulb rating
- Rug pad and clear walking path
- Vents, access panels, and signs of dampness
Do not use the nook as a hiding place for random boxes. If a drawer becomes hard to close, remove items instead of forcing the runners. Rotate a few books and change one throw with the season; there is no need to restyle the whole corner.
Final Thoughts
The most useful Cozy Under-Stairs Reading Nook Ideas are not complicated. A correctly sized bench, two reachable drawers, a supportive cushion, and a safe reading light can turn wasted space into a calm part of daily life.
Measure the real reader, include the cushion in the seat height, protect the stair structure, and keep access to services. Use official safety guidance and local professional advice where the work touches framing, fire protection, or electricity.
My strongest plan is simple: build idea 1 well, add idea 2 if storage is needed, and give idea 7 proper attention. Treat dark paint as an optional mood choice, and let a very low staircase remain storage if it cannot hold a comfortable seat. A nook that works in real life will always be better than one designed only to look impressive online.
Disclosure: Some visuals are AI-assisted design concepts created for inspiration. Always confirm measurements, materials, load limits, building rules, fire protection, electrical safety, ventilation, furniture stability, child and pet safety, and installation requirements for your home. Costs are rough U.S. planning estimates and may vary by location, labor, materials, permits, and project conditions.