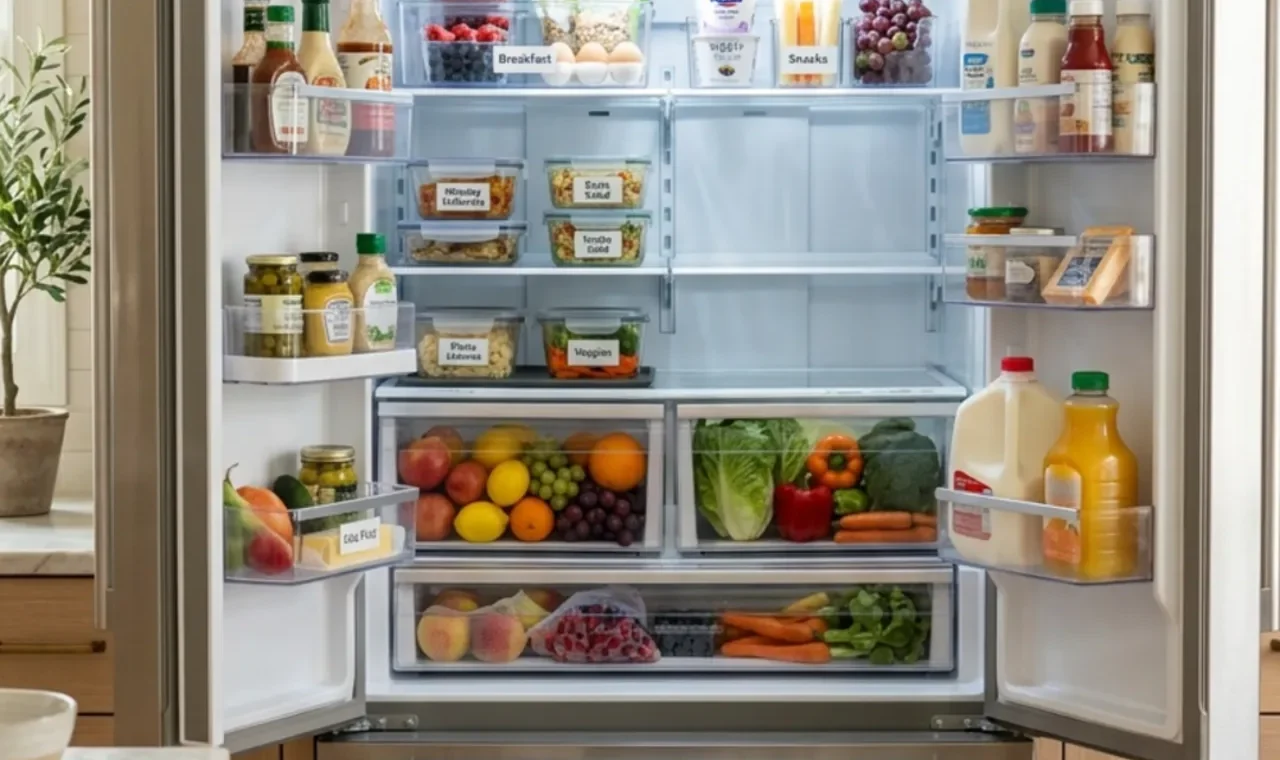
Fridge organization ideas can look perfect in a photo and still fail the first time you bring home a full grocery order. The problem is usually not the refrigerator. It is the system.
A row of matching clear containers may look clean, but if you have to remove food from its packaging, transfer everything after every shopping trip, and remember where six different bins belong, the setup can become another chore.
I prefer a simpler approach. Give the refrigerator a few clear zones, keep frequently used food easy to reach, label leftovers with dates, protect ready-to-eat food from raw meat juices, and leave enough open space for changing groceries.
If you are also trying to make a tight kitchen feel more functional overall, Small Apartment Kitchen Ideas has more practical layout and storage ideas that work well alongside refrigerator organization.
Food safety matters more than the aesthetic. The U.S. Food and Drug Administration recommends keeping the refrigerator at 40°F (4°C) or below and using an appliance thermometer to check it. You can read the FDA’s refrigerator food-safety guidance before reorganizing.
This guide includes practical measurements, rough U.S. planning costs, setup steps, pros, and cons for every idea. The goal is not a refrigerator that looks staged for five minutes. It is one that still makes sense on a busy Wednesday night.
Start With Temperature, Not Containers
Before buying any bins, check the refrigerator temperature.
The FDA recommends 40°F (4°C) or below for the refrigerator and 0°F (-18°C) for the freezer. An inexpensive appliance thermometer is useful because the display on the fridge does not always tell you the temperature at every shelf.
Do not pack the refrigerator so tightly that cold air cannot circulate. A beautifully organized fridge can still work poorly if every shelf is packed edge to edge.
I would also clean and organize one section at a time rather than emptying the whole fridge onto the counter for an hour.
Remove expired or spoiled food, wipe spills, then put perishable food back promptly.
FoodSafety.gov’s Cold Food Storage Chart is a useful reference when you are unsure how long a refrigerated item should be kept.
Before You Buy Organizers, Measure the Inside of the Fridge
Measure the usable shelf space rather than the appliance’s outside dimensions.
Check:
- shelf width
- shelf depth
- height between shelves
- door-bin width
- crisper-drawer dimensions
- clearance around vents
- space needed for tall bottles and milk
Open drawers and remove shelves if they are adjustable. Some refrigerators lose usable depth around lights, filters, vents, or curved door liners.
Clear bins often come in widths between about 4 and 12 inches and depths around 10 to 15 inches, but measure first. A bin that is half an inch too deep may stop the door from closing.
I would leave at least one flexible shelf area without a fixed organizer. That space is useful for a large pot, cake box, watermelon, pizza box, or unexpected leftovers.
1. Create a Simple Top-Shelf Ready-to-Eat Zone
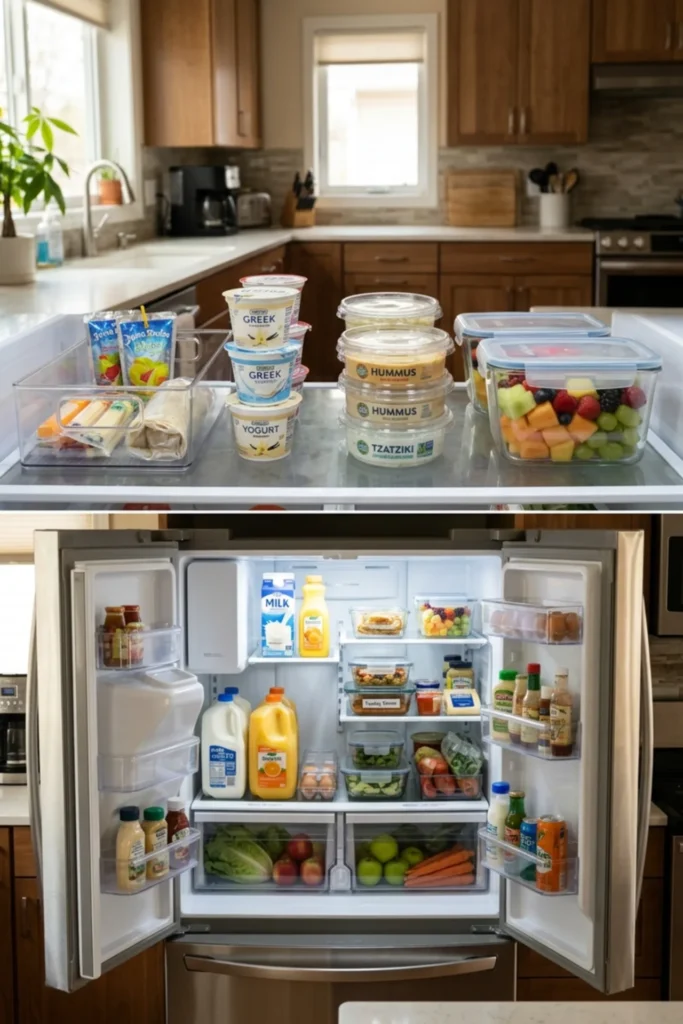
The top shelf is a good place for food that is already cooked or ready to eat.
That might include yogurt, prepared breakfast items, sealed dips, cut fruit, or items you want visible before they are forgotten.
The point is not to fill the shelf with containers. It is to make one shelf easy to understand.
Size and requirements: Measure the shelf width and keep at least 20%–30% of it flexible. Use one or two shallow bins around 4–8 inches wide if small items keep getting lost. Do not block air vents.
Method and cost: Remove everything from the shelf, group ready-to-eat foods, and return only those items. Add one bin for small cups or packets if needed. A simple setup may cost $0–$35.
Pros: Makes quick food easy to find; helps reduce forgotten items; easy to maintain without decanting everything.
Cons: The zone can become crowded after grocery day; tall packages may not fit; a strict system may fail if household habits change.
2. Use One Clear Bin for Breakfast Foods
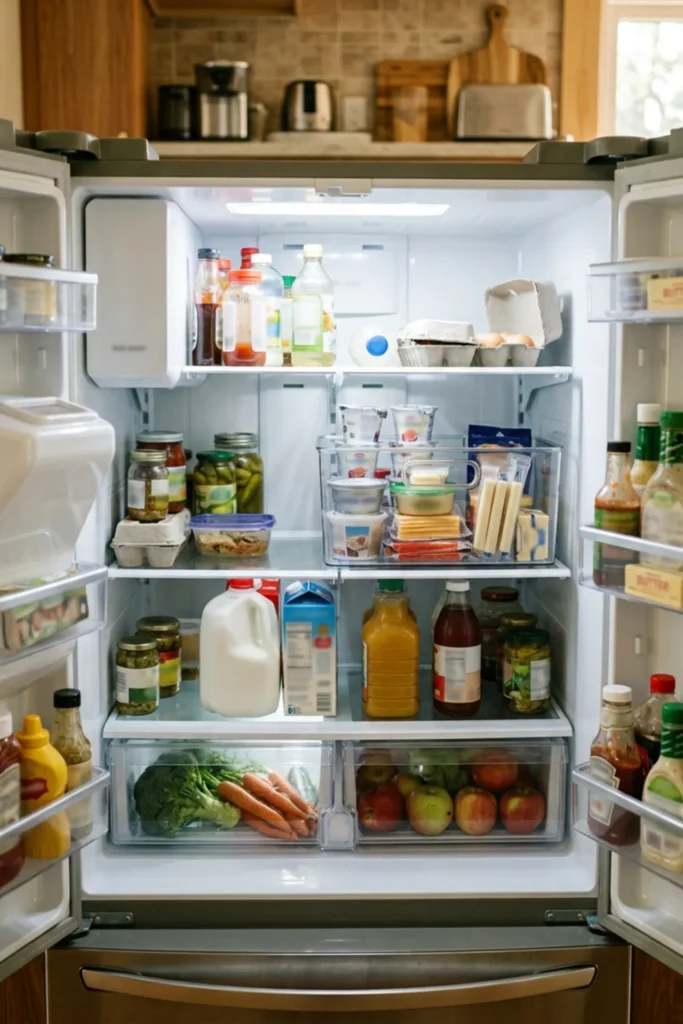
A breakfast bin works because the items are usually used together.
You might keep yogurt cups, cream cheese, breakfast bars that require refrigeration, or small jars in one easy-to-pull container.
For food that does not belong in the refrigerator, a simple wall-storage system can free up valuable cabinet and counter space. See DIY Kitchen Wall Organizer Ideas for ideas that complement this fridge setup without adding more containers inside the appliance.
I would not make five different themed bins. One useful category is enough.
Size and requirements: A bin around 6–10 inches wide and 12–14 inches deep works in many full-size fridges, but check your shelf. Choose a handle that does not reduce too much internal space.
Method and cost: Put the breakfast items together for a week before buying anything. If the group really stays together, buy one washable clear bin. Expect around $10–$30.
Pros: Faster mornings; small items stop disappearing behind larger containers; easy to pull out at once.
Cons: A bin uses some shelf width; deep bins can hide food in the back; not useful if your breakfast changes every day.
3. Make a Grab-and-Go Snack Zone
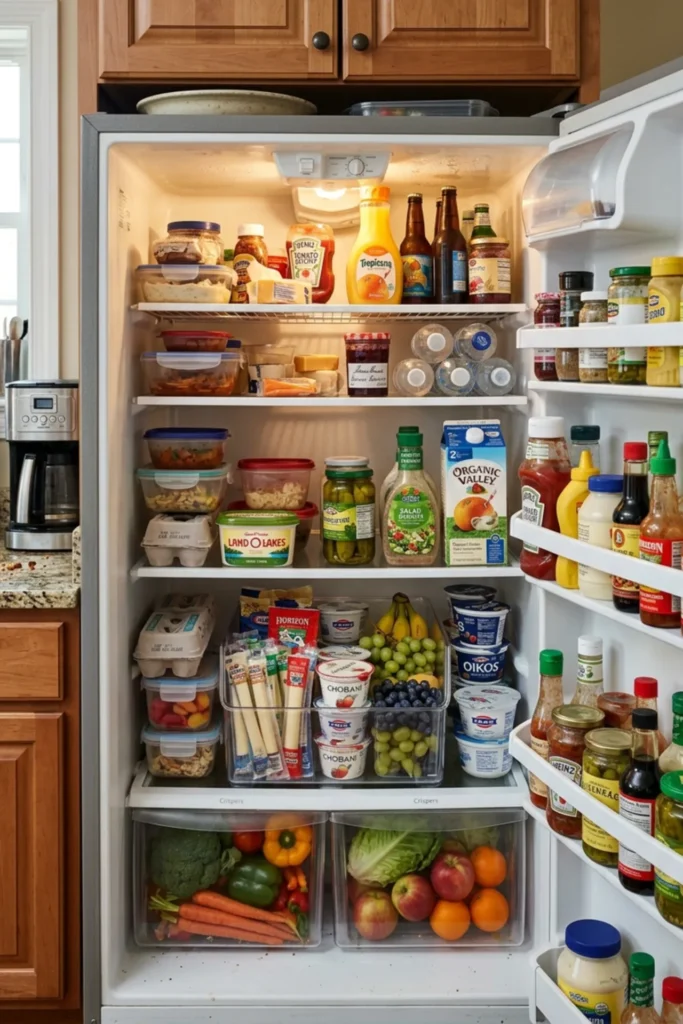
A snack zone works best for households where people open the refrigerator several times a day looking for something small.
Use it for cheese sticks, washed fruit in appropriate storage, yogurt, or other refrigerated snacks your household actually eats.
Keep the zone simple enough that children or adults can return items to the same place.
Size and requirements: One medium bin around 8–12 inches wide is usually enough. Place it at a comfortable height for the people using it. Do not place food where a child must reach over raw meat or fragile glass.
Method and cost: Choose five or six snack types that already belong in the fridge. Keep foods in their original labeled packaging when that information is useful for ingredients, allergens, dates, or storage instructions. A bin may cost $12–$35.
Pros: Easy access; fewer open packages scattered across shelves; can reduce repeated searching.
Cons: Can encourage overfilling; individual snack packaging creates waste; a large bin may take space from meal ingredients.
4. Give Leftovers One Dedicated Shelf or Bin
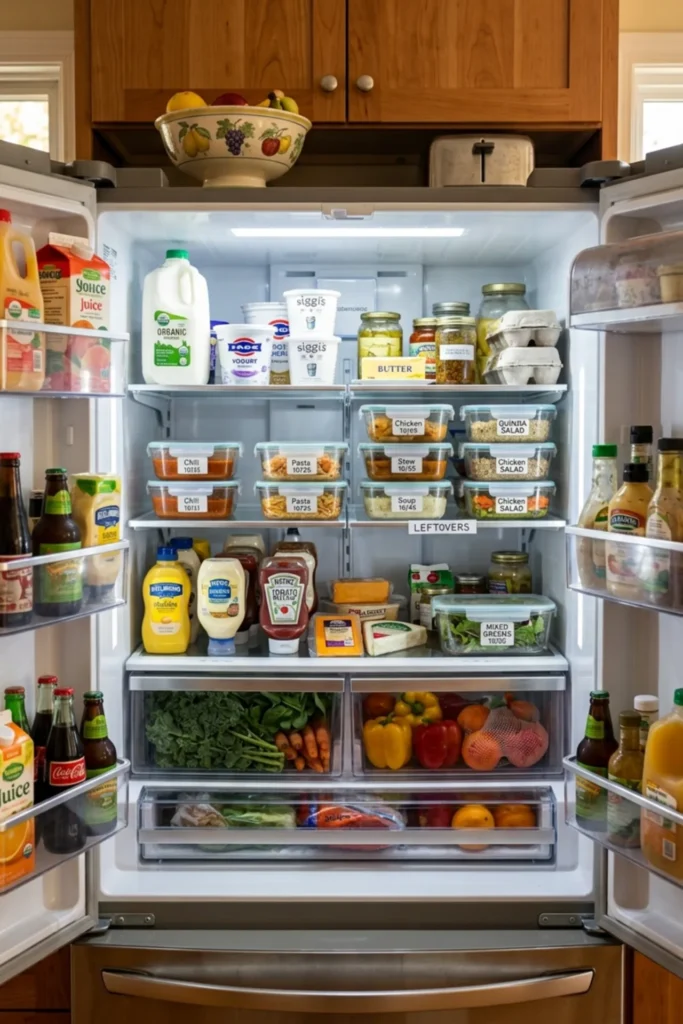
Leftovers are easier to use when they stay together.
I would rather have one clearly visible leftover zone than containers spread across three shelves behind milk and condiments.
Date labels are more useful than decorative labels here.
USDA guidance says refrigerated leftovers are generally kept for 3 to 4 days. You can check the USDA leftovers and food-safety guidance for details.
Size and requirements: Reserve roughly one-third to one-half of a shelf depending on how often you cook. Use shallow containers where practical so food cools efficiently. Leave enough height for stacked meal containers.
Method and cost: Label leftovers with the food name and date before refrigerating. Put the newest items behind older ones so older food stays visible. Reusable labels or tape may cost $5–$20; containers vary from $20–$80+ for a basic set.
Pros: Makes leftovers easier to see and use; reduces mystery containers; helps with meal planning.
Cons: Requires dating food consistently; large pots still need flexible space; overstacking can hide older items.
5. Use a Low Tray for Raw Meat and Poultry
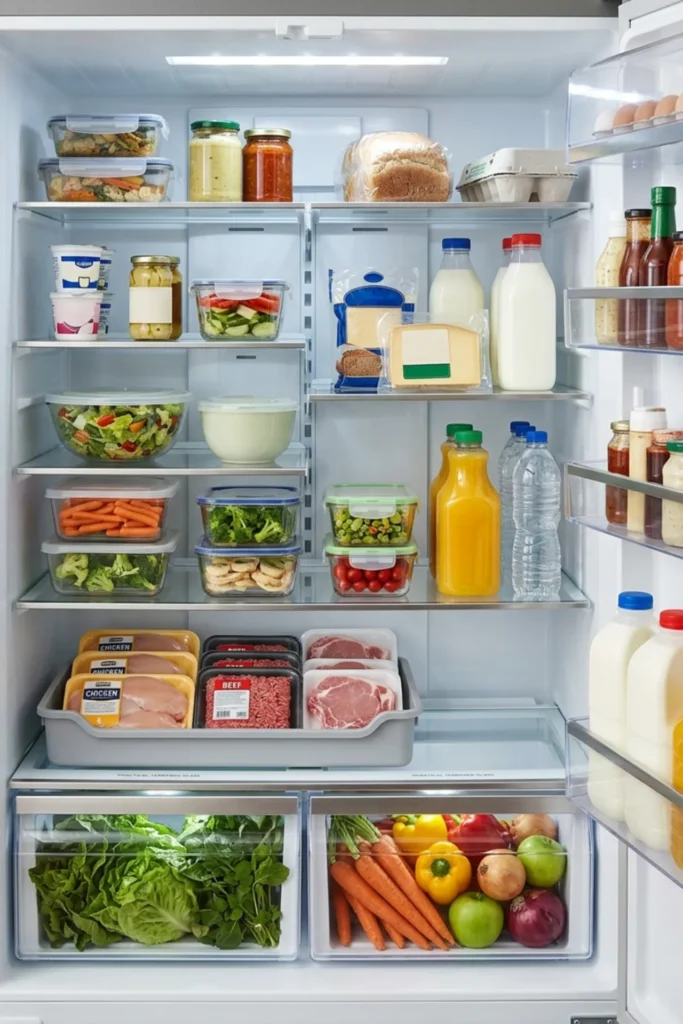
This is one organization idea where function matters much more than appearance.
Keep raw meat, poultry, or seafood in secure packaging and place it inside a washable tray or bin so leaks are less likely to reach other food.
I prefer a low tray on the lowest practical shelf rather than a deep decorative bin.
USDA food-safety guidance emphasizes keeping raw meat, poultry, fish, and their juices away from other foods. See USDA Food Safety Basics.
Size and requirements: Choose a tray large enough for the packages you normally buy, often around 10–14 inches wide and 12–15 inches deep. Keep it below ready-to-eat food where the fridge layout allows. The tray should have raised edges.
Method and cost: Place raw packages inside the tray as soon as groceries are unpacked. Clean and sanitize the tray after leaks according to its material instructions. A suitable washable tray may cost $10–$30.
Pros: Helps contain leaks; gives raw food a clear zone; easy to remove for cleaning.
Cons: Uses shelf space even when empty; must be cleaned carefully; oversized supermarket packs may not fit.
6. Keep Produce Drawers Simple: One for Fruit, One for Vegetables
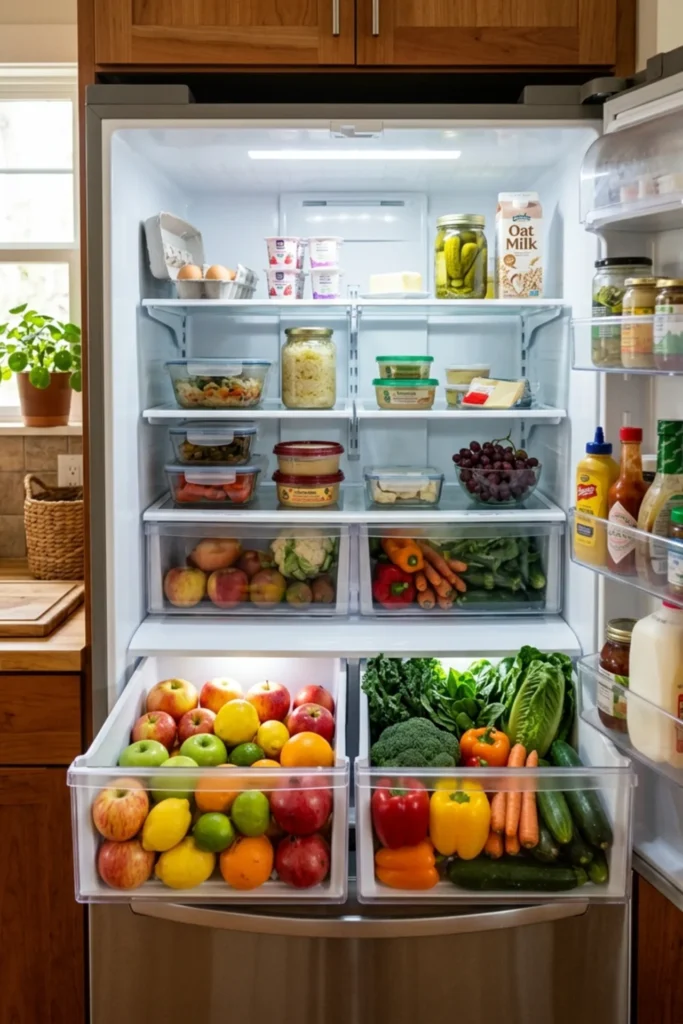
The crisper drawers already exist, so use them before buying more bins.
A simple fruit-and-vegetable split is easier to maintain than dividing produce into seven little containers.
Use the humidity settings according to your refrigerator manual because drawer controls vary by model.
Size and requirements: Do not pack produce so tightly that you cannot see what is underneath. Leave enough room to slide the drawer open without bags catching at the top.
Method and cost: Empty both drawers, clean and dry them, then group produce in a way that matches your household. Remove damaged items regularly. Cost: $0 unless you add washable liners.
Pros: Uses storage you already have; easy to understand; no extra plastic organizers required.
Cons: Deep drawers can hide older produce; different produce has different storage needs; large items can take over the whole drawer.
7. Add One Small “Use First” Bin
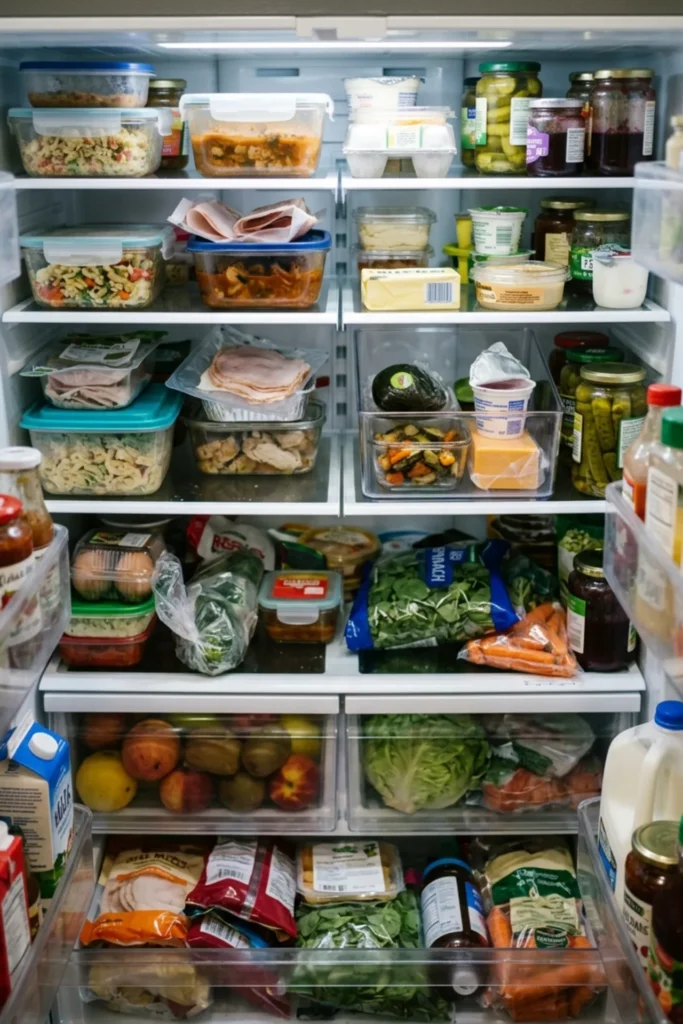
A “use first” bin is one of the most practical fridge organization ideas because it gives food close to its quality window a visible place.
This could include an opened package, a ripe fruit, or a leftover that should be eaten soon.
Do not use it to override food-safety dates or storage guidance.
Size and requirements: Keep the bin small—around 4–8 inches wide. If the bin is too large, it becomes another place to forget food.
Method and cost: Check the fridge two or three times a week and move suitable items into the bin. Use a simple label such as “Use First.” Cost is around $5–$20.
Pros: Can reduce food waste; makes meal choices easier; requires little space.
Cons: Needs regular review; family members must understand the label; unsafe or spoiled food should be discarded, not moved into the bin.
8. Use a Lazy Susan for Small Jars
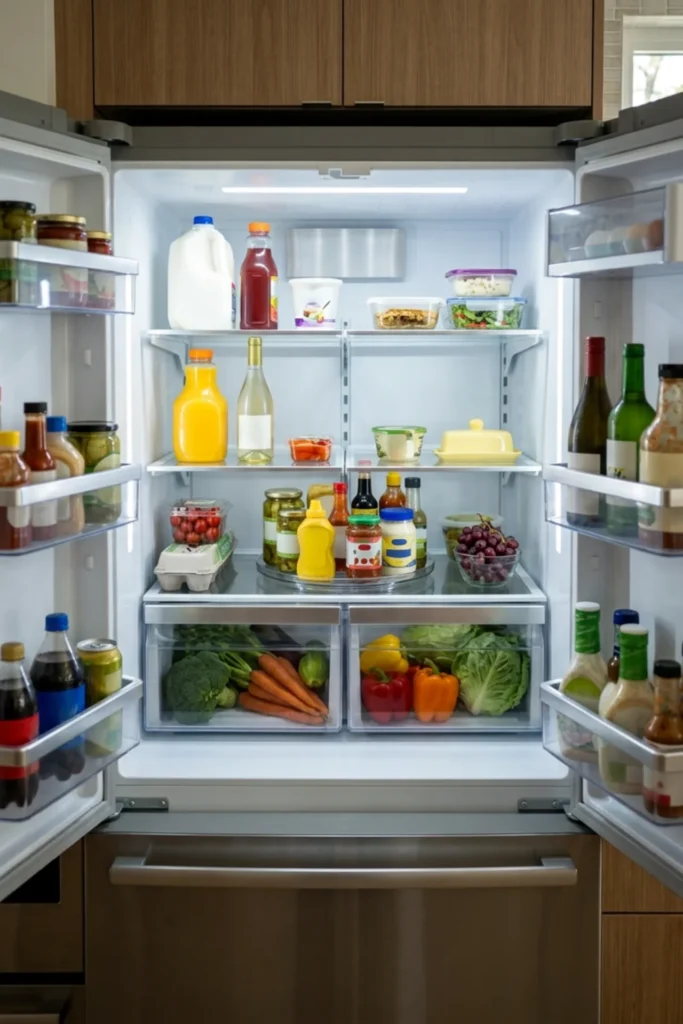
A turntable works well for short jars that usually disappear behind one another.
Use it for condiments, small sauces, or jars with similar heights.
I would keep it on a shelf where it can rotate freely without hitting the refrigerator wall.
Size and requirements: A turntable around 9–12 inches in diameter works in many refrigerators. Measure the usable depth and door clearance. Choose a model with a raised edge.
Method and cost: Group the small jars first. If there are enough to justify a turntable, arrange them with labels facing outward. Expect around $10–$30.
Pros: Makes back-row jars easier to reach; quick to clean; useful for short containers.
Cons: Round organizers waste some corner space; tall bottles may fall; too many jars make rotation difficult.
9. Keep Condiments in the Door Instead of Filling Prime Shelf Space
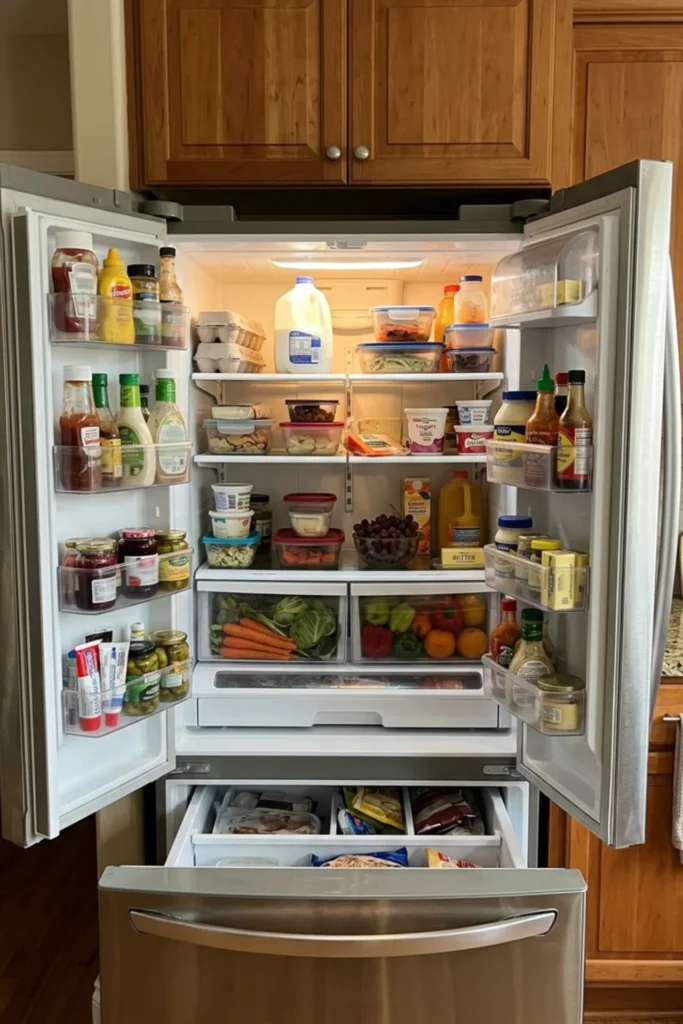
The refrigerator door is useful for many bottled condiments and other items that the manufacturer and food label allow there.
Use the door for categories that fit the bins naturally rather than forcing tall bottles onto main shelves.
Keep food-storage directions on the package in mind because not every refrigerated food belongs in the same location.
Size and requirements: Measure door-bin height and width before adding extra containers. Make sure tall bottles do not hit the shelf above when the door closes.
Method and cost: Group similar bottles—such as sauces, dressings, and spreads—without transferring them to decorative bottles. Reuse the built-in bins first. Cost: $0–$20 if you add a small divider.
Pros: Frees main shelf space; original labels remain visible; easy to organize by bottle height.
Cons: Door space is limited; tall bottles can tip; categories become messy if every small jar is placed there.
10. Use a Shelf Riser Only Where Vertical Space Is Being Wasted
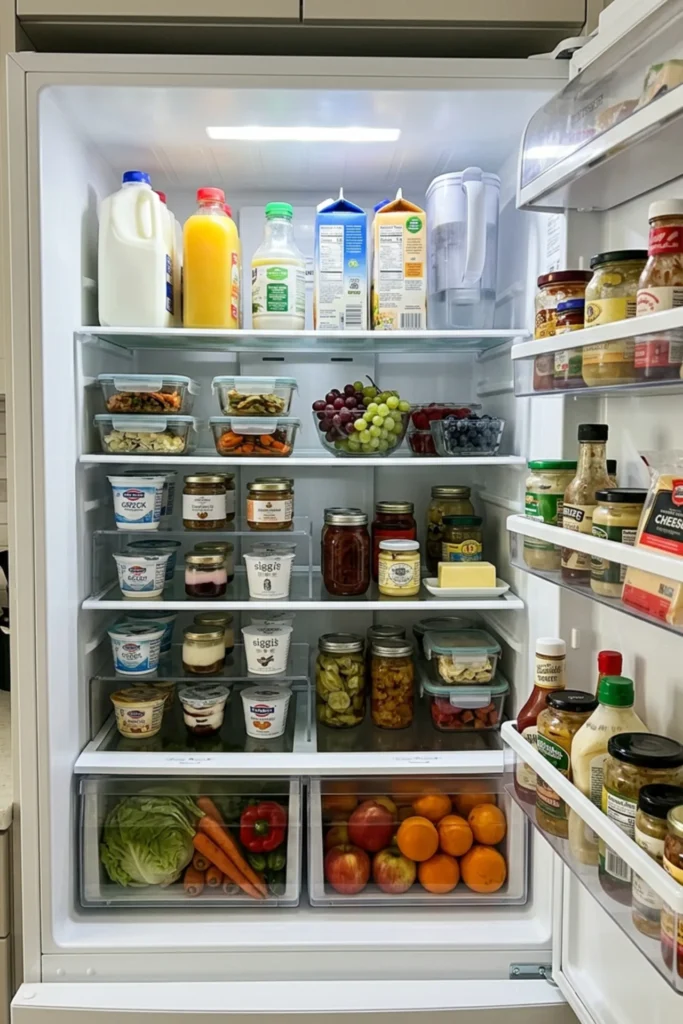
Shelf risers can create a second level for short containers.
They are useful when a shelf has a lot of empty space above yogurt, small containers, or short jars.
They are not useful when they create a low cave that hides food underneath.
Size and requirements: Measure the shelf height before buying. A riser around 4–6 inches high and 10–14 inches wide works in many situations. Leave enough clearance to remove food from the lower level easily.
Method and cost: Test the idea first with a sturdy temporary box placed outside the fridge to see whether two levels actually help. A washable shelf riser may cost $10–$30.
Pros: Uses vertical space; helps short items stay visible; inexpensive.
Cons: Can make cleaning harder; creates hidden back corners; not useful for changing package sizes.
11. Store Drinks in One Controlled Zone
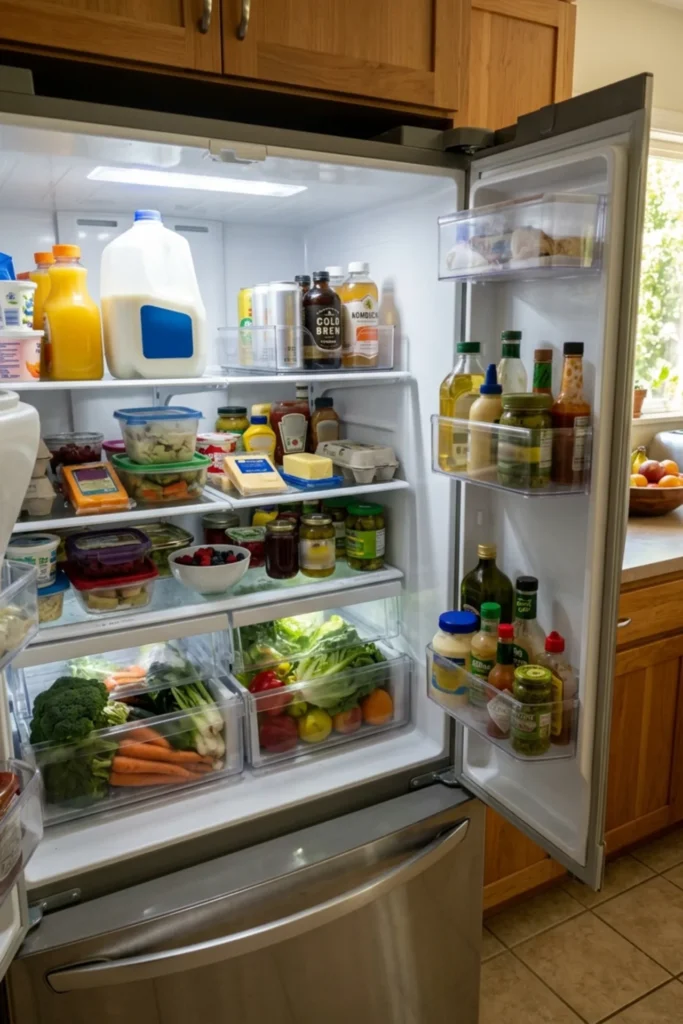
Bottles and cans spread quickly if they do not have a home.
Choose one door bin, one shelf section, or one can organizer rather than filling several refrigerator levels with drinks.
I would leave room for milk or other large everyday containers instead of designing the fridge around beverages.
Size and requirements: A can organizer may be around 5–7 inches wide and 13–15 inches deep. Measure the shelf first. Do not overload glass shelves beyond the refrigerator manufacturer’s limits.
Method and cost: Count how many chilled drinks your household realistically needs at one time. Store the rest elsewhere if they are shelf-stable before opening. A drink organizer may cost $15–$35.
Pros: Reduces rolling cans and scattered bottles; easy restocking; keeps one category together.
Cons: Can consume a lot of cold-storage space; large organizers are inflexible; unnecessary if drinks are not used often.
12. Label Zones, Not Every Single Container
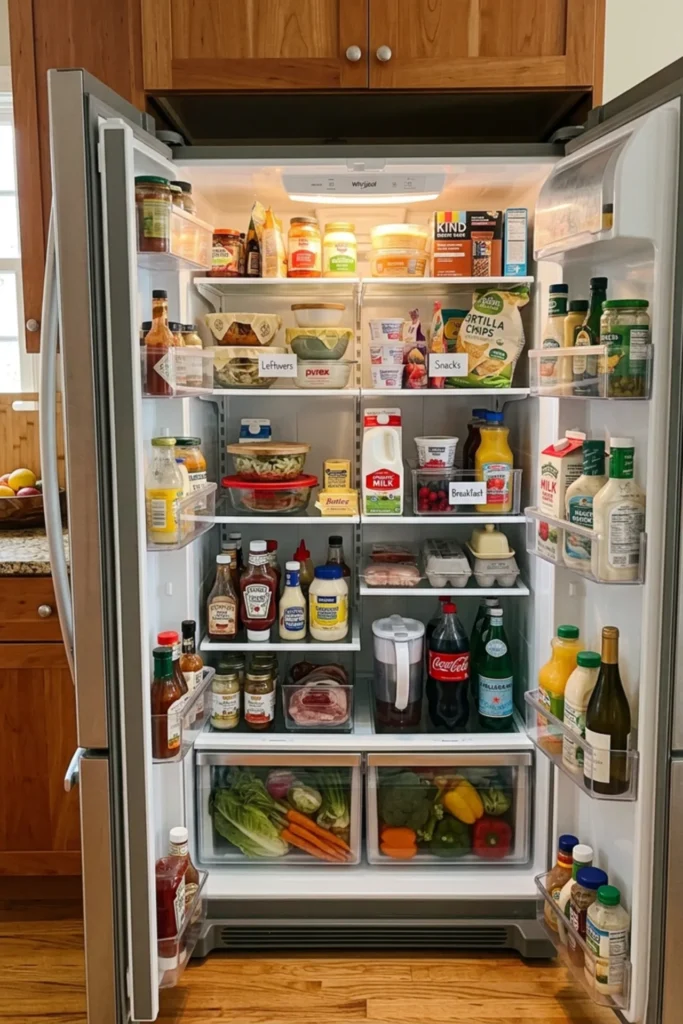
Aesthetic refrigerator photos often label everything.
In a real home, fewer labels usually work better.
Label the zones that need explanation: “Leftovers,” “Snacks,” “Use First,” or “Breakfast.” You do not need a label that says “Milk” on a bottle that already says milk.
Size and requirements: Keep labels around 1–3 inches wide and place them where they remain visible after food is loaded. Use waterproof or wipeable labels if condensation is common.
Method and cost: Start with only three or four labels. Add another only when someone repeatedly puts food in the wrong place. Reusable labels may cost $5–$20.
Pros: Makes the system easy to learn; creates a clean look; helps shared households.
Cons: Too many labels make the fridge feel rigid; categories change; adhesive can leave residue on some bins.
13. Use Clear Containers Without Decanting Everything
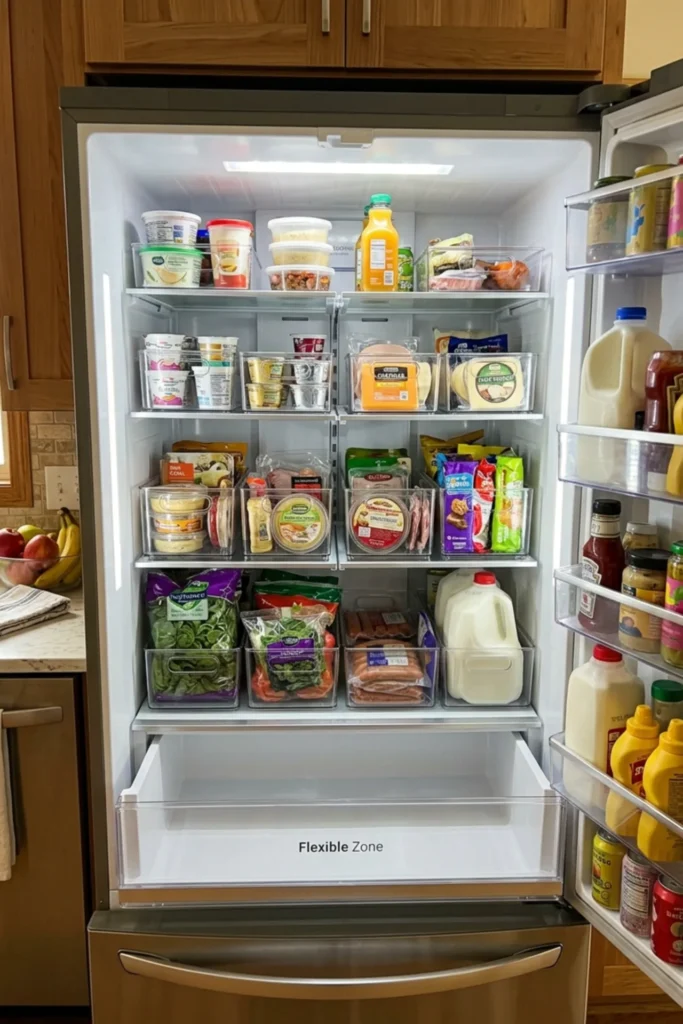
Clear bins are useful when they group packages, not when they create extra work.
I would keep yogurt, cheese, sauces, and packaged foods in the original container if the label carries ingredients, allergen information, dates, preparation instructions, or storage guidance.
Use the clear bin as a drawer around the packages.
Size and requirements: Choose bins around 4–10 inches wide depending on the category. Leave finger space around packages so they are easy to lift out.
Method and cost: Group the original packages first, then buy only the number of bins needed for recurring categories. A small set may cost $25–$80.
Pros: Maintains original food information; looks organized; less washing than decanting.
Cons: Packaging colors remain visible; bins still need cleaning; rigid containers reduce flexibility.
14. Keep One Shelf Flexible for Large and Unexpected Items
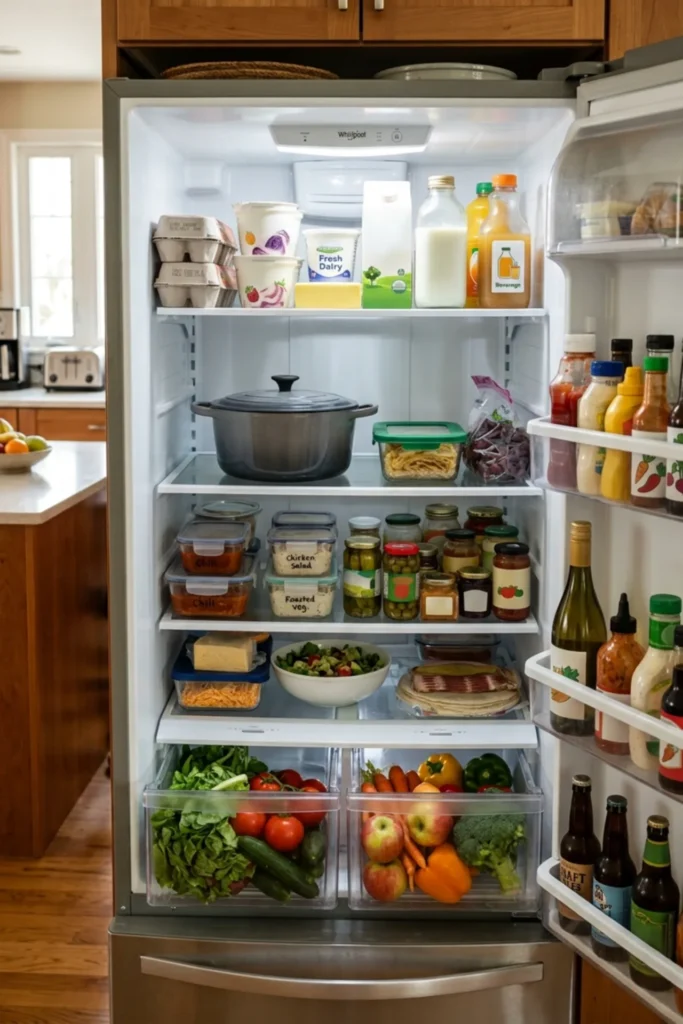
This is the step many aesthetic fridge systems forget.
A refrigerator changes from week to week. You may need space for a large pot, birthday cake, takeout box, holiday leftovers, or a tall pitcher.
Do not fill every inch with organizers.
Size and requirements: Reserve at least 25%–35% of one shelf as flexible space. If possible, use an adjustable shelf so the height can change for tall items.
Method and cost: Remove one permanent organizer from the middle or lower shelf and keep that area open. Cost: $0.
Pros: Handles real life; makes grocery days easier; prevents constant rearranging.
Cons: Empty space may look less “perfect”; household members may start filling it with random items; requires occasional reset.
15. Do a Five-Minute Fridge Reset Once a Week
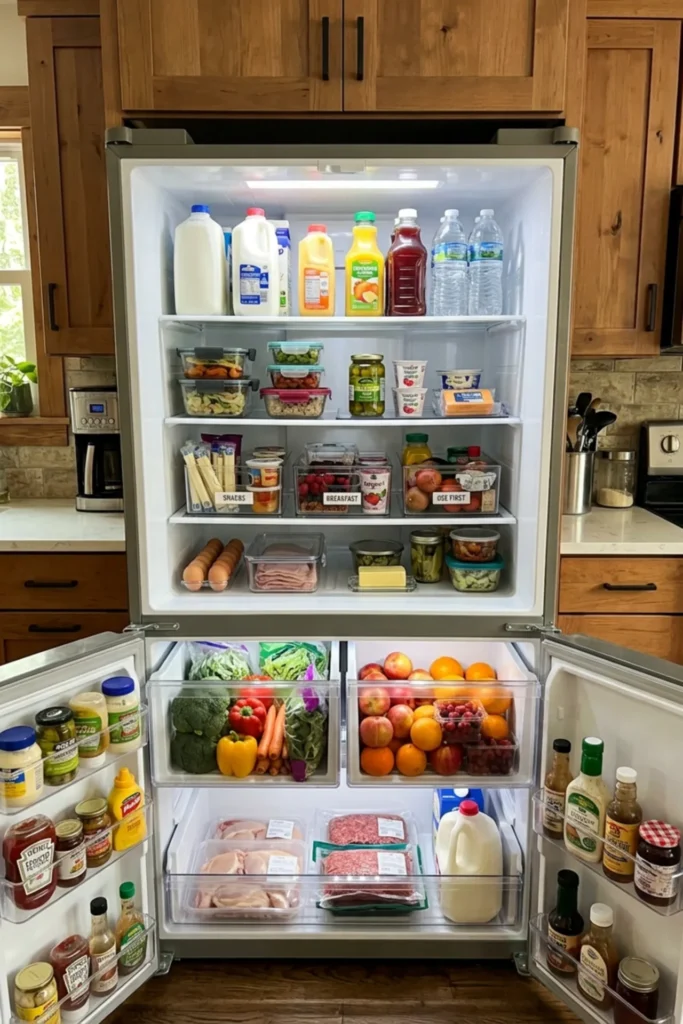
The best organization system still needs maintenance.
A five-minute reset is more realistic than a full fridge makeover every month.
Check leftovers, produce, spills, nearly empty jars, and the “use first” bin.
Size and requirements: No organizer required. Keep a small roll of removable date labels or tape nearby if that helps. Do not leave perishable food sitting out while you slowly reorganize.
Method and cost: Once a week, work shelf by shelf. Throw away food that should no longer be kept, move older safe food forward, wipe small spills, and return items to their zones. Cost: $0–$10.
Pros: Prevents the system from falling apart; reduces hidden food; takes very little time.
Cons: Requires a routine; some weeks need more than five minutes; organization cannot compensate for overbuying.
A Practical 10-Step Fridge Organization Plan
If I were reorganizing a normal family refrigerator, I would use this order:
- Check that the refrigerator is holding 40°F (4°C) or below.
- Remove spoiled or expired food.
- Wipe one shelf or drawer at a time.
- Group ready-to-eat foods.
- Create one leftovers zone.
- Add a washable tray for raw meat and poultry.
- Use the existing crisper drawers before buying produce bins.
- Add only the organizers that solve a recurring problem.
- Label three or four zones instead of every item.
- Leave one shelf section flexible.
This is usually enough to make the fridge easier to use without turning grocery unpacking into a second job.
Approximate Budget by Organization Level
You do not need a full set of matching bins.
No-cost reset: $0–$15
- Clean existing shelves
- Rearrange food into zones
- Reuse built-in drawers
- Date leftovers
- Create a weekly reset
Simple organizer setup: $40–$120
- Breakfast bin
- Snack bin
- Raw-meat tray
- Lazy Susan
- Reusable labels
Full organizer setup: $120–$300+
- Multiple clear bins
- Shelf risers
- Drink organizer
- Drawer dividers
- Refrigerator thermometer
- New reusable food containers
I would start with the no-cost version and buy organizers only after you see which problems remain.
What I Would Spend More On
I would spend more on a reliable refrigerator thermometer, good reusable leftover containers, and organizers that are easy to wash.
I would spend less on matching containers used only for appearance.
If a clear bin saves time every morning, it earns its space. If it simply hides a package inside another piece of plastic, I would skip it.
The refrigerator should make food easier to see and safer to store. It does not need to look like a grocery display.
If you are reorganizing the whole kitchen rather than just the fridge, browse more Kitchen Ideas for storage, layout, and small-space updates that can work with the system above.
Common Mistakes I Would Avoid
The first mistake is decanting everything for the photo. Original packaging often carries useful dates, ingredients, allergen information, and storage directions.
The second is buying organizers before measuring the shelves.
Another mistake is putting raw meat beside ready-to-eat food without a secondary tray or clear separation.
Do not keep leftovers indefinitely because they still look fine. FoodSafety.gov and USDA provide time guidance for refrigerated foods, including the commonly cited 3-to-4-day window for many cooked leftovers.
I would also avoid filling the refrigerator edge to edge. Cold air needs room to circulate.
Finally, do not organize around an unsafe temperature. The FDA says the refrigerator should stay at 40°F (4°C) or below. A pretty label cannot fix a fridge that is too warm.
Final Thoughts
The best fridge organization ideas are the ones you can still maintain after a full grocery trip.
You do not need twenty matching containers.
Start with temperature, food safety, and visibility. Give leftovers one home. Keep raw meat contained and separate from ready-to-eat food. Use the produce drawers you already have. Add one snack bin, one breakfast bin, or one turntable only when it solves a real problem.
Labels should explain the system, not decorate every jar.
And leave some empty space.
A refrigerator that looks slightly less perfect but has room for tomorrow’s leftovers will usually work better than one that is packed with organizers from wall to wall.
Disclosure: Some visuals are AI-assisted design concepts created for inspiration. Always follow food-package storage instructions, refrigerator manufacturer guidance, food-safety recommendations, temperature requirements, allergen information, and safe food-handling practices. Cost ranges are approximate U.S. planning figures and can vary by retailer, brand, size, and product quality.
About the Author
Ali Hamza — Founder & Editor
Hi, I’m Ali Hamza, and Styled Room Living is my personal home decor project. I don’t have a formal background in interior design. I started this website because home makeovers and organization ideas are something I genuinely enjoy looking at and learning about.
Most of the ideas shared here are not projects I have personally tested in every possible home or appliance. When I put a guide together, I try to separate an idea that only looks good in a photograph from one that could actually be useful in normal daily life. Will it fit? Is it easy to clean? Does it create extra work? Can it be adjusted for a smaller budget? These are the questions I keep in mind while working on an article.
Some images on the website are AI-assisted design concepts used to explain an idea more clearly. They are meant for inspiration, not as exact storage or food-safety plans. Please check dimensions, product instructions, food labels, refrigerator settings, and current food-safety guidance before making changes in your own home.
I’m still learning as the website grows, and I know every home and every refrigerator works differently. My purpose with Styled Room Living is simply to collect useful home ideas, explain them in plain language, and help readers find something they can adapt to their own space.
Read more about Ali Hamza →