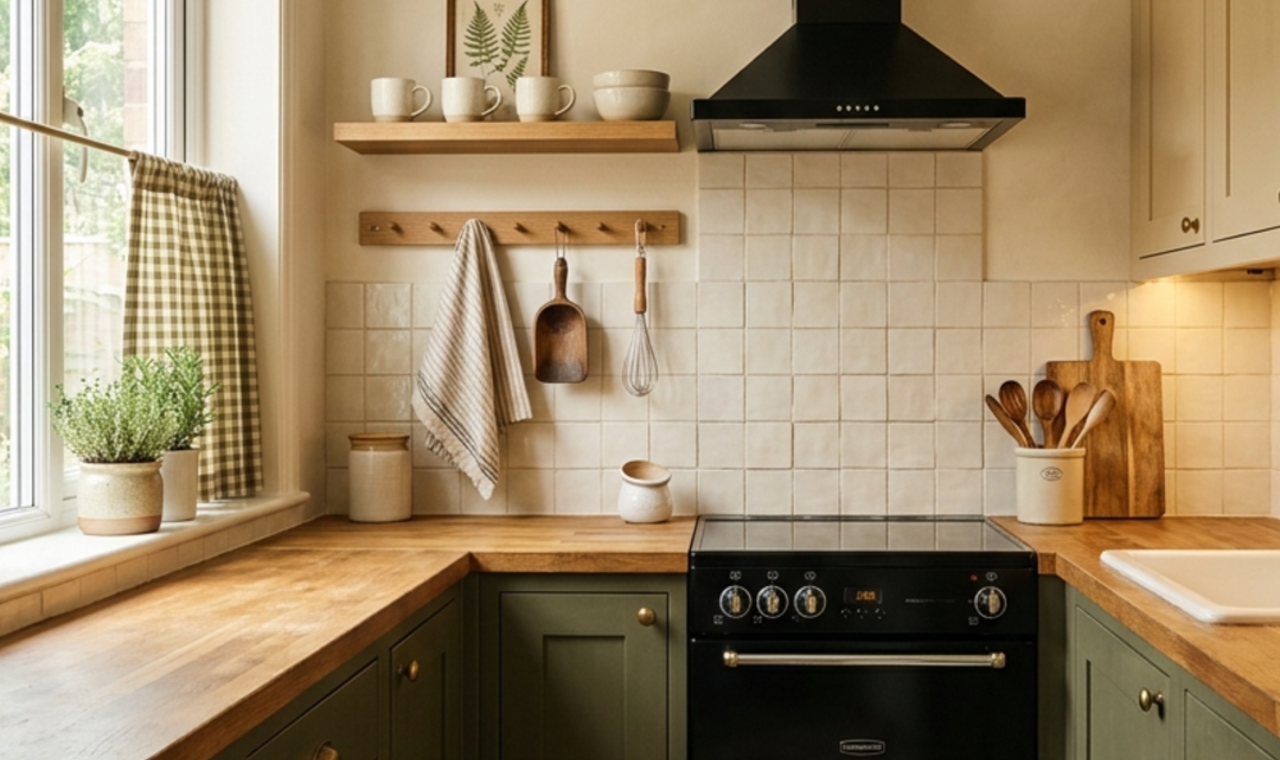
Dark cottagecore small kitchen ideas can look wonderful when the room feels warm, layered, and a little old-fashioned without becoming visually heavy. The challenge is that a compact kitchen already has limited wall and floor space. If every cabinet, wall, curtain, shelf, and accessory is dark, the room can start to feel closed in very quickly.
I would treat the dark color as an anchor rather than the entire room. Deep olive, smoky brown, charcoal, inky blue, black-green, and oxblood can all work, but they need lighter surfaces around them. Warm cream walls, pale stone, natural wood, reflective hardware, glass, and good task lighting help the kitchen keep its shape.
Cottagecore also works better when the room feels useful rather than staged. A peg rail should hold something you actually reach for. Open shelves should carry mugs or bowls you use. A vintage-style curtain should still clear the sink and cooktop. The best version is cozy because it supports everyday cooking, not because every inch has been decorated.
This guide includes practical sizing, rough U.S. planning costs, setup steps, pros, cons, and small-space decisions for each idea. I have also included lighting, ventilation, range safety, wall storage, floor patterns, worktop choices, and ways to keep the final kitchen dark and characterful without making it feel cramped.
What Makes Dark Cottagecore Work in a Small Kitchen?
A dark cottagecore kitchen usually needs contrast in four places: the ceiling, the work surface, the lighting, and at least part of the wall.
That does not mean everything has to be white. Warm cream, oatmeal, old plaster beige, pale stone, honey oak, and natural linen can all create enough relief.
I would also keep the visual weight lower in the room when possible. Dark lower cabinets with lighter upper walls often feel easier in a small kitchen than floor-to-ceiling dark cabinetry.
Benjamin Moore’s guide to paint colors for small rooms is a useful reference when testing a moody color in a compact room.
For cottagecore, the dark color is only half the look. The other half comes from texture and age: wood grain, unlacquered-looking brass, simple ceramics, checked fabric, woven baskets, framed botanical art, and pieces that look collected instead of matched.
If you want more small-space layout ideas before choosing the aesthetic, start with Small Apartment Kitchen Ideas.
Before You Decorate, Protect the Working Space
In a small kitchen, circulation matters more than styling.
Measure the distance between counters, cabinets, appliances, and any movable island before adding furniture or floor storage. If two people regularly cook together, test the real room with cabinet and appliance doors open.
Standard base cabinets are commonly around 24 inches deep, and upper cabinets are often around 12 inches deep, but actual products vary. Countertops usually project a little beyond the cabinet box.
Keep the worktop closest to the sink and range as clear as possible. Cottagecore can tempt you to leave crocks, boards, baskets, jars, and plants everywhere, but prep space is more useful than decorative surface area.
If you have a freestanding range, check that its anti-tip bracket is installed and engaged. The U.S. Consumer Product Safety Commission has specific information on freestanding range tip-over safety.
Ventilation matters too. ENERGY STAR discusses kitchen exhaust and indoor air quality in its indoor air quality guidance.
1. Use Deep Olive on Lower Cabinets
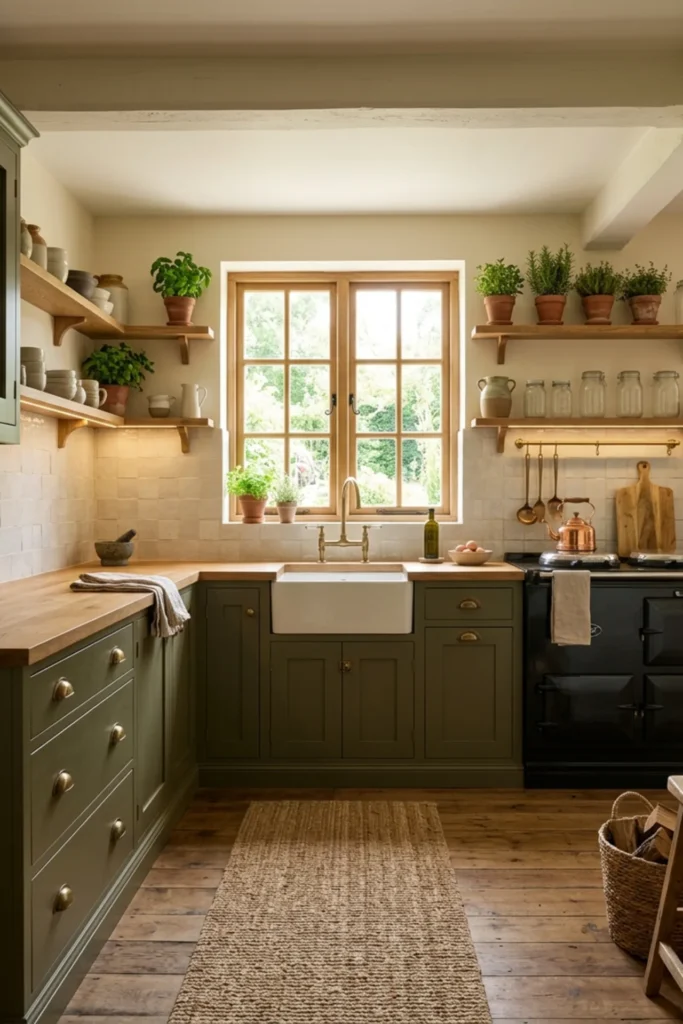
Deep olive is one of the easiest cottagecore colors because it feels dark without looking flat black.
Use it on the lower cabinets and keep the walls or upper cabinets lighter. This puts the visual weight near the floor and helps the room feel taller.
Warm brass or aged bronze hardware works naturally with olive, but simple black pulls can make the scheme cleaner.
Size and requirements: Standard lower cabinet runs are usually around 24 inches deep before the countertop. Keep the upper half of the room visually lighter when the kitchen is narrow. Test a large paint sample beside the floor, counter, backsplash, and evening lighting.
Method and cost: Remove doors and hardware where practical, clean grease thoroughly, sand or degloss as required, prime with a product suited to the cabinet material, and use a durable cabinet coating. A DIY repaint may cost around $150–$500. Professional cabinet painting can run roughly $1,500–$5,000+, depending on door count, preparation, location, and finish.
Pros: Strong cottagecore character; hides everyday marks better than white; easy to combine with wood and cream.
Cons: Poor lighting can make olive look muddy; cabinet painting requires careful prep; touching up a factory-like finish can be difficult.
2. Paint the Upper Cabinets Warm Cream
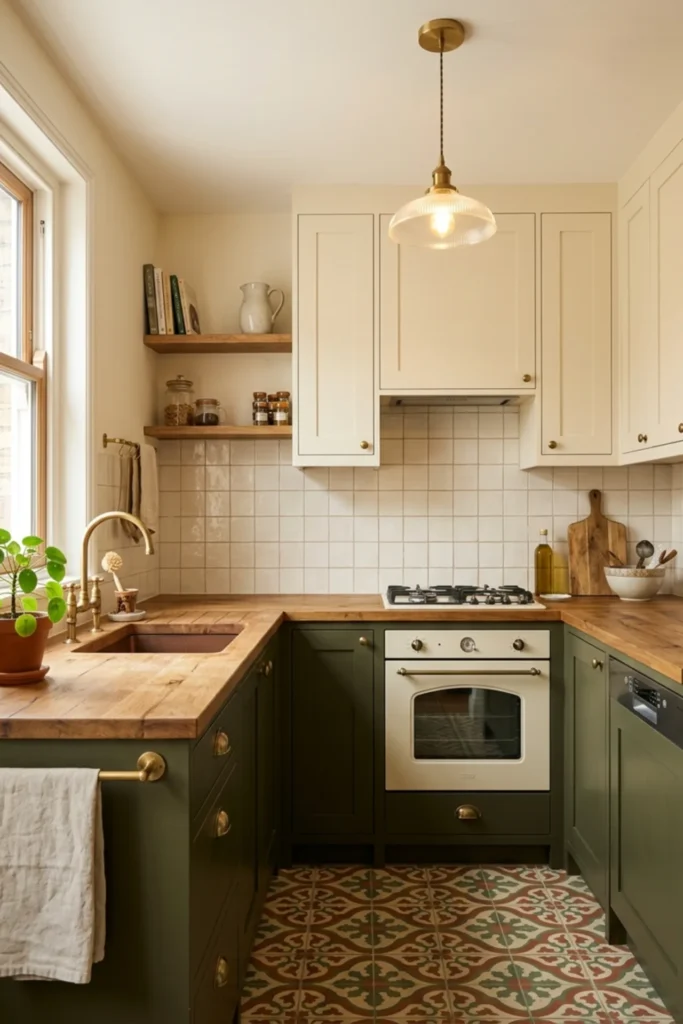
If your kitchen already has upper cabinets, warm cream can keep dark lowers from closing in the room.
I prefer cream, bone, or soft ivory to a very stark blue-white. Cottagecore usually looks better with a slightly warmer contrast.
This also helps the upper cabinets blend into light walls rather than forming a dark ceiling-level band.
Size and requirements: Keep the cream within the same warm undertone family as the worktop and wall. Test the color beside any existing tile because some creamy paints look surprisingly yellow next to cool white backsplash tile.
Method and cost: If you are repainting both upper and lower cabinets, finish all prep work at the same time but label doors carefully. A DIY upper-cabinet repaint may add $100–$300 in materials. Professional work will usually be priced as part of the full cabinet job.
Pros: Makes the room feel taller; keeps dark cottagecore from becoming gloomy; works with nearly any wood tone.
Cons: Cream shows grease and hand marks; mismatched whites can look accidental; two-tone cabinetry requires good color testing.
3. Try Smoky Brown Cabinets for a Softer Dark Look
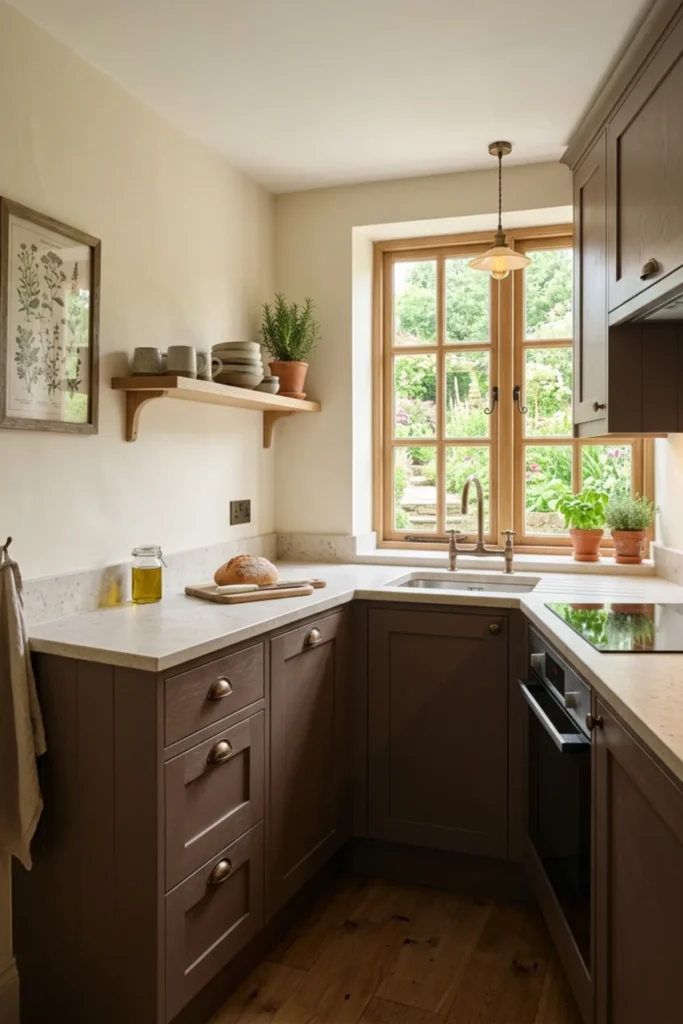
Not every dark kitchen has to be green.
Smoky mushroom-brown, dark taupe, and cocoa can create a cottage feel that is quieter than charcoal and warmer than black.
This works especially well with unlacquered-looking brass, creamy stone, and medium oak.
Size and requirements: Use the darkest brown on one main cabinet run rather than every tall surface in a windowless room. Keep the ceiling and at least one large wall light.
Method and cost: Order or paint a 24-by-36-inch sample board and check it in morning and evening light. If repainting cabinets, budget around $150–$500 DIY or $1,500–$5,000+ professionally for a typical small kitchen, depending on the scope.
Pros: Warm and forgiving; less severe than black; hides dirt reasonably well.
Cons: Can look muddy beside gray floors; dark brown and orange-toned wood may blend too much; weak lighting reduces contrast.
4. Add a Warm Wood Worktop
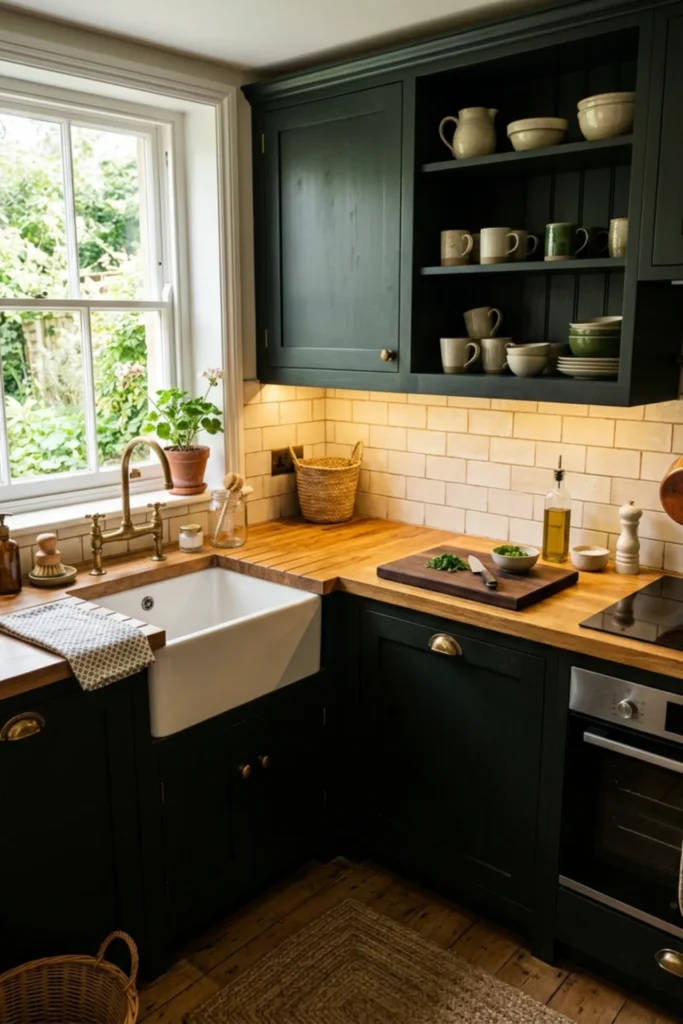
Wood brings immediate cottage character and is one of the best ways to soften dark cabinetry.
Butcher-block-style counters can look beautiful in small kitchens because the grain creates warmth without adding another decorative pattern.
The practical question is how much water, heat, and maintenance the surface will face.
Size and requirements: Standard counters are commonly around 25 inches deep, but measure the actual cabinet run, wall irregularities, sink cutout, and appliance gaps. Follow the worktop manufacturer’s requirements around sinks, cooktops, and heat.
Method and cost: A small butcher-block counter project may cost around $400–$1,500 DIY depending on species and length. Professional fabrication and installation can raise the total to $1,500–$4,000+. Seal and maintain the surface according to the manufacturer’s instructions.
Pros: Adds warmth; easy cottagecore material; can sometimes be sanded and refinished.
Cons: Requires maintenance; water around sinks can damage poorly protected wood; hot pans and standing moisture need care.
5. Use a Cream Stone-Look Backsplash
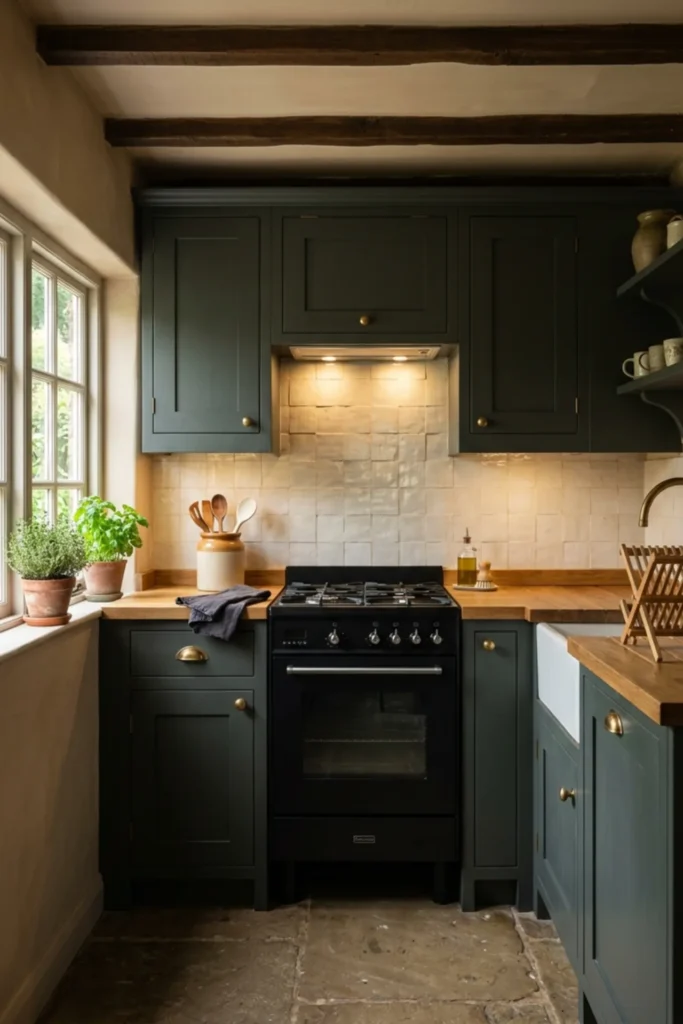
A light backsplash gives dark cabinets breathing room.
I would choose small handmade-look tile, warm off-white subway tile, or a quiet cream stone-look surface rather than a busy high-contrast mosaic.
The aim is to reflect some light without turning the kitchen into a modern white box.
Size and requirements: Measure the backsplash area in square feet and add waste according to the tile pattern and installer recommendation. Outlets, corners, windows, and herringbone layouts increase cutting. Keep material and clearances around cooking appliances consistent with manufacturer and local requirements.
Method and cost: Tile and supplies for a small backsplash may cost $250–$800 DIY. Professional installation can bring the total to around $700–$2,500+, depending on demolition, tile type, pattern, and local labor.
Pros: Brightens dark cabinets; easier to wipe than painted walls; adds handmade texture.
Cons: Grout requires cleaning; handmade-look tile can be expensive; complicated patterns make a small wall busier.
6. Add One Shallow Open Shelf
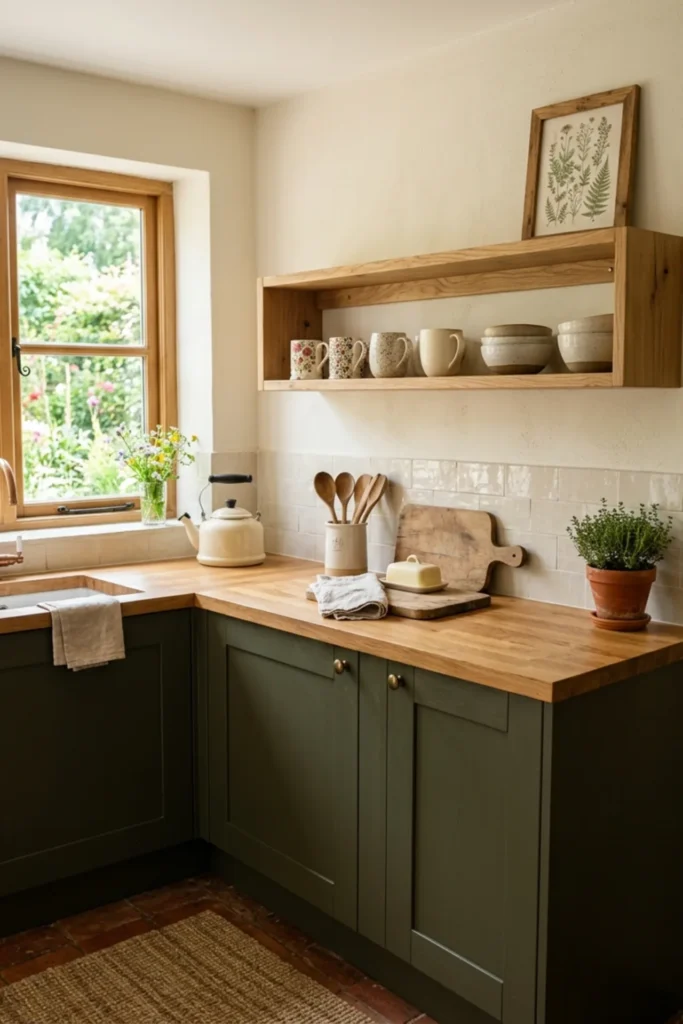
Cottagecore kitchens often use open shelving, but I would limit it in a small kitchen.
One useful shelf for everyday mugs, bowls, or tea supplies can add charm without turning the wall into a display.
Keep the objects practical and leave a little space between groups.
Size and requirements: A shelf around 8–10 inches deep is enough for many mugs, bowls, small plates, and jars. For full dinner plates, check their diameter before deciding depth. Do not place wood shelves where heat, steam, or appliance clearances make them unsuitable.
Method and cost: Locate suitable wall structure or use fixings rated for the wall type and expected load. A simple shelf may cost $60–$300 DIY. Custom hardwood shelving and professional installation can reach $300–$900+.
Pros: Makes everyday items easy to reach; adds warmth and cottage character; less visually heavy than another upper cabinet.
Cons: Collects grease and dust; reduces hidden storage; poorly mounted shelves are a safety risk.
For more useful wall-storage ideas, see DIY Kitchen Wall Organizer Ideas.
7. Install a Slim Peg Rail for Everyday Tools
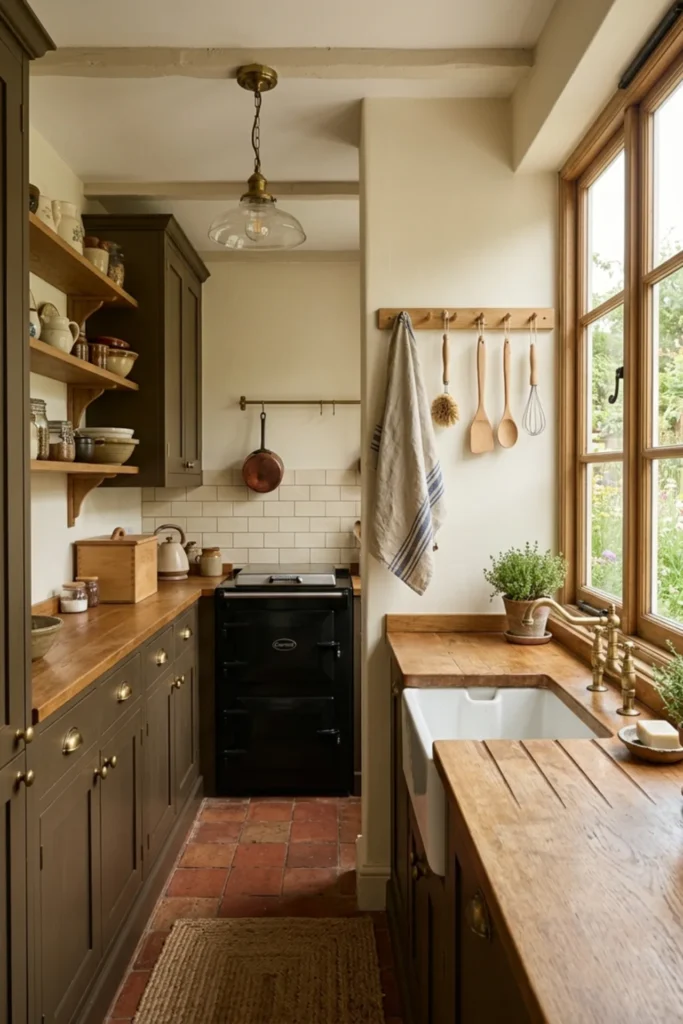
A traditional-looking peg rail can give cottage character while using very little depth.
Use it for light items you reach often: tea towels, small brushes, measuring spoons, or a lightweight basket.
I would not load it with heavy pans just because they look good in a photograph.
Size and requirements: A rail around 2–4 inches deep can work on a narrow wall. Leave enough vertical clearance so hanging items do not hit the counter, switch plates, or doors. Keep fabric and combustible items safely away from cooking flames and hot surfaces.
Method and cost: Mark the rail level, locate appropriate wall support, and use hardware suited to the expected load. A DIY peg rail may cost $40–$180. Custom wood and professional installation may cost $150–$500+.
Pros: Very shallow storage; inexpensive; easy to personalize.
Cons: Visible items can become clutter; fabric near cooking areas is a poor choice; hooks encourage overloading.
8. Use Warm Brass or Aged Bronze Hardware
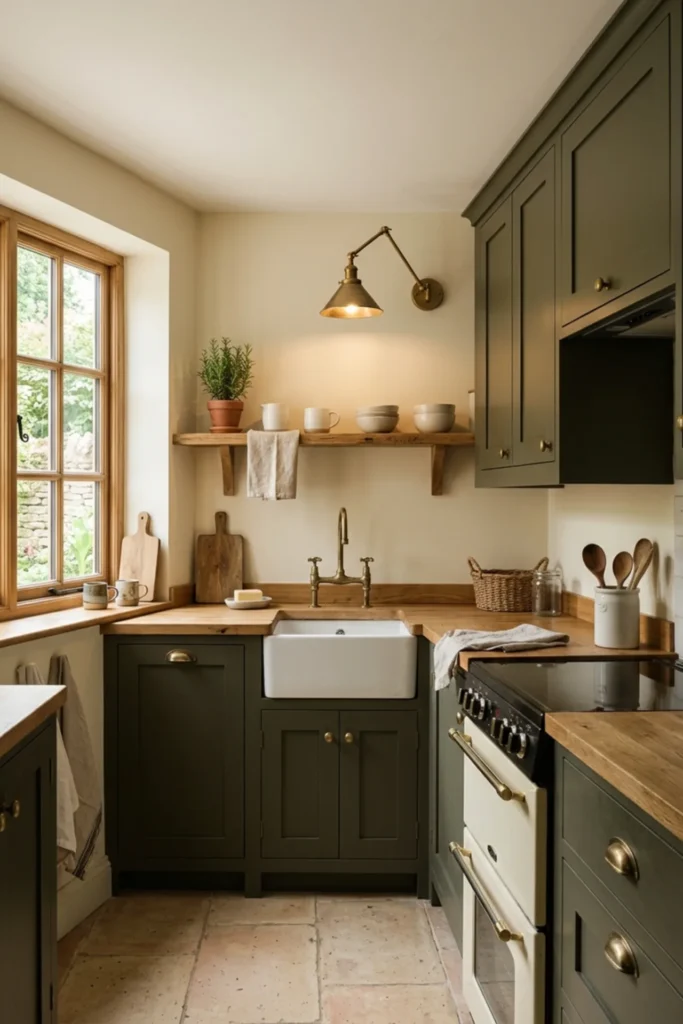
Small kitchens do not need many decorative finishes.
One warm metal repeated on cabinet pulls and one light fitting can give dark cabinets enough detail.
I would choose brushed brass, aged bronze, or antique-looking metal rather than very shiny gold.
Size and requirements: Count every door and drawer before ordering. For replacements, match the existing hole spacing when possible. A 3–5-inch pull works on many standard drawers and doors, but scale it to the cabinet width.
Method and cost: Order one sample pull before buying the full set. Check grip comfort as well as color. Replacing basic hardware may cost $80–$500; premium solid-brass pieces can push the total to $600–$1,500+.
Pros: Quick visual upgrade; small amount of metal adds warmth; easy to reverse.
Cons: Premium hardware becomes expensive across many doors; unlacquered finishes change over time; mixed hole spacing can require filling and drilling.
9. Hang One Small Vintage-Style Pendant
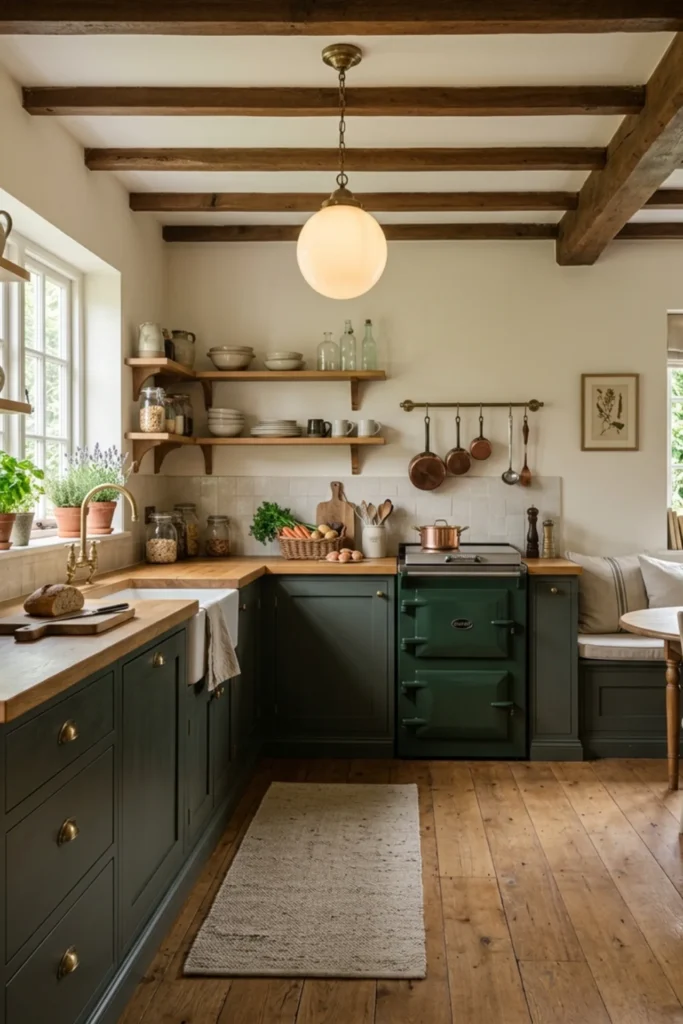
A single pendant can make the kitchen feel cozy, but the work surfaces still need useful light.
Think opal glass, aged brass, pleated shade, or a simple enamel-inspired fixture rather than an oversized chandelier.
In a tiny kitchen, the fixture should support the room rather than dominate it.
Size and requirements: For a small kitchen, a pendant around 10–16 inches wide is often enough for a central light or tiny table zone. Maintain appropriate head clearance and follow the fixture manufacturer’s requirements. Do not hang a decorative pendant where it conflicts with cabinet doors or a range hood.
Method and cost: Make a paper template of the fixture diameter and hang it temporarily before ordering. Fixtures may cost $100–$700+. Professional electrical installation may add $150–$600+, especially if the wiring point moves.
Pros: Strong cottage mood; useful warm glow; adds character without using counter space.
Cons: Decorative shades may not provide enough task light; moving wiring is expensive; low fixtures can make a small room feel busier.
10. Add Under-Cabinet Task Lighting
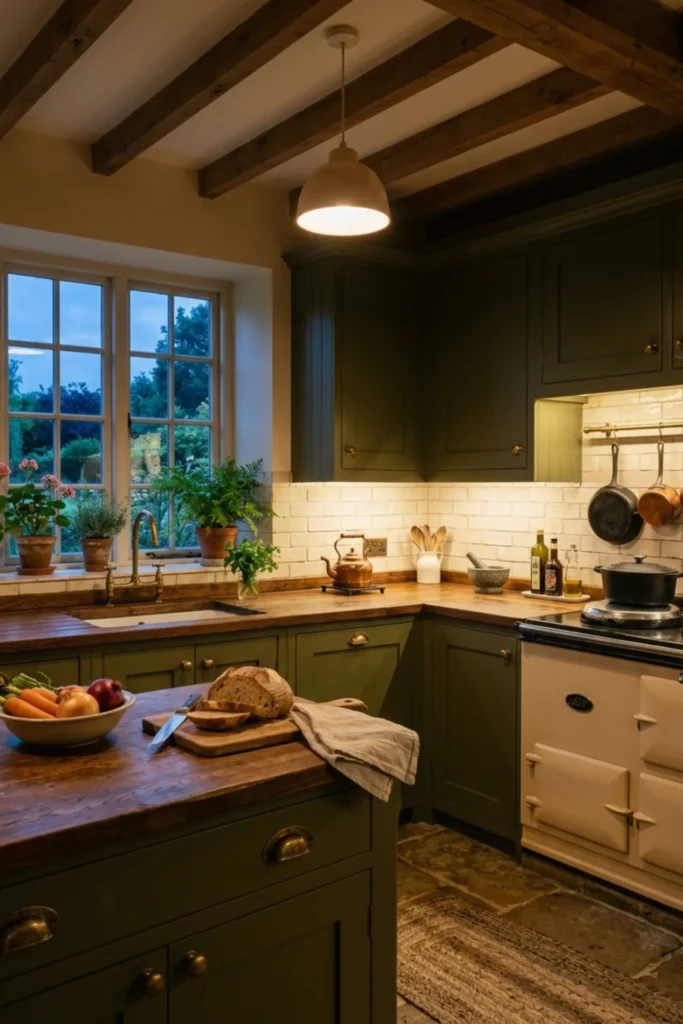
This is one of the upgrades I would prioritize in a dark small kitchen.
Warm under-cabinet lighting keeps the worktop usable after sunset and stops dark cabinetry from swallowing the corners.
The light should illuminate food-preparation surfaces, not act only as decoration.
Size and requirements: Run lighting along the useful prep zones, avoiding visible gaps where possible. Warm white around 2700K–3000K usually suits dark cottage colors. Check product location ratings, wiring requirements, dimmer compatibility, and heat near appliances.
Method and cost: Plug-in or low-voltage systems may cost around $80–$350 for a small kitchen. Hardwired systems with professional installation can cost roughly $400–$1,500+, depending on wiring access.
Pros: Makes dark kitchens feel brighter; improves prep visibility; adds evening atmosphere.
Cons: Visible cords look messy; cheap strips can show individual light dots; hardwired installation raises cost.
11. Use a Small Checkerboard Floor
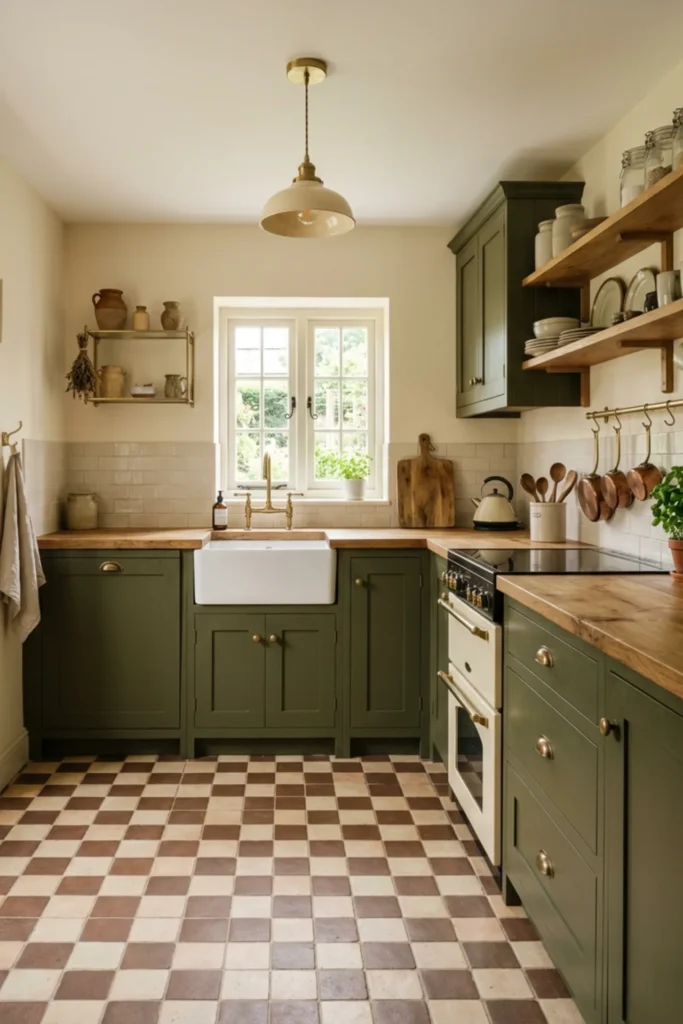
Checkerboard floors fit cottagecore naturally, but they do not have to be black and white.
Soft cream and brown, warm gray and ivory, or muted green and beige feel easier in a small kitchen.
I would keep the contrast moderate so the floor does not fight with dark cabinets.
Size and requirements: Smaller kitchens usually handle tiles around 8–12 inches square well, although larger formats can also work. Measure the room and plan the tile layout around visible edges before installation. Check slip resistance and suitability for kitchen use.
Method and cost: Sheet vinyl or luxury vinyl can give the look for around $400–$1,500 installed in a small kitchen. Ceramic or stone-style tile may cost $1,000–$3,500+, depending on subfloor preparation and labor.
Pros: Strong cottage character; hides small crumbs better than solid pale flooring; creates visual movement.
Cons: High contrast can make the room busy; grout needs cleaning; tile can feel hard and cold underfoot.
12. Add a Washable Floral or Gingham Café Curtain
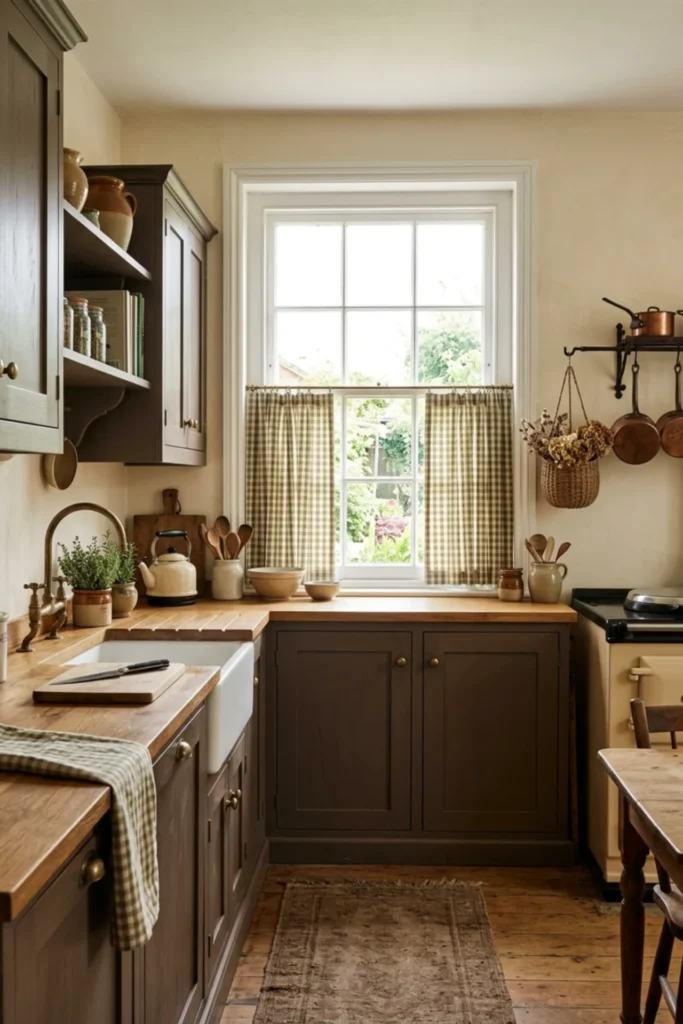
A short café curtain brings pattern without covering the whole window.
This is a good place for a muted floral, tiny check, or simple stripe in brown, olive, rust, or faded red.
Keep the pattern small enough that the window still feels light.
Size and requirements: Cover only the lower 40%–60% of the window if privacy allows. Keep fabric clear of open flames, hot cooking surfaces, and wet zones. Check that the curtain does not interfere with the window handle.
Method and cost: Measure the lower sash and use a removable tension rod if suitable for the window. Ready-made café curtains may cost $30–$150. Custom linen or handmade fabric can cost $120–$400+.
Pros: Adds softness and cottage pattern; preserves upper-window daylight; inexpensive to change.
Cons: Fabric near a kitchen collects grease; unsuitable beside some cooking zones; strong prints can make a tiny room feel busy.
13. Use a Narrow Rolling Prep Cart
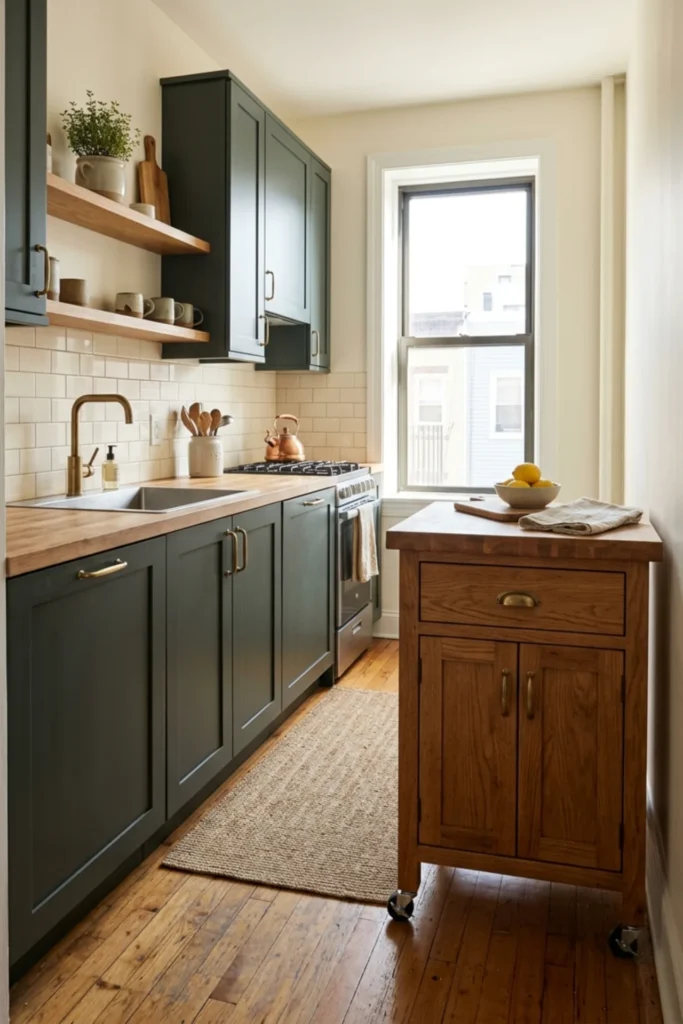
A small cart can add work surface without committing to a built-in island.
This works best when it can move out of the main aisle after cooking.
Choose a simple wood or dark-painted cart with closed storage below.
Size and requirements: A compact cart around 18–24 inches wide and 30–36 inches long can fit many small kitchens, but tape the size on the floor first. Aim for a worktop height around 34–36 inches if you want it to function like a counter. Keep appliance and door openings clear.
Method and cost: Mark both the cart and the space needed to walk around it. A ready-made cart may cost $200–$900+. Locking casters are useful if the product is designed for them.
Pros: Adds prep space; movable; can provide drawers or shelves.
Cons: Reduces floor clearance; wheels collect debris; becomes a clutter station if it has no clear purpose.
14. Use Glass-Front Cabinets for One Small Section
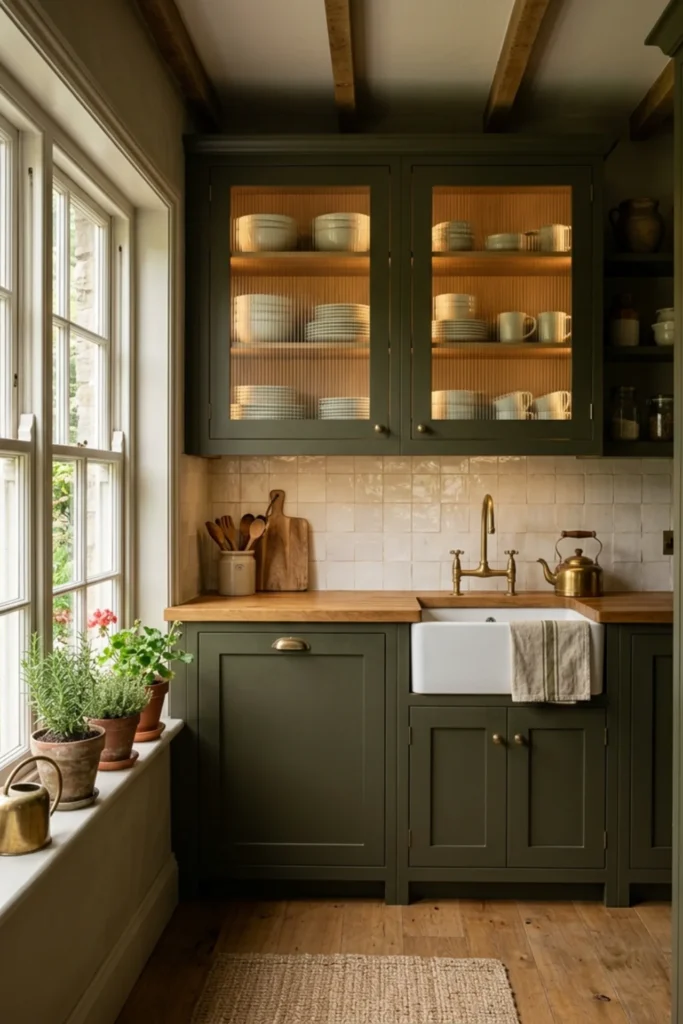
Glass-front doors can break up a dark cabinet wall and add a little visual depth.
I would use them on one or two upper cabinets, not the whole kitchen.
Put attractive everyday items behind the glass rather than creating a display cabinet you rarely open.
Size and requirements: Use glass where cabinet contents can stay reasonably neat. Consider reeded or textured glass if you want some concealment. Check door swing and shelf load before adding heavy dishes.
Method and cost: Replacing two upper cabinet doors with glass inserts may cost around $250–$900+, depending on door construction and glass type. New custom glass-front cabinetry can cost much more.
Pros: Lightens a dark cabinet run; makes everyday dishes easier to find; adds vintage character.
Cons: Contents remain visible; fingerprints show; retrofitting existing doors is not always simple.
15. Add a Small Herb Ledge Near a Bright Window
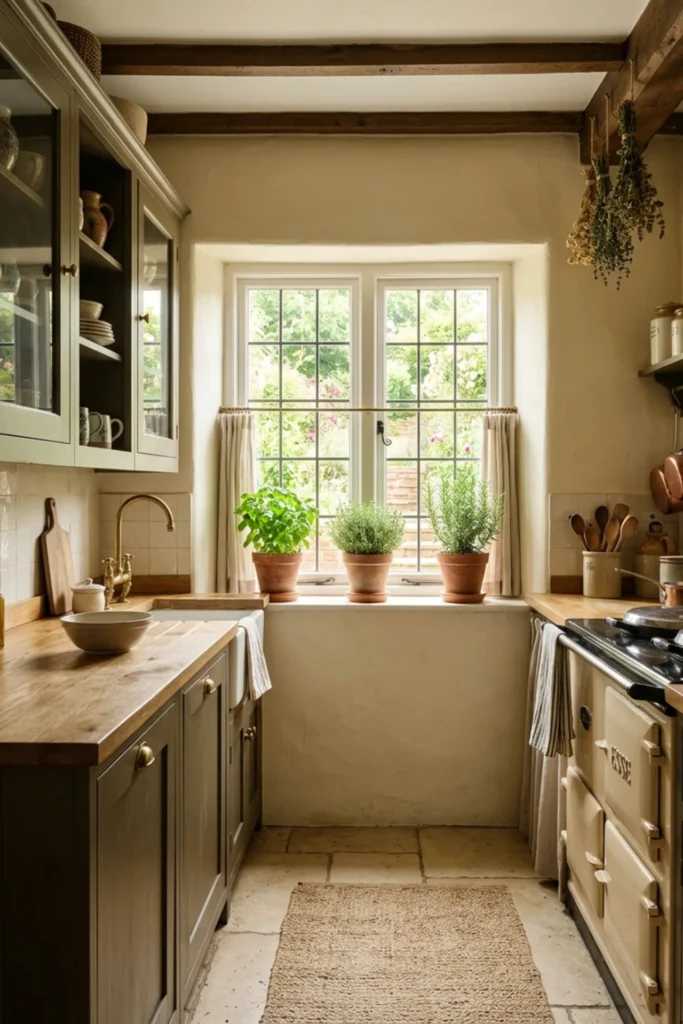
A few herbs can make cottagecore feel real rather than decorative.
The important part is putting them where they actually receive enough light and where watering will not damage the counter.
Three small pots are better than a crowded indoor garden.
Size and requirements: A ledge around 6–8 inches deep can hold several small pots. Use waterproof saucers. Keep soil and plants away from direct food-preparation zones and away from the heat of the range.
Method and cost: Start with two or three herbs suited to the available light. Pots, saucers, and plants may cost $30–$120. If you need to install a new ledge, budget another $40–$200+.
Pros: Useful as well as decorative; adds fresh green against dark cabinets; inexpensive.
Cons: Herbs fail in low light; watering can damage wood; small pots dry quickly.
16. Use Closed Storage for the Cottagecore Clutter
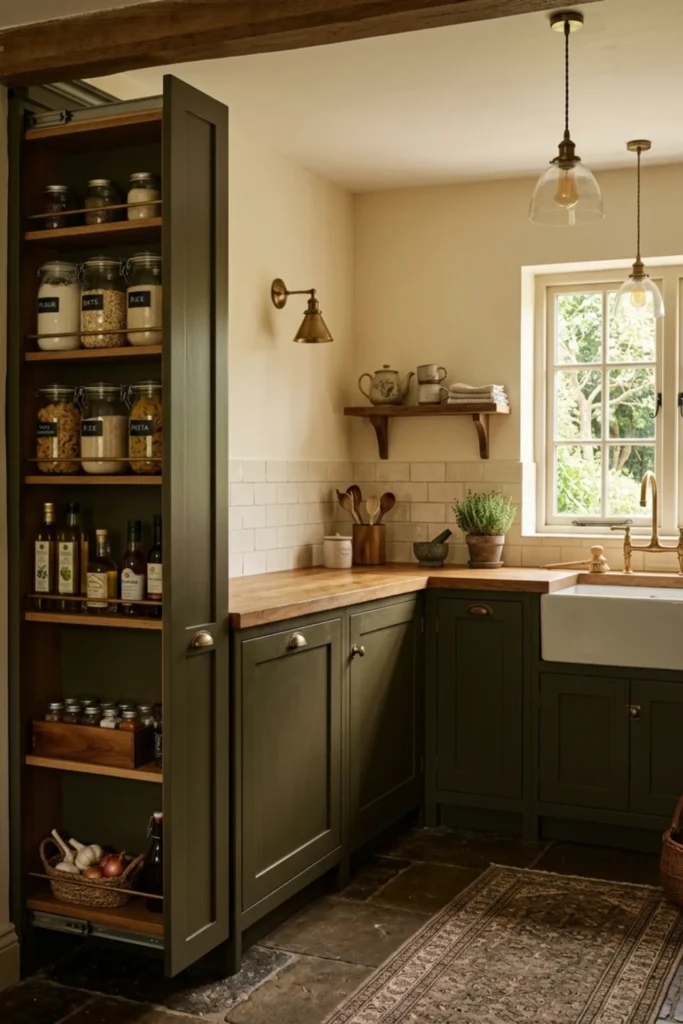
Dark cottagecore looks best when the counters are not buried under vintage-style objects.
Use drawers, cabinet-door organizers, narrow pull-outs, or bins to hide packets, cleaning supplies, backup mugs, and small appliances.
Keep the pretty objects for the few things that are actually used every day.
Size and requirements: Measure the inside of every cabinet before buying organizers. Leave room for hinges, pipes, and door hardware. A pull-out should not block an adjacent appliance or drawer when extended.
Method and cost: Empty one cabinet at a time, group similar items, remove duplicates, then buy organizers only for the remaining problem areas. A basic organization update may cost $80–$400. Custom pull-outs can cost $300–$1,500+.
Pros: Makes the kitchen feel larger; easier to clean; lets the dark palette look intentional rather than messy.
Cons: Custom organizers can be expensive; deep cabinets still require planning; over-organizing creates too many small containers.
17. Keep the Range Wall Practical, Not Decorative
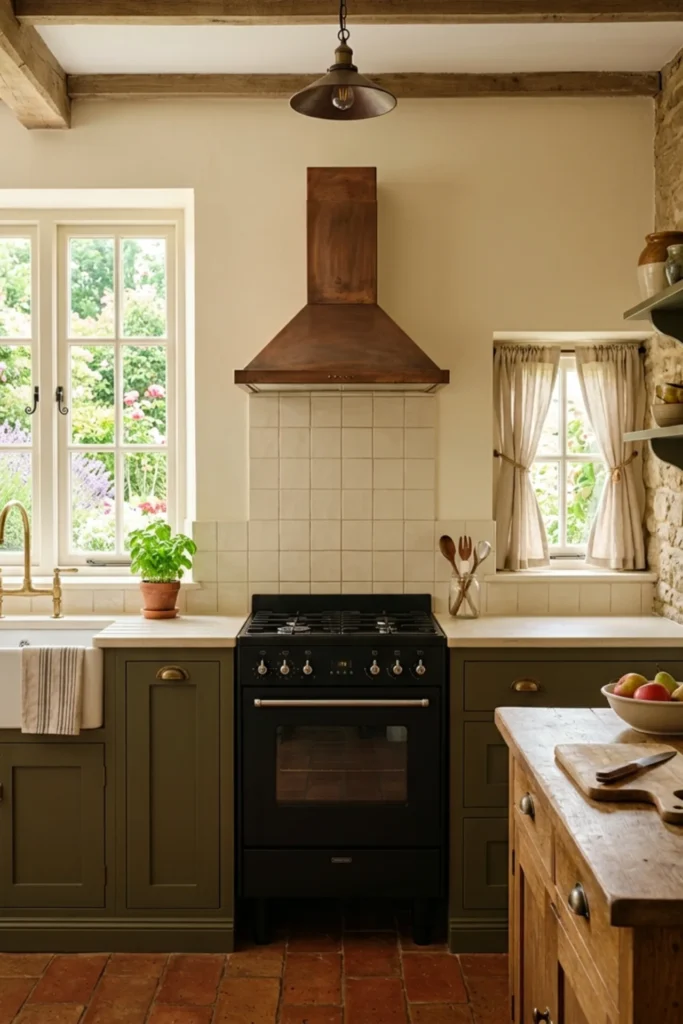
The area around the range is not the place for hanging tea towels, dried flowers, baskets, or low wood shelves just because they fit the cottagecore look.
Keep combustible decor away from heat and follow the range, hood, and cabinetry manufacturer’s clearance instructions.
Use the character on nearby walls instead.
Size and requirements: Do not invent universal clearances around the cooktop; follow the actual appliance installation manual, local requirements, and hood instructions. Make sure a freestanding range is properly engaged with its anti-tip device. Keep flammable items away from hot burners and the oven area.
Method and cost: Remove decorative clutter first. Check the range installation, hood operation, and anti-tip bracket. This may cost $0 if everything is already correct. Professional appliance or ventilation work may cost $150–$1,500+, depending on what needs correction.
Pros: Safer cooking zone; easier cleaning; ventilation works better when not visually crowded.
Cons: The range wall may look simpler than inspiration photos; moving existing shelves can require patching; upgrading ventilation can be expensive.
18. Edit the Dark Palette Until the Kitchen Feels Open
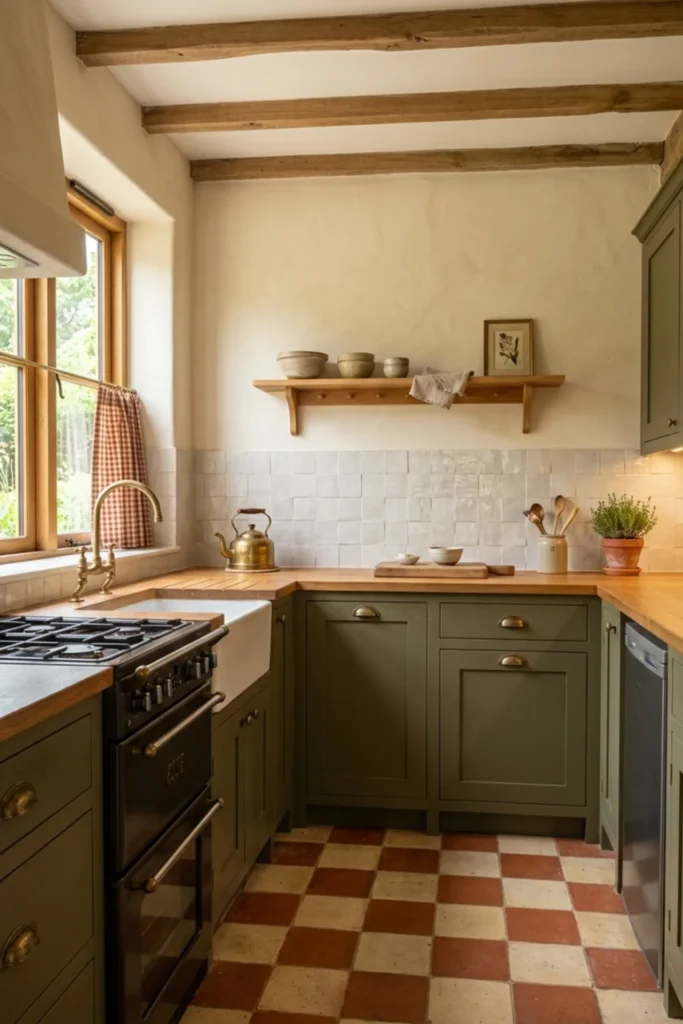
The final cottagecore layer is usually subtraction.
If the room already has dark cabinets, patterned curtains, checker floor, wood counters, brass hardware, open shelves, framed botanical art, crocks, baskets, herbs, and vintage signs, something needs to come out.
Choose a few strong elements and give them space.
Size and requirements: Keep at least 30%–40% of the main prep counter visually clear. Limit open-shelf objects to items that fit without touching or stacking awkwardly. Leave one wall or backsplash zone mostly quiet.
Method and cost: Remove all loose decor from the kitchen. Put back only the pieces that are useful or meaningful. This costs $0 and often improves the room more than another purchase.
Pros: Makes a small dark kitchen feel larger; easier to clean; saves money; lets the best cottage details stand out.
Cons: Can feel plain if the room lacks texture; collectors may need storage elsewhere; removing decor does not solve poor lighting or bad layout.
A Practical 10-Step Dark Cottagecore Kitchen Plan
If I were starting with a small plain kitchen, I would use this order:
- Measure the room, appliance openings, cabinets, and main aisle.
- Check ventilation and range safety before decorative work.
- Decide where the dark color will live.
- Keep the ceiling, worktop, backsplash, or upper wall lighter.
- Improve task lighting.
- Add warm wood or another natural texture.
- Solve hidden storage before adding open shelves.
- Add one cottage pattern through the floor, curtain, or art.
- Repeat one warm metal finish.
- Remove extra countertop decor before photographing or publishing the final room.
This sequence protects the kitchen’s function before the cottagecore styling starts.
Approximate Budget by Update Level
You can create this look without a full remodel.
Low-cost refresh: $200–$900
- Dark cabinet or wall paint
- New hardware
- Café curtain
- Peg rail
- Warm bulbs
- Small shelf or art
Mid-range update: $1,500–$5,000
- Professional cabinet painting
- Backsplash
- Under-cabinet lighting
- New pendant
- Rolling cart
- Organization upgrades
Full small-kitchen update: $7,000–$25,000+
- New cabinets or fronts
- Worktops
- Sink and faucet
- Flooring
- Lighting
- Backsplash
- Ventilation
- Professional electrical and plumbing work
Appliances, structural work, custom cabinetry, premium stone, rewiring, plumbing relocation, and local labor can move far beyond these ranges.
What I Would Spend More On
I would spend more on lighting, work surfaces, cabinet function, and ventilation.
Those things affect the kitchen every day.
I would spend less on themed cottage accessories. A good wood worktop, warm task light, and one useful open shelf will do more than a collection of faux-vintage signs and decorative jars.
If the budget is tight, repaint first and live with the room for a few weeks. Dark color changes the visual balance so much that you may need fewer upgrades than expected.
Common Mistakes I Would Avoid
The first mistake is painting every cabinet and wall dark before checking the light.
The second is confusing cottagecore with clutter. Small kitchens need clear counters more than they need another basket.
Another mistake is making the open shelves too deep. Deep shelves above a narrow counter can make the room feel top-heavy and collect more grease.
I would also avoid using dark patterned flooring, dark cabinetry, dark curtains, and a dark worktop together unless the kitchen gets exceptional daylight.
Keep combustible decor away from the range. Follow appliance and range-hood instructions rather than copying shelf clearances from an inspiration photo.
Finally, do not forget ventilation. A cozy kitchen still needs to handle steam, cooking odors, moisture, and grease in real life.
Final Thoughts
Dark cottagecore small kitchen ideas work best when the darkness is controlled.
Deep olive lowers, smoky brown cabinets, a dark side wall, or one moody cabinet run can create enough character. Then use warm cream, wood, light tile, brass, glass, and good task lighting to keep the room open.
The cottagecore details should be useful: one peg rail, one shelf, one café curtain, one herb ledge, one vintage-style light.
A small kitchen does not need every trend in the same room.
The goal is a kitchen that feels warm when the lights come on, interesting in daylight, easy to cook in, and clear enough that the dark palette feels intentional rather than cramped.
Disclosure: Some visuals are AI-assisted design concepts created for inspiration. Always confirm measurements, materials, product dimensions, appliance clearances, electrical requirements, ventilation, wall fixings, fire safety, manufacturer instructions, and local requirements before making changes in your kitchen. Cost ranges are approximate U.S. planning figures and vary by location, labor, materials, brand, shipping, and project conditions.
About the Author
Ali Hamza — Founder & Editor
Hi, I’m Ali Hamza, and Styled Room Living is my personal home decor project. I don’t have a formal background in interior design. I started this website because home makeovers are something I genuinely enjoy looking at and learning about.
Most of the ideas shared here are not projects I have personally built. When I put a guide together, I try to separate an idea that only looks good in a photograph from one that could actually be useful in a normal home. Will it fit? Is it easy to clean? Does it require drilling? Can it be adjusted for a smaller budget? These are the questions I keep in mind while working on an article.
Some images on the website are AI-assisted design concepts used to explain an idea more clearly. They are meant for inspiration, not as exact construction plans. Please check measurements, materials, prices, load limits, electrical details, appliance clearances, and installation requirements before trying anything in your own home.
I’m still learning as the website grows, and I know every home works differently. My purpose with Styled Room Living is simply to collect useful home ideas, explain them in plain language, and help readers find something they can adapt to their own space.
Read more about Ali Hamza →