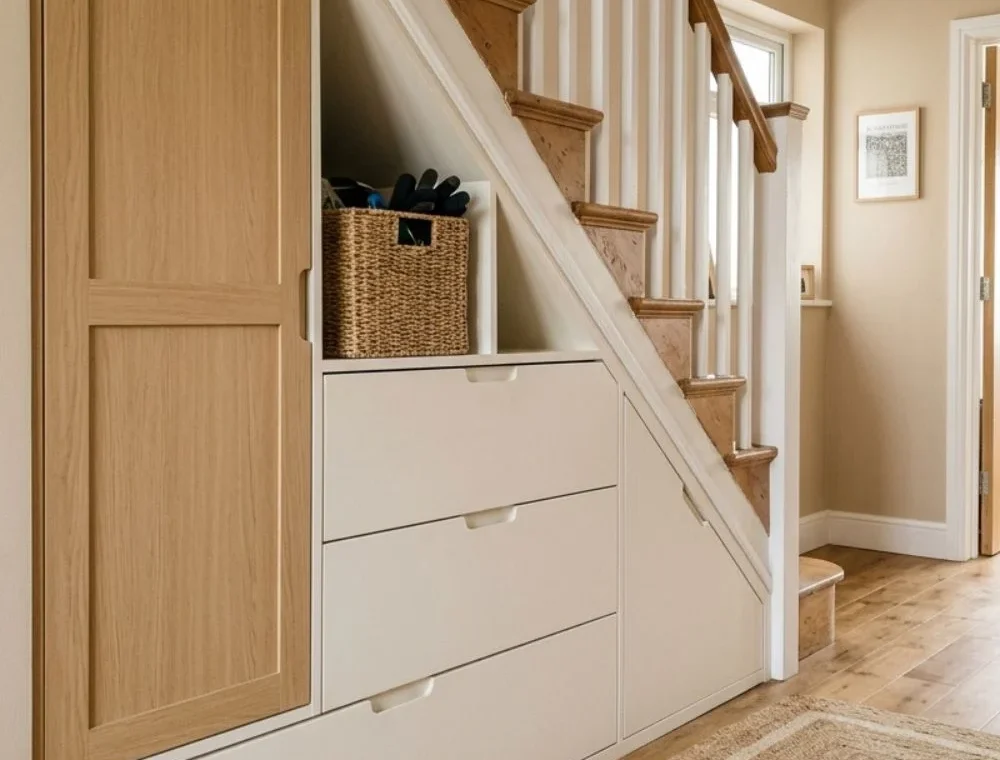
Under stairs storage ideas look simple in photos: add a few doors, hide the mess, and enjoy a cleaner hallway. Real staircases are less polite. The floor may slope, the deepest corner may be impossible to reach, and pipes or wires can sit exactly where a drawer needs to go.
Written and reviewed by Ali Hamza | Styled Room Living
I still think this is one of the most useful spaces to improve in a small home. The trick is to solve a real storage problem instead of forcing a Pinterest feature into an awkward triangle.
My three strongest choices are deep pull-out drawers, a reading nook with storage, and storage hidden behind simple wall panels. Drawers make the deep area reachable. A reading nook gives the space a real purpose. Flush doors can hide mixed household items without making a hallway look crowded.
I am less excited about a pet station and a coffee station. Both can work, but pets may dislike a dark, noisy corner, while a coffee machine brings heat, steam, water, and electrical needs below a staircase. I would treat those as optional ideas, not default recommendations.
This guide includes starting measurements and rough U.S. costs so you can judge an idea before calling a carpenter. They are planning figures, not quotes. Stair shape, wall condition, material, hardware, labor, permits, and location can change the final price a lot.
Check the Staircase Before Planning Cabinets
Start with a tape measure, phone camera, pencil, and one large sheet of paper. Measure the full width, the deepest usable point, and the height at several spots along the slope. Do not assume the triangle is straight.
Then check what already lives inside or beside the stair:
- Structural stringers, posts, or beams
- Electrical wires and outlets
- Plumbing or heating pipes
- Air vents and return grilles
- Alarm equipment or access panels
- Damp marks, insects, or damaged drywall
Do not cut a stair part because it blocks a drawer. A qualified contractor or structural professional should confirm what may be changed. The 2024 International Residential Code section R302.7 also shows why the lining matters: enclosed, accessible space under stairs may require 1/2-inch gypsum protection on the enclosed side. Local rules differ, but this is a good reason not to remove existing protection casually.
Measure the space in front too. I like to aim for roughly 36 inches of clear walking room where the layout allows it. That is a practical target, not a promise that every old hallway can provide it. Tape the open position of each door and drawer on the floor.
A cardboard mock-up is worth the trouble. Build the planned bench or drawer front with old boxes. Walk past it for a day. If shoulders hit the corner or the drawer blocks the route, change the plan before wood is cut.
A Realistic Budget Before You Begin
Costs are easiest to understand in three levels. Current U.S. pricing varies widely, but Angi’s 2026 built-in cabinet guide places many fitted projects around $2,000 to $7,500, with an average near $4,500. Custom materials, difficult access, electrical work, and complex drawers can push higher.
Here is the budget I would use for early planning:
| Approach | Rough U.S. planning cost | What it may cover |
|---|---|---|
| Simple DIY or stock setup | $100–$600 | Paint, baskets, a small shelf, or a freestanding bench |
| Better semi-custom update | $600–$2,000 | Trimmed stock units, open shelving, bench storage, better hardware |
| Fitted carpenter-built storage | $2,000–$7,500+ | Made-to-measure drawers, flush doors, mixed cabinetry, finishing |
| Extra trade work | Separate quote | New outlet, lighting, drywall, fire protection, plumbing, or structural review |
Get at least two or three written quotes for a fitted project. Ask whether design, hardware, paint, disposal, electrical work, and wall repair are included. A low cabinet price can become expensive once every missing item is added.
1. Install Deep Pull-Out Drawers
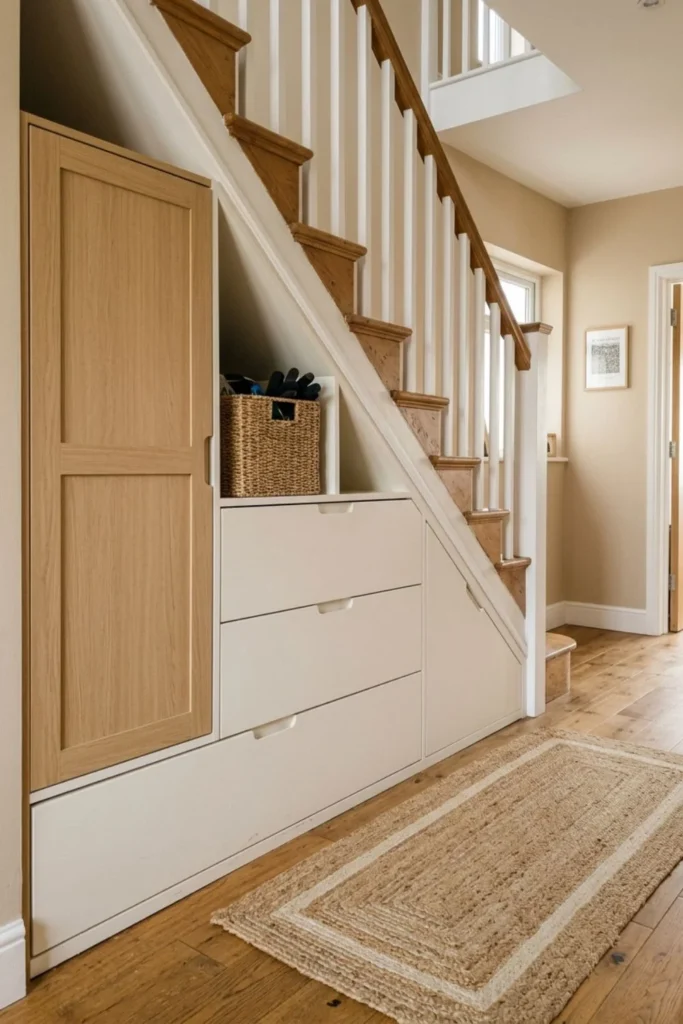
This is my strongest storage choice because it fixes the worst part of the space: the deep, dark back. A normal cupboard door gives access only to the front. A full-extension drawer brings everything toward you.
I would divide an average staircase into two or three wider drawers instead of many tiny ones. Fronts around 18 to 30 inches wide are a useful starting point, but the final width must match the opening and runner capacity. A usable drawer may be 20 to 30 inches deep; going deeper only helps if the hardware supports the weight and the back remains reachable.
Measure every opening separately. Old floors and stair slopes are rarely perfect. Leave the fitting gaps recommended by the runner and cabinet maker so fronts do not scrape.
Full-extension runners are worth paying for. Soft-close is pleasant, but load rating matters more. Store heavy tools or bottled items low, and use small boxes inside so loose objects do not slide into one pile.
Two or three custom drawers will often sit in the fitted-project range of roughly $2,000 to $6,000, depending on finish and hardware. A lower-cost version uses sturdy rolling bins behind simple doors, though it will not look as seamless.
I would use these drawers for bags, folded linens, toys, or seasonal decor. I would not fill the deepest one with objects nobody remembers. Good storage makes things easier to reach, not easier to forget.
2. Create a Hidden Shoe Cabinet
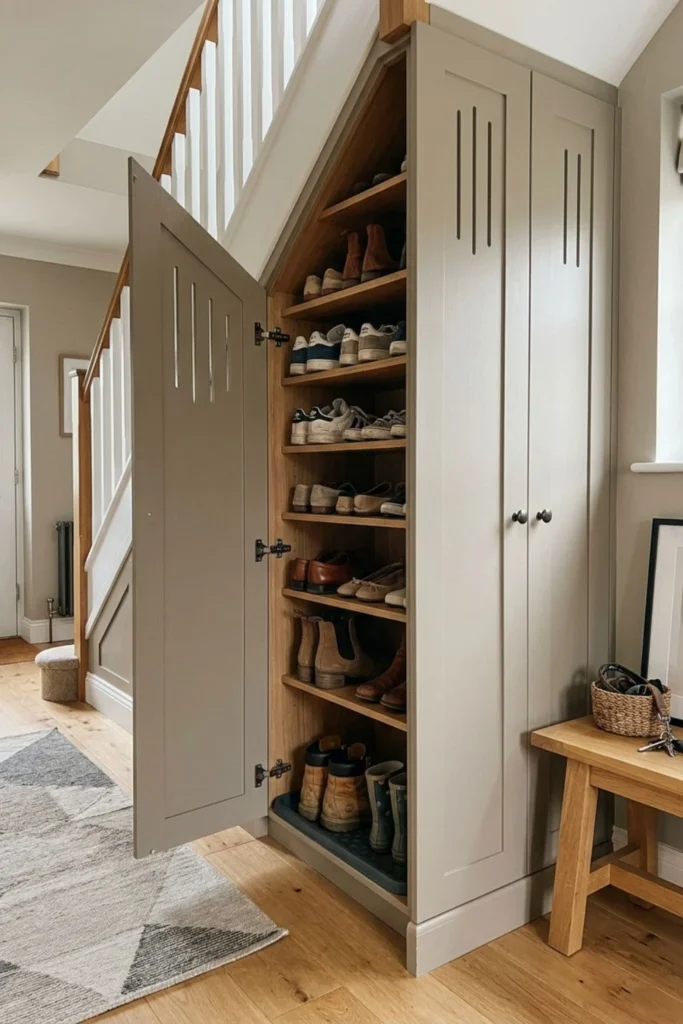
A shoe cabinet makes sense when the stairs are near the main entrance. Start with shelves around 10 to 14 inches deep for everyday shoes. Allow more vertical space for boots, and measure the largest pair instead of relying on a standard number.
Damp shoes need airflow. Use vented doors, small gaps, or a breathable internal layout. Add a washable tray at the bottom and let wet footwear dry before closing it inside.
For a simple stock cabinet fitted neatly below the slope, plan around $300 to $1,200. Custom pull-out shoe trays can move the project into the $1,500 to $4,000 range.
I would avoid doors that swing across a narrow hall. Shallow pull-outs or sliding fronts may work better, but test the complete movement on the floor first.
3. Build a Small Coat Closet
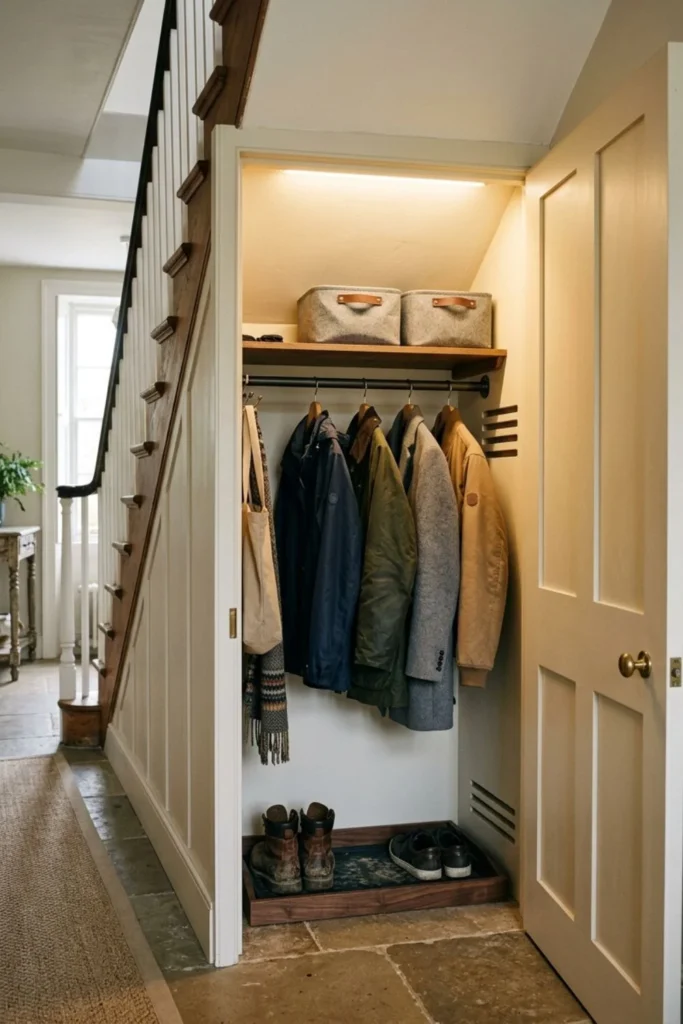
Use the tallest end for coats. A comfortable full-depth closet is often around 22 to 24 inches deep, though short jackets can work in a shallower space with front-facing hooks.
Measure the longest coat from hanger to hem. Place the rail where clothing clears the floor and sloped ceiling. Hooks for bags and scarves can use the middle height; shoes and a drip tray belong below.
A trimmed stock wardrobe may cost $500 to $1,500. Fitted doors, lighting, ventilation, and custom rails can raise that to $2,000 to $5,000.
I would add a door-activated light only through a proper electrical plan. Damp coats also need room to dry. A closet packed to the door will smell stale no matter how beautiful the outside looks.
4. Add Open Shelves for Books
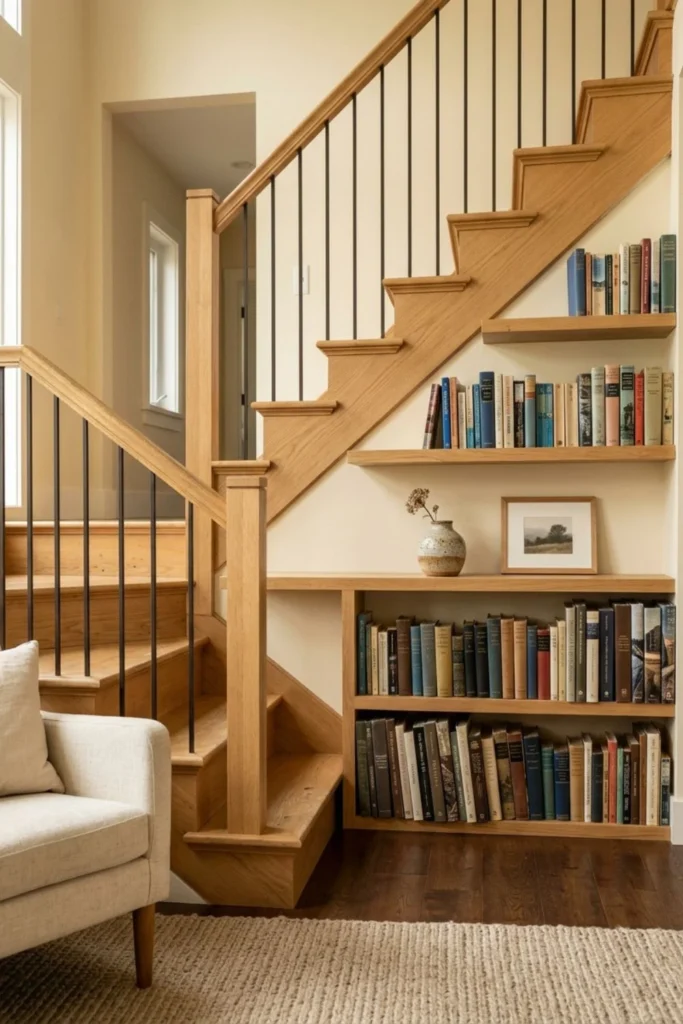
Bookshelves are one of the easier projects to understand. Most paperbacks fit on shelves about 8 to 10 inches deep, while larger books may need 11 to 12 inches.
Do not make every shelf as deep as the staircase. Books disappear at the back, and the unit becomes harder to dust. Use a false back or shallow boxes to control the depth.
A basic DIY shelf system may cost $200 to $800. Secure, painted, carpenter-built shelves often begin around $1,000 and rise with length and material.
Books become heavy as a group. Fix the unit correctly, use shelf thickness and spans suited to the load, and put the heaviest books lower. I would leave around one-quarter of the display empty so it feels like a home library, not a storage wall.
5. Make a Cozy Reading Nook with Storage
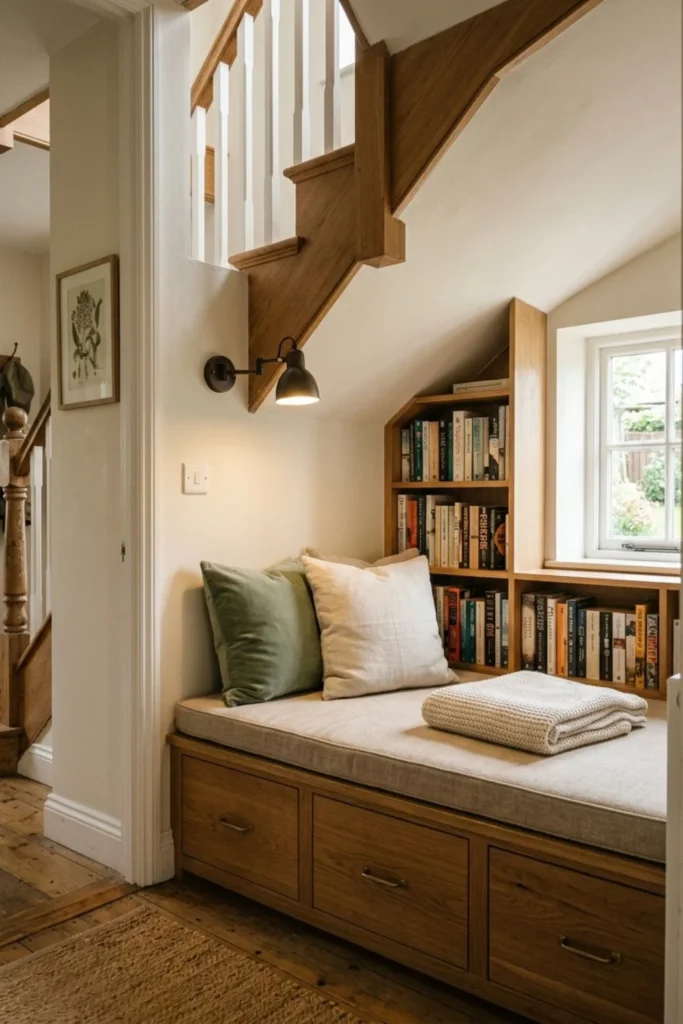
This is my second top choice because it turns an odd corner into a place someone may actually enjoy. The seat has to fit the person, not only the photograph.
A useful starting point is a finished seat height of 17 to 19 inches and a depth around 20 to 24 inches. Those numbers also sit within the bench dimensions used in the 2010 ADA Standards, although a private-home nook is not automatically governed by those rules.
Headroom is more personal. Put a box at the planned seat height, add the cushion thickness, and ask the tallest regular reader to sit down and stand up. I would want roughly 36 to 42 inches above the finished cushion at the main sitting position, but the real test is whether the user can move without ducking into the slope.
For storage, drawers under the bench are easier than a heavy lift-up lid. If you use a lid, choose safe soft-close hardware and a finger gap. The bench structure must support sitting loads, not just baskets.
A freestanding bench and cushions may cost $250 to $800. A fitted seat with drawers, wall finish, lighting, and upholstery commonly lands around $1,500 to $4,500.
Use a wall lamp rather than a loose floor lamp in the nook. Keep the fixture, switch, and cord away from pillows. Washable cushion covers and one warm blanket are enough. I would skip ten decorative pillows that leave no room for a person.
6. Create a Compact Home Office
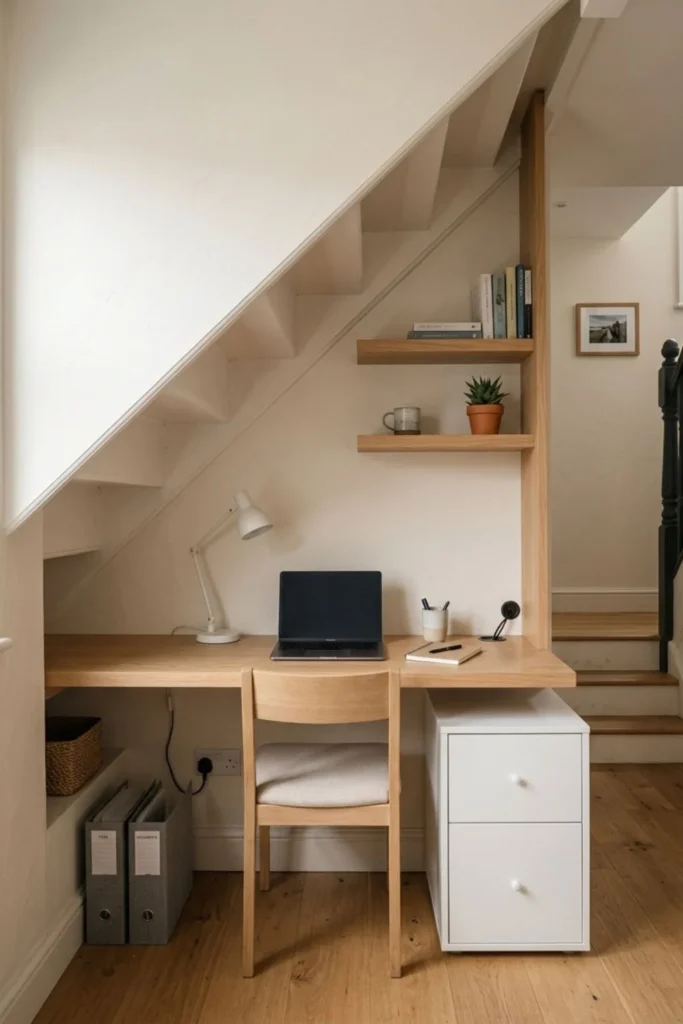
An under-stair desk can work for homework, bills, or short laptop sessions. I would not promise it as a perfect eight-hour office unless the headroom and ergonomics truly work.
A typical desk is close to 29 to 30 inches high. Allow at least 20 inches of width, 17 inches of knee depth, and more foot depth where possible. OSHA’s computer workstation guidance gives useful clearance references and recommends enough desk depth to place a monitor at least 20 inches from the eyes.
A simple desk and shelves may cost $300 to $1,000. Fitted cabinetry, a new outlet, task lighting, and cable management can raise it to $1,500 to $4,000.
Sit at a temporary table in the space before building. Check chair movement, screen glare, stair noise, and whether anyone walking past brushes the chair. If a permanent outlet is needed, use a qualified electrician rather than treating an extension lead as household wiring.
7. Organize Toys in Easy Cubbies
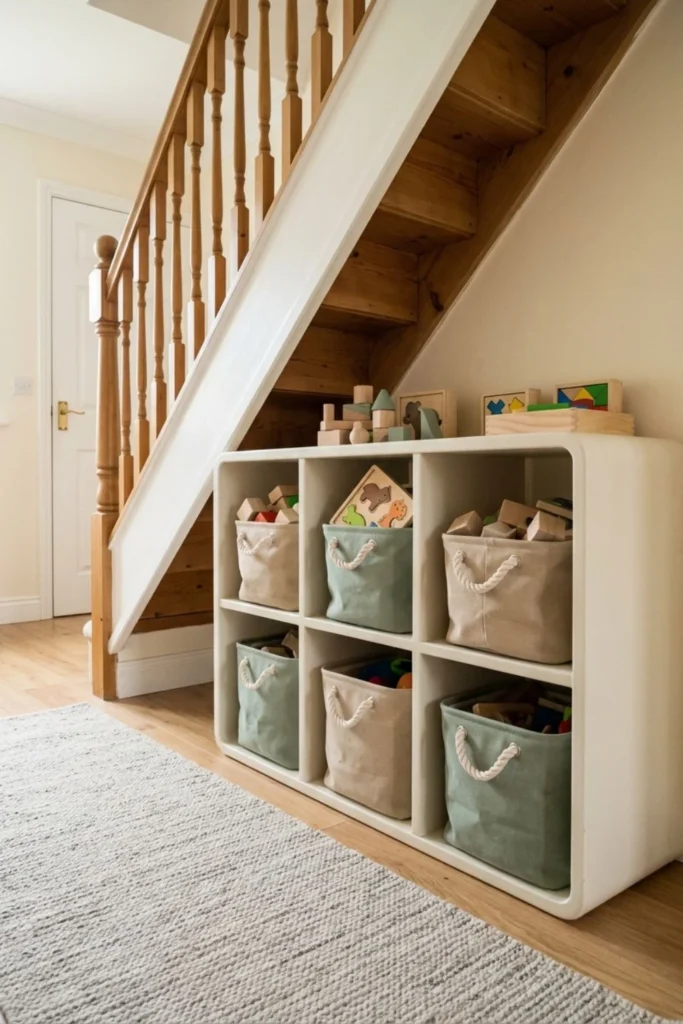
Low cubbies are easy for children to use, but the unit must not invite climbing. Keep daily baskets below roughly 36 to 40 inches for younger children and store heavier items at floor level.
Cubby openings around 12 to 15 inches square fit many common fabric bins. Buy the baskets first, then size the openings; “standard” baskets often differ by an inch.
A stock cubby plus bins may cost $150 to $500. A secured fitted unit with rounded trim can cost $800 to $2,500.
Anchor the unit with approved hardware and follow the maker’s instructions. The CPSC Anchor It campaign recommends securing furniture and keeping heavier items lower. I would also keep toys away from open stair rails so children are not encouraged to climb.
8. Design a Safe Pet Station
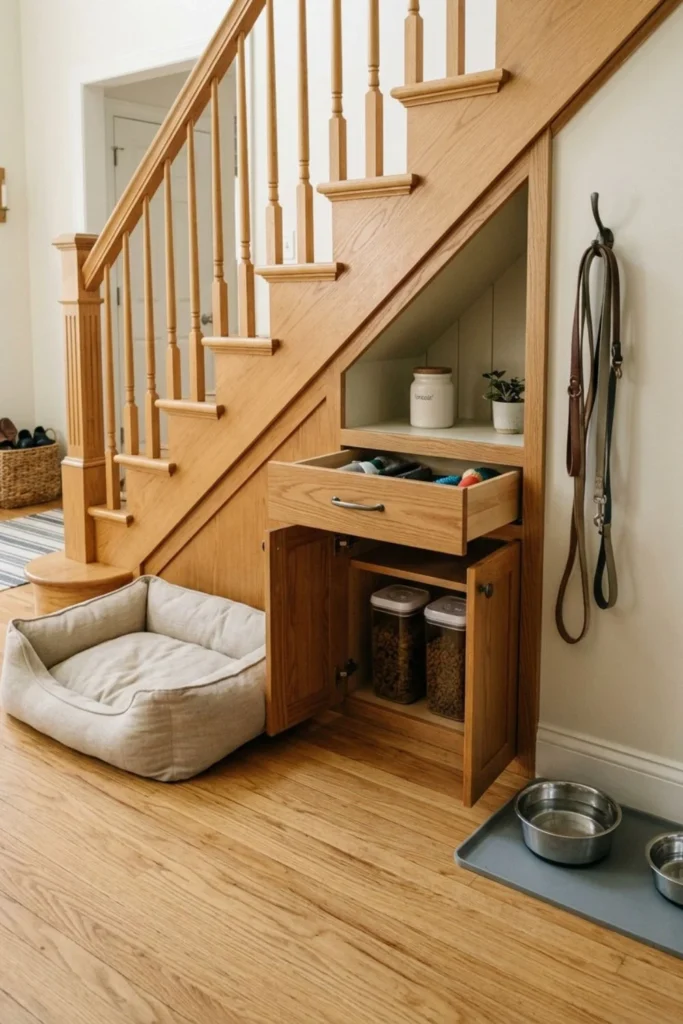
This is one of my weaker ideas because the sheltered shape is not automatically cozy for an animal. Footsteps above can sound loud, and a dark closed cubby may trap heat or make an anxious pet feel stuck.
If the pet already chooses this area, begin with a removable bed rather than a built-in house. The opening should be wider than the pet’s body and high enough to enter without crouching. Place the bed on the floor, observe it for a week, and only then consider storage around it.
A simple setup with a washable bed, hooks, and sealed food bin may cost $100 to $400. Custom doors and cabinetry can exceed $1,500, but they may make cleaning harder.
Keep water on a washable mat and away from outlets. Avoid chemicals, loose wires, sharp hooks, or paint not suited to the intended use. I would never use the space as a forced enclosure or hide ventilation for a cleaner look.
9. Make a Useful Cleaning Closet
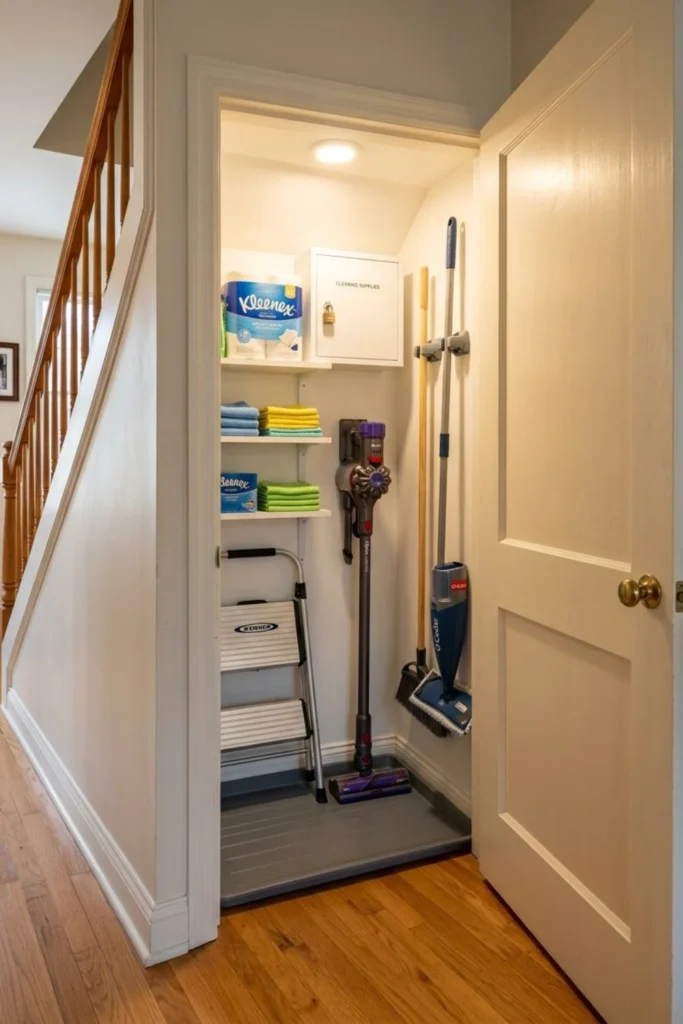
The tallest section can hold a vacuum, mop, broom, and folding step stool. Measure each item first; many upright vacuums need roughly 45 to 50 inches of vertical space.
Use wall clips to stop handles falling forward. Shallow shelves about 8 to 12 inches deep are enough for cloths and spare brushes. Leave space to remove the vacuum without emptying the cupboard.
A basic fitted shelf-and-hook setup may cost $200 to $800. Doors, lighting, and a custom interior can move it toward $1,000 to $3,000.
Keep products in original containers and lock unsafe items away from children and pets. Do not store chemicals beside food, pet bedding, or an electrical charging station. A waterproof bottom tray makes small leaks easier to spot.
10. Build a Small Pantry Zone
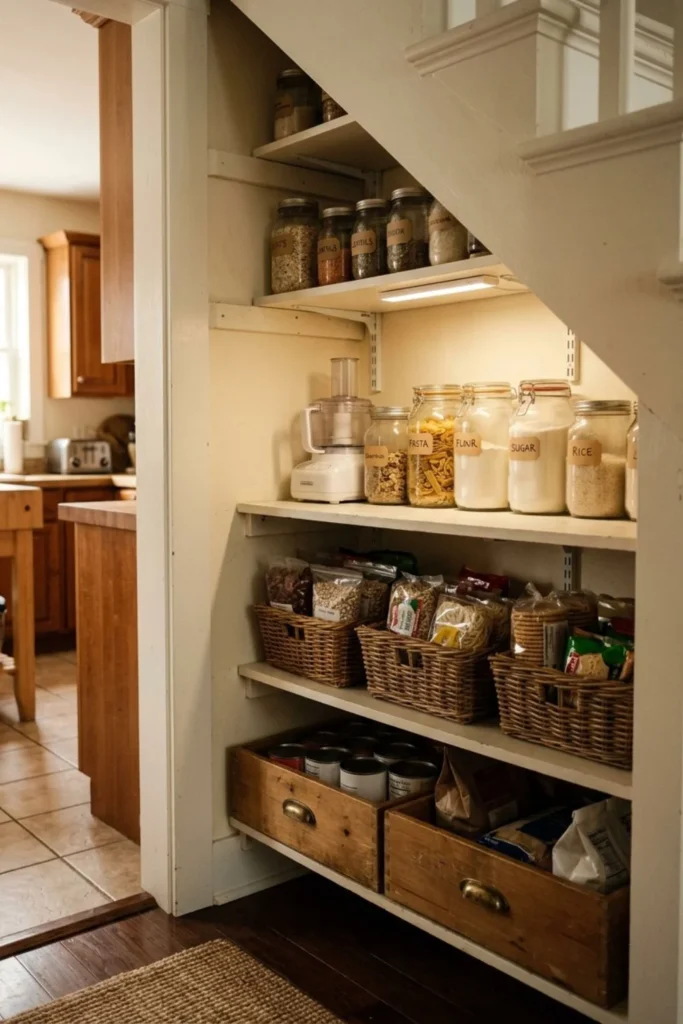
A pantry works only when the stairs are close to the kitchen and the area stays dry and cool. Shelves around 10 to 12 inches deep keep cans and packets visible. Deeper shelves of 14 to 16 inches suit small appliances but can hide food at the back.
Leave a few inches between the tallest item and the shelf above. Adjustable holes make this easier. Put heavy bottles or appliances on low, supported shelves.
Stock shelving may cost $250 to $900. Fitted pantry drawers and doors can cost $1,500 to $4,500.
I would not place food beside cleaning chemicals, pet supplies, heat, or damp walls. Keep original labels and dates visible. If the space is far from the kitchen, use it for serving dishes rather than turning every grocery trip into a walk across the house.
11. Add a Bench with Hidden Storage
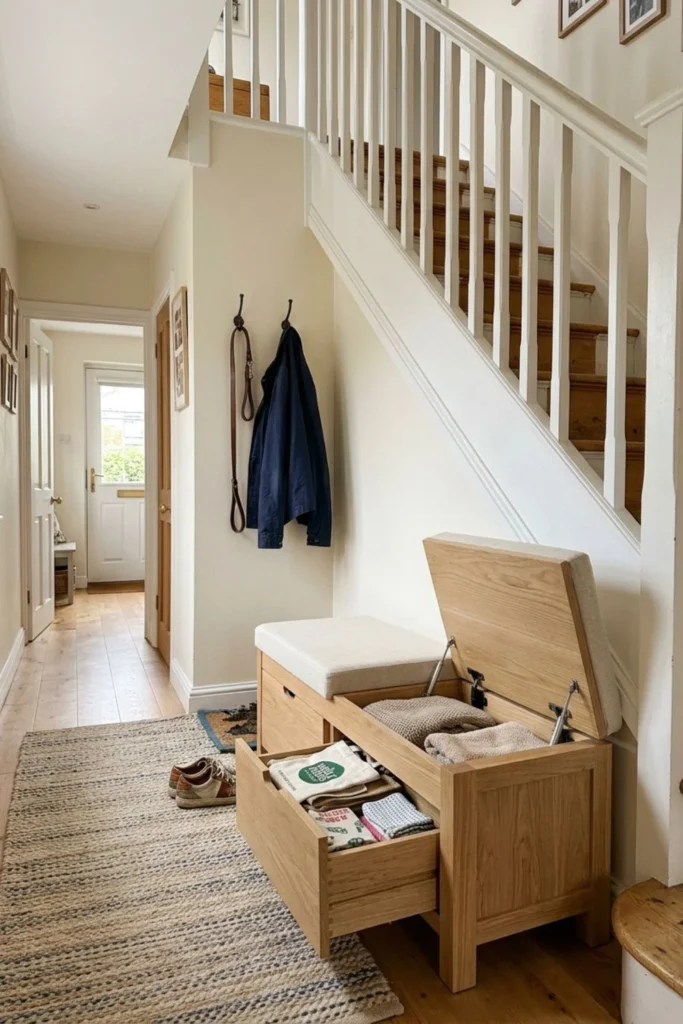
A bench is a good middle option when full cabinetry is too expensive. Aim for a finished seat height around 17 to 19 inches and a depth near 18 to 22 inches for putting on shoes.
Drawers are safer and easier to sort than one giant box. If you choose a lift-up lid, use soft-close supports and make sure fingers cannot be trapped.
A freestanding storage bench can cost $150 to $600. A fitted bench with drawers, trim, paint, and cushion may cost $1,000 to $3,500.
Keep the cushion firm and washable. Check that an open drawer does not block the hallway. If the bench is tall, narrow, or likely to be climbed, secure it correctly.
12. Create a Neat Coffee Station
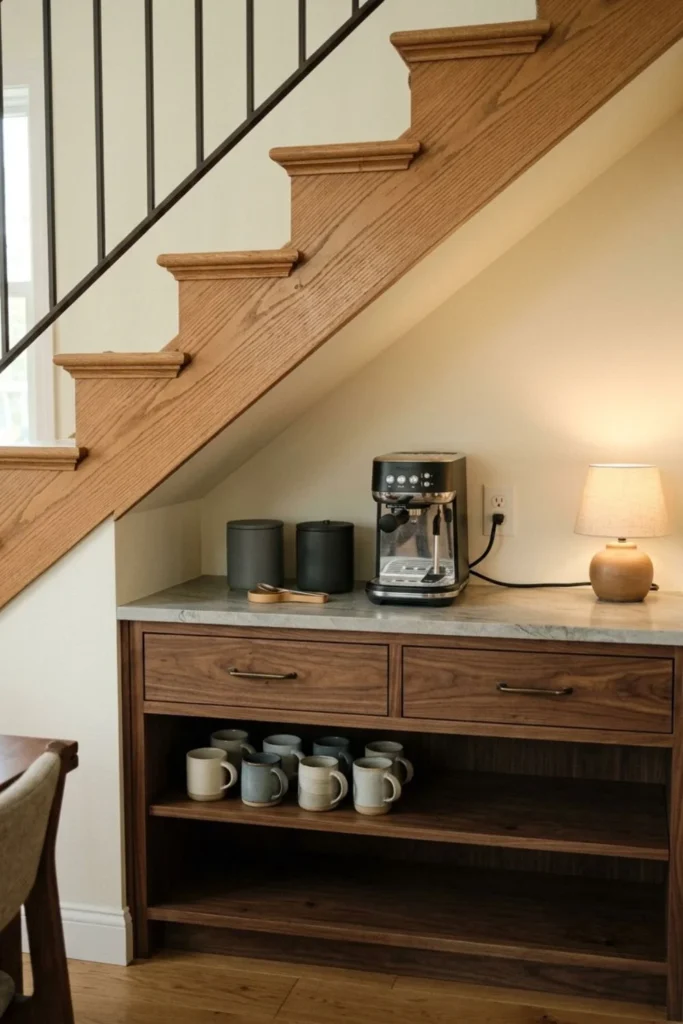
This is my other weak choice. A coffee station looks lovely online, but it puts hot liquid, steam, water, cords, and an appliance under a structure that may need protected lining.
A common counter height is around 36 inches, but the sloped ceiling must also leave the clearance required by the coffee-machine maker. Never guess that space. Steam can mark paint and cabinets, while a machine pushed into a low corner may be difficult to fill.
A cabinet-only setup for mugs can cost $300 to $1,000. A proper powered station with a heat-safe top, outlet work, lighting, and fitted storage may reach $1,500 to $4,000.
I would choose it only beside a kitchen or dining room with a suitable existing outlet and easy cleaning. Do not run a permanent extension lead across the floor. CPSC warns that overloaded or damaged cords can create fire and shock hazards; the appliance instructions and local electrical requirements come first.
When the location is low, damp, or far from plumbing, store cups and serving pieces there and keep the hot machine on the kitchen counter.
13. Display Decor Behind Glass Doors
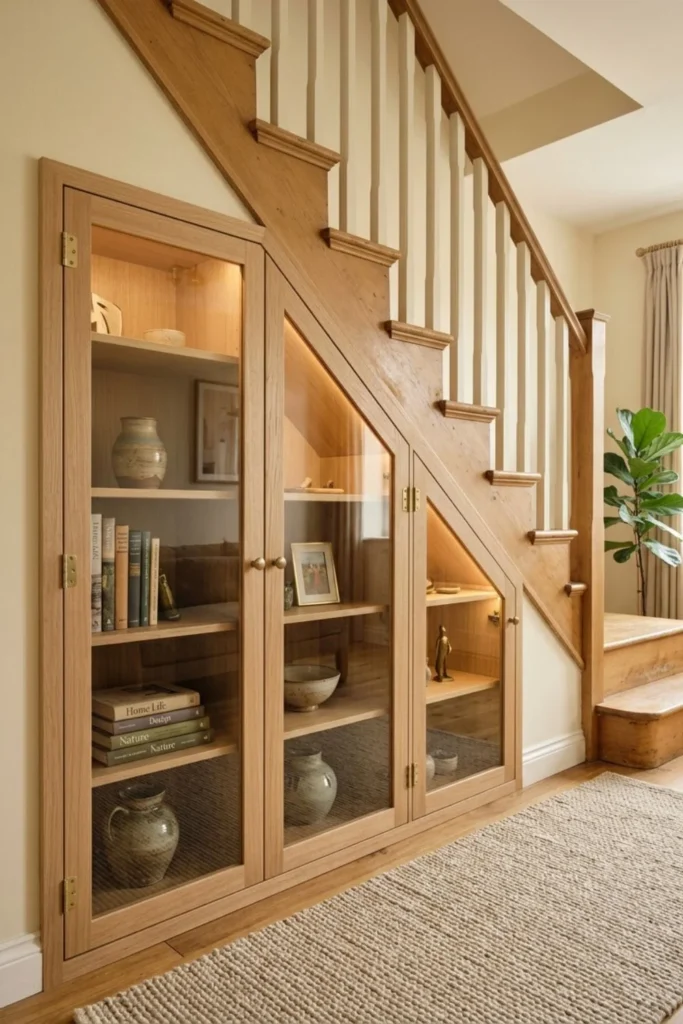
Glass doors protect a small collection while keeping the staircase wall light. Shelf depth around 10 to 14 inches works for books, ceramics, and framed pieces.
Use safety glass, secure hinges, and adjustable shelves. Keep heavier objects low and fragile pieces away from children. Internal lights need an accessible, safe wiring route and enough space to avoid heat buildup.
A stock glass cabinet may cost $400 to $1,200. Fitted sloped cabinets with glass fronts can cost $2,000 to $5,000.
I would use ribbed glass if the contents are not always perfectly arranged. Clear glass is unforgiving; it turns hidden clutter back into visible clutter.
14. Hide Storage Behind Wall Panels
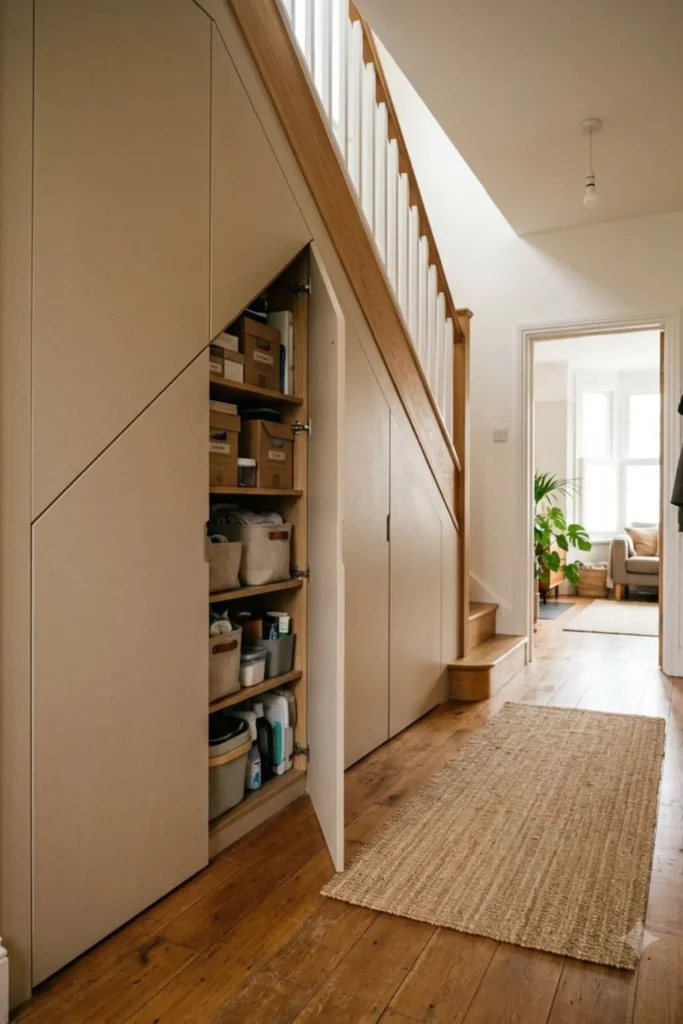
This is my third top choice, especially in an entrance or living room. Flush doors painted like the wall can hide coats, bags, cleaning tools, and seasonal boxes without creating a row of busy handles.
The clean look depends on accurate gaps. Doors still need a visible, usable opening method. Push latches can work, but a slim finger pull is easier when hands are full.
I would divide the interior into separate bays around 18 to 30 inches wide rather than create one giant cave. Use the tallest bay for coats or a vacuum, middle bays for shelves, and the low end for drawers. Keep frequently used items within the first 18 to 24 inches of reach.
This is usually a fitted job. A simple three-door painted system may begin near $2,000 to $4,000; more complex panels, premium hardware, lighting, and detailed trim can reach $5,000 to $8,000 or more.
The biggest warning is access. Do not bury an electrical panel, shutoff valve, vent, or required inspection point. Do not remove protective under-stair lining just to gain a little depth. Ask the carpenter to show how each service point remains reachable before approving the drawing.
Luxury images often hide handles and door gaps completely. Real doors need clearance to move. I would rather accept a neat 1/8-inch reveal than own a “seamless” panel that sticks every summer.
15. Use Baskets in Open Cubbies
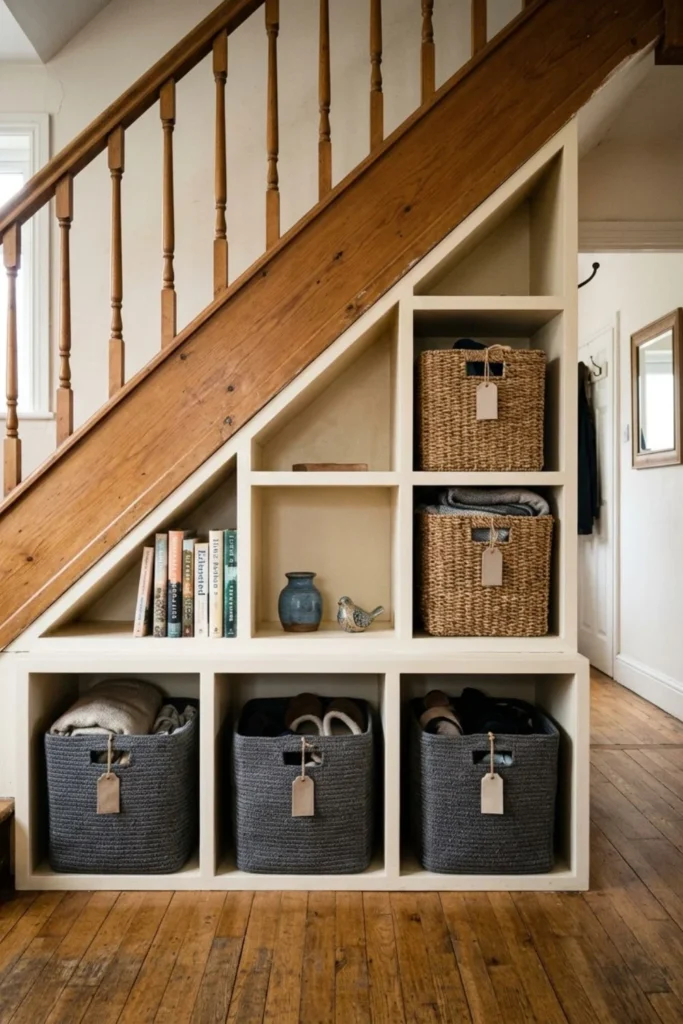
This is the most flexible low-cost choice. Choose baskets first and leave about 1/2 to 1 inch around each so they slide without scraping.
A sturdy stock shelf and baskets may cost $150 to $600. Trim, paint, and a fitted top can raise the result toward $800 to $1,500.
Give each basket one job and place heavy contents low. Leave one or two cubbies open for books so the wall does not become a stack of identical boxes.
Secure the unit, check handles for wear, and stop filling a basket when it becomes difficult to lift. This setup is less dramatic than custom drawers, but it is easy to change as family needs change.
16. Make a Compact Craft Station
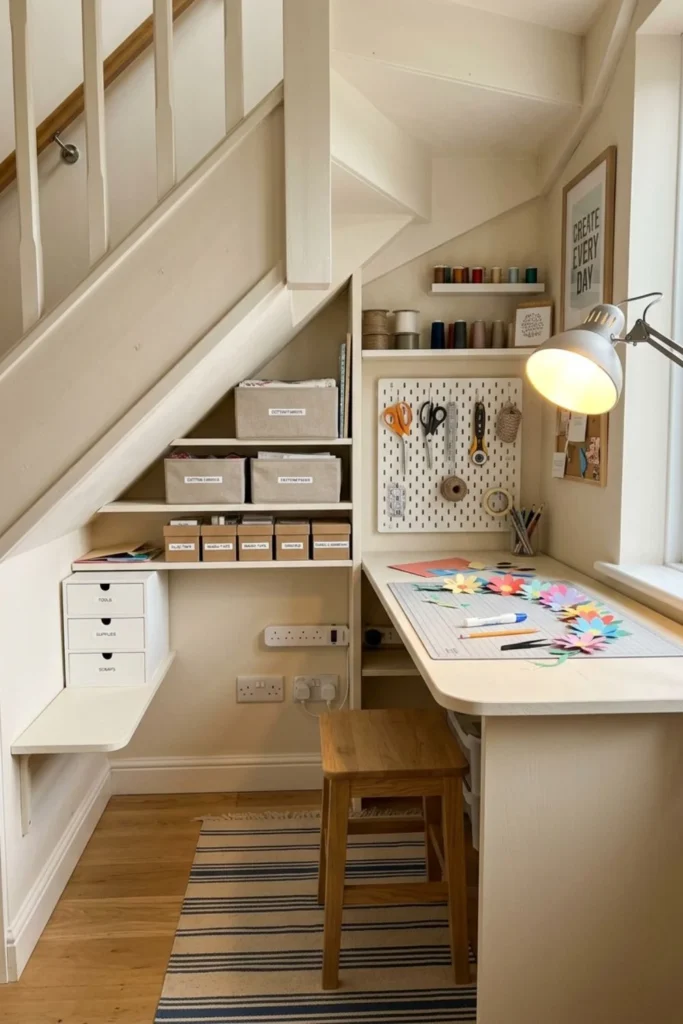
A craft station needs a surface at a comfortable seated height, often around 29 to 30 inches, plus a chair that slides away completely. A top 18 to 24 inches deep can work for paper crafts without taking over the hallway.
Use shallow drawers for paper and closed boxes for small parts. Pegboard should hold light tools only and stay within comfortable reach.
A simple desk-and-cart setup may cost $250 to $800. Fitted drawers, lighting, and cabinetry can cost $1,200 to $3,500.
Keep blades, hot glue tools, paint, and tiny pieces locked away from children. I would design for one or two hobbies, not every craft supply owned since school.
17. Store Sports and Outdoor Gear
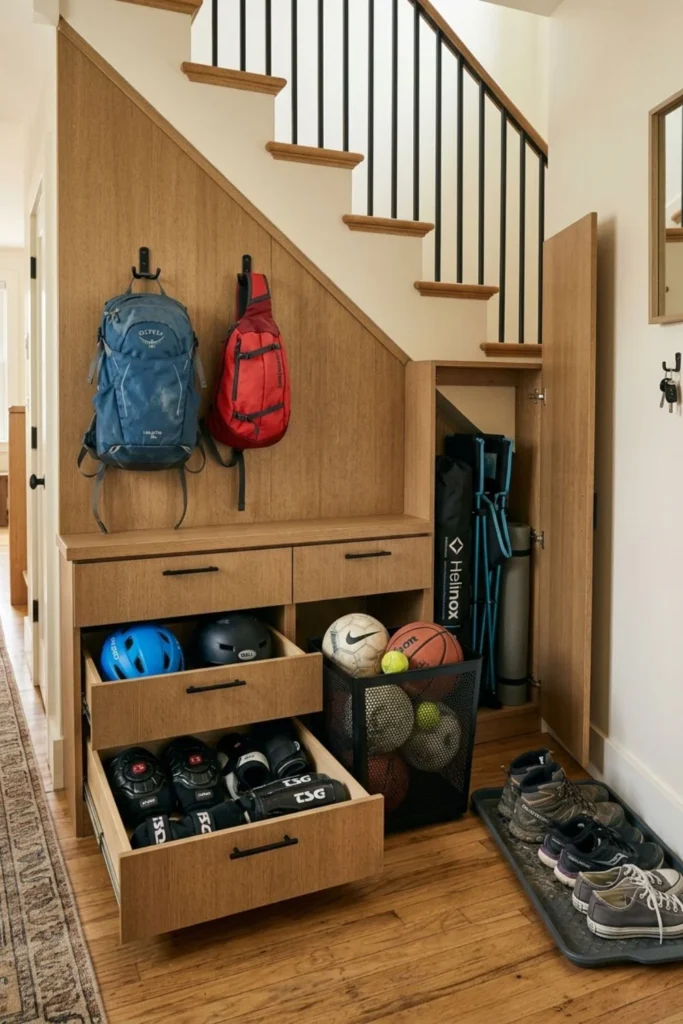
Sports gear needs durable, washable storage. Measure the longest racket, bat, or folded chair, then give that item the tall section. Deep bins around 16 to 24 inches can hold balls and helmets.
Ventilated baskets help damp gear dry. Do not seal wet shoes or pads inside painted cabinetry. Heavy objects belong low, and hooks should not stick into the walking path.
A rack-and-bin setup may cost $200 to $700. Custom drawers and tall compartments can cost $1,500 to $4,000.
I would rotate seasonal gear instead of demanding that one staircase hold everything all year. The area stays useful only when items can be removed without starting an avalanche.
18. Combine Several Storage Types
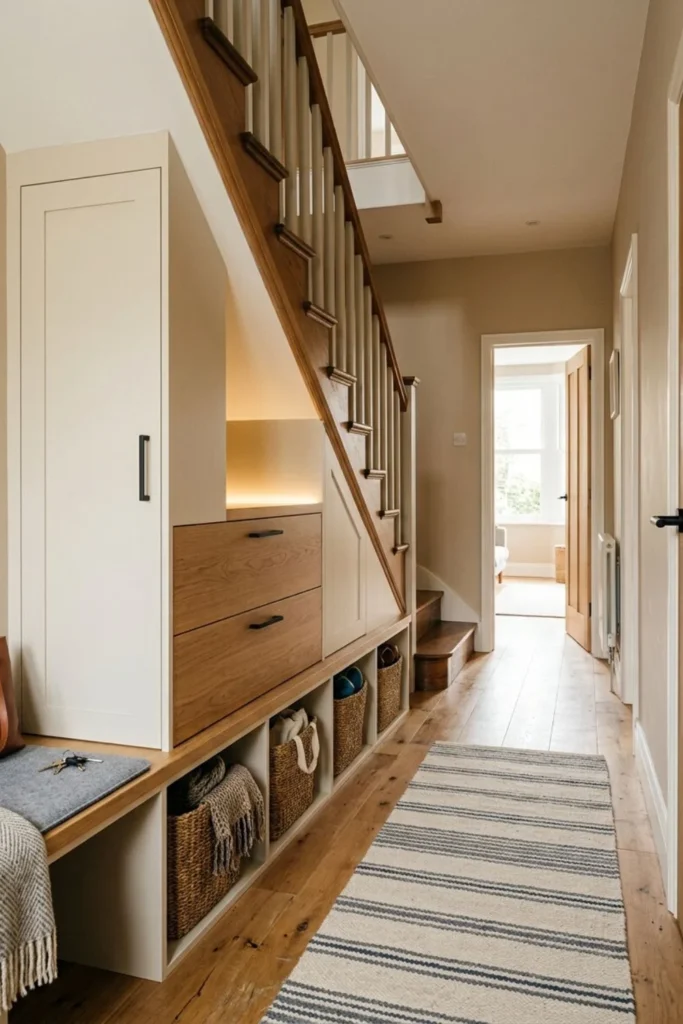
A mixed system often gives the best final result: a tall coat bay, two pull-out drawers, and low baskets. The slope decides the order naturally.
Before drawing doors, list the five items causing the most trouble. Give those items space first. Do not squeeze in a desk, pantry, pet bed, and coffee station simply because all four appeared online.
Keep one paint color and one handle style across the front. Inside, let each section work differently. This makes the exterior calm while the storage remains practical.
A mixed custom wall usually falls in the $3,000 to $7,500+ range. Price rises with drawers, lighting, premium fronts, and awkward site work. Ask the quote to separate cabinetry, hardware, finish, and trade work so you can simplify the expensive part without losing the whole plan.
What I Would Choose at Three Budgets
With under $500, I would use measured baskets, a secured stock cubby, paint, and a good light nearby. It will not look fully built-in, but it can solve clutter this weekend.
With $500 to $2,000, I would consider a freestanding bench, better shelving, trimmed stock cabinets, or one simple fitted section. Spend on strong hardware and safe fixing before decorative moulding.
With $2,000 to $7,500 or more, I would ask a carpenter to price deep drawers or simple flush-panel storage. I would keep the design to two or three zones and request a drawing showing dimensions, access panels, ventilation, and open door positions.
A reading nook deserves money only when someone will use it. Sit in a mock-up first. The same rule applies to every idea: build for real habits, not an empty styled picture.
Keep the Storage Useful After Installation
Empty one section every few months. Vacuum drawer runners and corners, look for moisture, and check that doors still move freely. A small leak or rubbing front is easier to fix early.
Do not force a drawer that becomes heavy. Sort it and check the runner limit. Keep air gaps open around shoes, coats, food, pet items, and electrical equipment.
As needs change, move shelves and relabel baskets. Leave some free space from the start. Storage that is packed completely on day one has no room for real life.
Final Thoughts
The best under stairs storage ideas respect the staircase first. Structure, protective lining, wiring, airflow, and the walking path matter more than a perfect door line.
My first choice is deep pull-out drawers because they make the hidden depth usable. A reading nook is worthwhile when the headroom and seating test feel comfortable. Flush wall-panel doors are excellent for mixed storage, but they need accurate carpentry and clear access.
I would keep pet and coffee stations optional. Neither is wrong, but both ask more from the space than a photograph shows.
Measure the actual objects, build a cardboard mock-up, set a budget, and get qualified advice before changing the stair enclosure. A smaller, well-planned project will feel more human—and serve the home longer—than a complicated feature copied from a viral image.
Disclosure: Some visuals are AI-assisted design concepts created for inspiration. Always confirm measurements, materials, load limits, building rules, fire protection, electrical safety, ventilation, furniture stability, child and pet safety, and installation requirements for your home. Costs are rough U.S. planning estimates and may vary by location, labor, materials, permits, and project conditions.