DIY kitchen wall organizer ideas are most useful when they solve a problem you notice every day. A small kitchen does not need a wall covered with baskets, hooks, and signs. It needs a few well-placed organizers that make the counter easier to use.
That may mean moving spice jars away from the prep area, storing cutting boards where they do not fall over, or lifting a wet dish rack off a crowded counter. These are ordinary problems, but fixing one of them can change how the whole room works.
For this guide, I placed three ideas at the top of my list: a wooden spice rack, a vertical cutting board holder, and a wall-mounted dish drying rack. They are different in cost and difficulty, yet each one can solve a clear storage problem without turning the kitchen into a display wall.
I am less convinced by a chalkboard meal station or a pocket made only for foil and wrap boxes. They can work in the right home, but they also take up space and depend heavily on personal habits. I have included them with their limitations instead of pretending that every idea is perfect.
This article is for both renters and homeowners. Some projects need proper screws and wall anchors, while others can be adapted for the inside of a cabinet door or hung with a removable system. Always check your lease, wall surface, hardware instructions, and expected weight before installation.
How to Choose the Right DIY Kitchen Wall Organizer Ideas
Begin with the item that keeps getting in your way. Do spice jars crowd the counter? Do cutting boards slide around inside a cabinet? Does the dish rack remove the only useful place for food preparation?
Next, empty the items you want to store and place them together. Measure the full group, including the tallest jar, widest board, or largest plate. An organizer built from a product photo may be too shallow or too narrow for what you actually own.
Use painter’s tape to mark the planned width and height on the wall. Open every nearby cabinet and drawer. Walk past the taped shape, stand at the sink, and reach for an imaginary item. This simple test is much easier than moving a finished rack later.
Think about the surrounding conditions as well:
- Heat: Spices, fabric, paper, and wood should not sit beside a flame or hot appliance.
- Water: Metal needs to resist rust, while wood needs a suitable finish and time to dry.
- Grease: Open storage close to cooking may need wiping several times a week.
- Weight: Plates, produce, mugs, and cutting boards become heavy as a group.
- Reach: Everyday items should be easy to take down without stretching over a hot surface.
Wall type matters more than the color of the rack. Drywall, tile, masonry, and solid wood require different fixings. Never guess the position of wires or pipes. If the wall is unfamiliar or the organizer is heavy, ask someone qualified to install it.
Renters still have options, but “removable” does not mean suitable for every surface or every load. Check the exact manufacturer’s limits and surface instructions. For example, 3M’s own guidance lists compatible smooth surfaces and warns against wallpaper, fabric, textured walls, brick, and rough surfaces for that particular product.
Do not use adhesive strips for a loaded dish rack, knife bar, heavy crate, or any organizer whose failure could hurt someone. Removable products are better reserved for light items within their stated limits.
A Quick Comparison Before You Start
This table is not a substitute for product instructions, but it helps narrow the list before buying supplies.
| Organizer | Best use | Skill level | Rental potential | Main concern |
|---|---|---|---|---|
| Wooden spice rack | Everyday spice jars | Beginner–medium | Possible as a freestanding or door-mounted version | Heat and jar clearance |
| Pegboard | Mixed light utensils | Medium | Possible with an approved mounting system | Visual clutter and secure spacing |
| Magnetic strip | Knives and metal tools | Medium | Usually better with permanent fixing | Child safety and holding strength |
| Rail with hooks | Utensils, mugs, towels | Beginner–medium | Good when fitted inside a cabinet or approved by landlord | Swinging or crowded items |
| Produce baskets | Firm produce | Medium | Limited | Loaded weight and food care |
| Mug rack | Everyday cups | Medium | Possible as a cabinet-side version | Mug handles and board strength |
| Cutting board holder | Boards and trays | Beginner–medium | Good inside a cabinet door if clearance allows | Moisture and weight |
| Glass jar holder | Light, dry tools | Medium | Limited | Broken glass and overloading |
| Fold-down shelf | Temporary work surface | Advanced | Poor | Brackets, wall strength, walkway |
| Paper towel holder | One paper roll | Beginner | Good | Heat and cabinet permission |
| Wall dish rack | Wet plates and cups | Advanced installation | Poor | Heavy wet load and rust |
| Chalkboard station | Meal notes and shopping list | Beginner | Good | Maintenance and visual clutter |
| Wrap pocket | Foil and paper boxes | Beginner | Good inside a door | Door clearance and limited purpose |
| Wooden crates | Bowls, books, light decor | Medium | Poor | Depth and secure mounting |
| Fabric pockets | Cloths, cards, reusable bags | Beginner | Very good | Grease, washing, and overloading |
1. Build a Slim Wooden Spice Rack
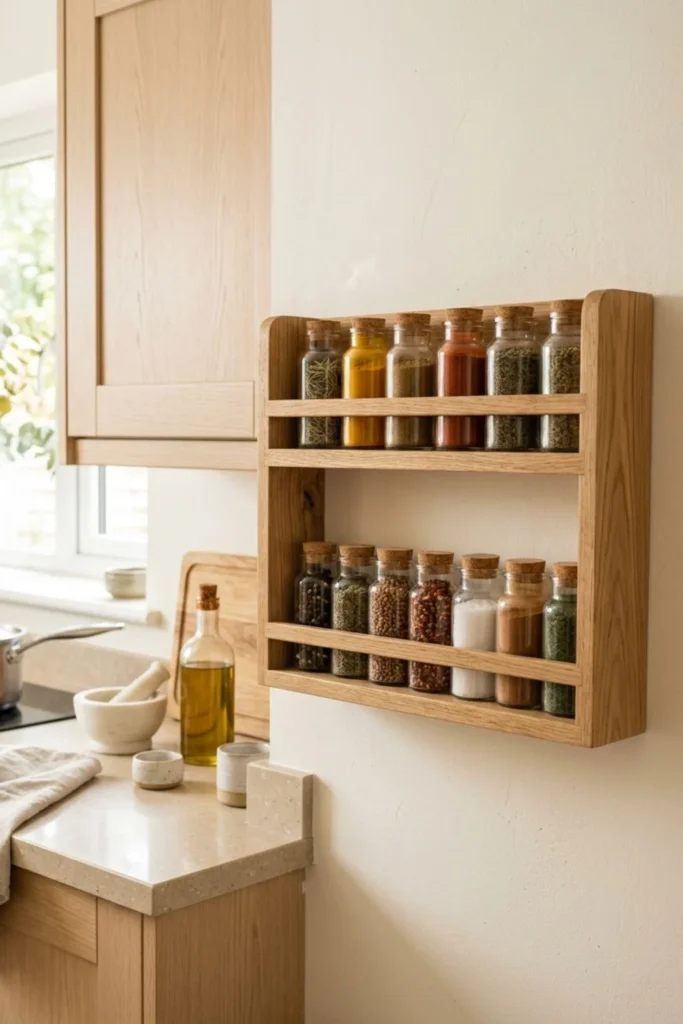
A wooden spice rack is my first choice because it solves a common problem without needing much wall depth. It can look warm in a cozy kitchen, clean in a modern kitchen, or more polished when the wood tone matches the cabinets.
Do not choose the shelf size first. Line up the jars you use most, then measure them. Allow enough room above the tallest jar to lift it forward and out. A low front rail should stop jars from sliding without covering their names.
A useful two-level rack might be shallow, but its exact depth should follow your containers. Small spice jars need less room than wide seasoning bottles. Building around your own collection keeps the rack compact.
Placement is the real decision. The rack should be close enough to the cooking area to reach, but not directly above steam, heat, or oil splashes. Spices are easier to manage in a dry location, and the wood will stay cleaner there too.
Choose a wipeable finish and leave a little empty shelf space so new jars do not immediately crowd the rack.
Worth choosing when: spices live on the counter or disappear inside a deep cabinet.
Skip this location when: the only wall available is beside constant heat or heavy steam.
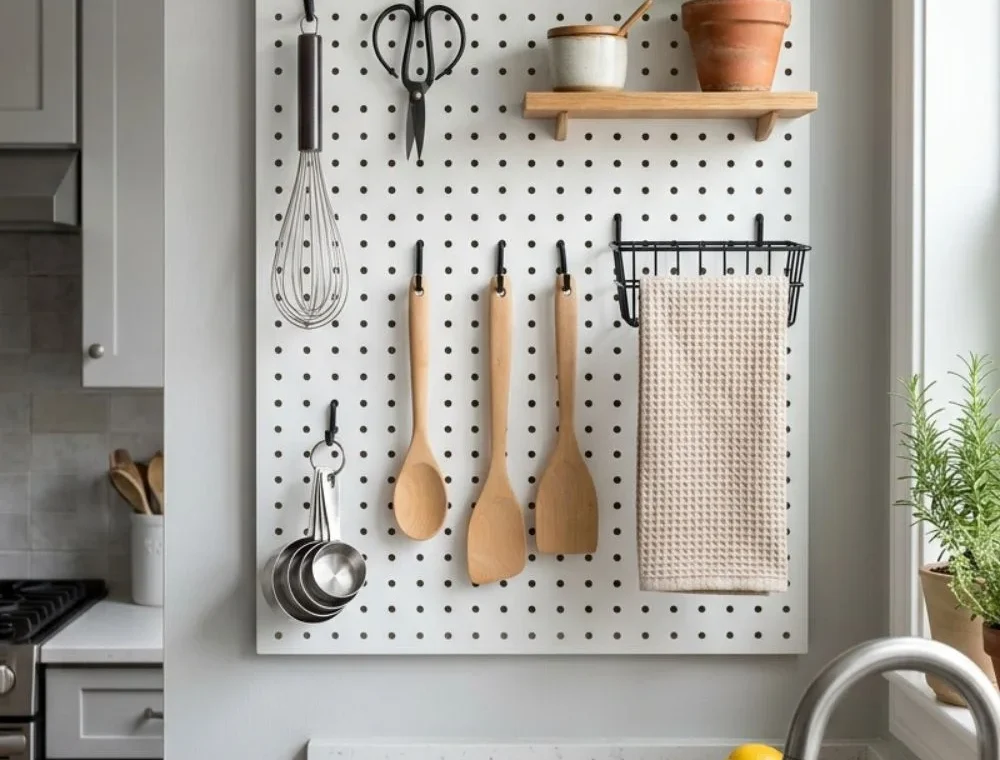
2. Make a Flexible Kitchen Pegboard
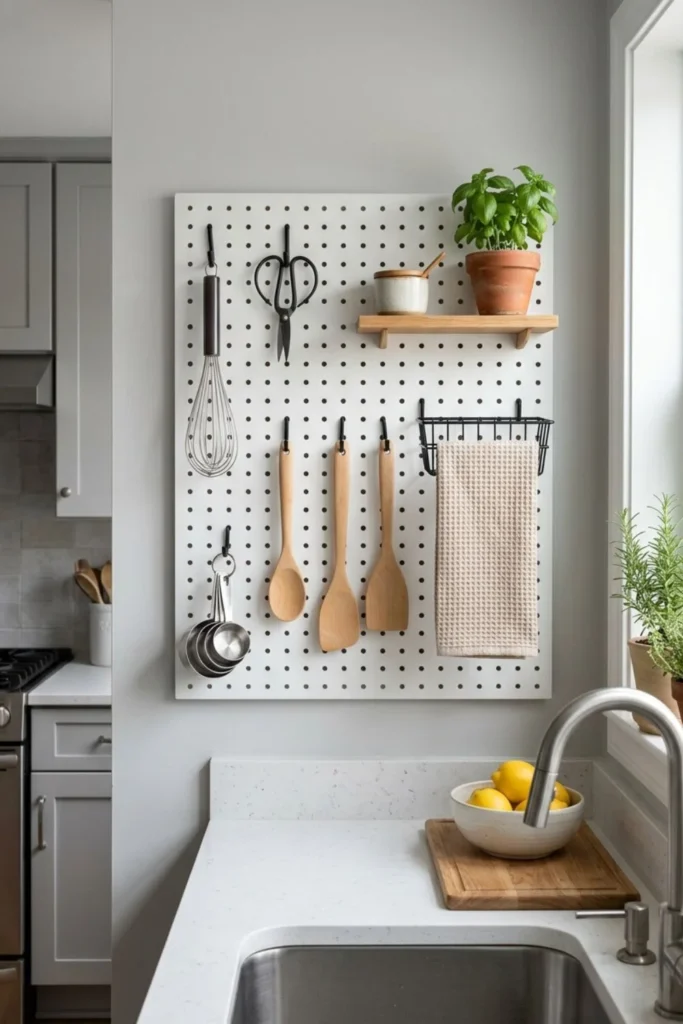
A pegboard is useful for a kitchen that changes often. Hooks can move, baskets can come down for washing, and a small shelf can be added without starting a completely new wall project.
Its biggest advantage can also become its weakness. Because almost anything can hang on it, the board may slowly collect scissors, receipts, brushes, towels, pans, and tools that have no other home.
Plan the arrangement on the floor first. A whisk, two wooden spoons, measuring cups, one small basket, and a folded towel may be enough. Leave open holes between groups so one item can be removed without knocking against the rest.
The board needs a gap behind it for the hooks to work. Use proper spacers and fixings rather than attaching it flat to the wall. Keep knives, heavy pans, and breakable objects off a casual pegboard setup unless the system is designed and installed for them.
3. Install a Proper Magnetic Knife Strip
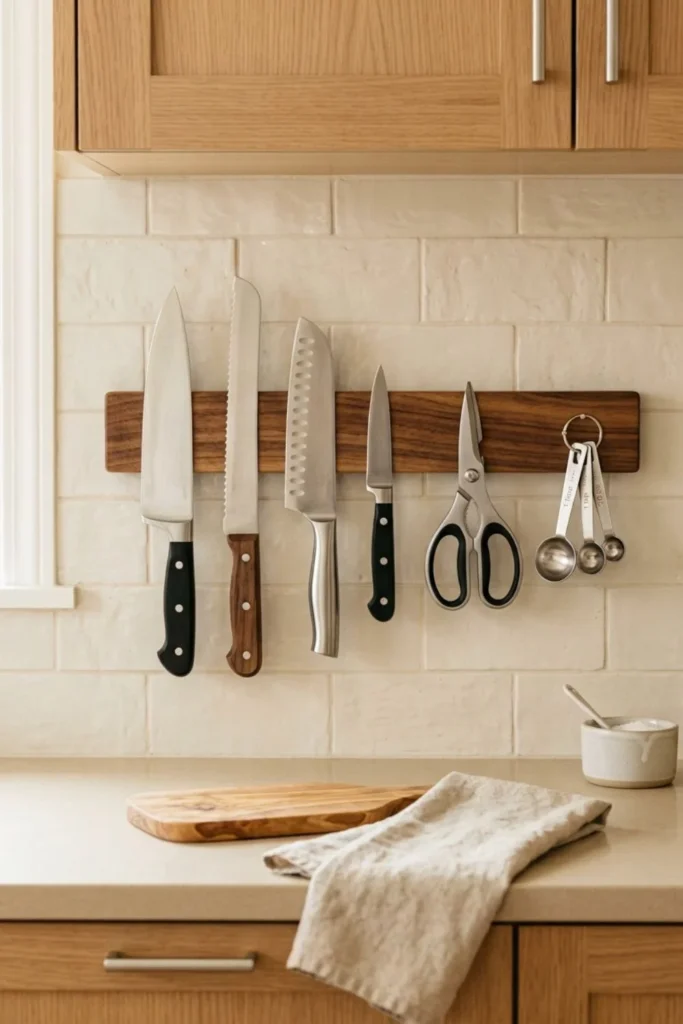
A magnetic strip can free a drawer and keep knives visible, but it is not a decorative project to improvise. Buy a strip made for kitchen tools and follow its installation instructions.
Before fixing it, check that every knife and tool is strongly attracted to the bar. Some metals may not hold as expected. Add items one at a time and test the grip carefully.
Location needs extra thought:
- Keep it above a child’s reach.
- Avoid narrow walkways and doorways.
- Make sure cabinet doors cannot hit the handles.
- Leave room to grip and remove each knife safely.
- Do not place it where someone must reach across heat.
If you are not confident about the installation or the strip feels weak with your knives, use a drawer insert instead. Saving a little space is not worth creating a safety worry.
4. Add a Short Rail with Movable Hooks
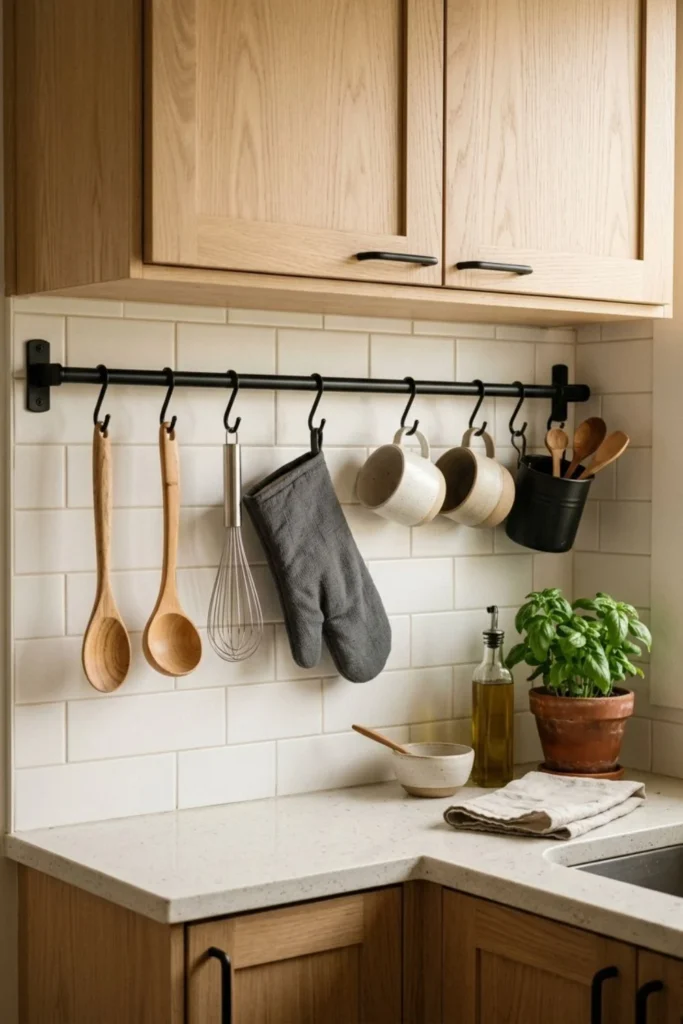
A short rail suits a narrow backsplash, the side of a cabinet, or the space below an upper cabinet. Movable S-hooks make it easy to change the spacing without drilling separate holes for every utensil.
Hang the longest tool temporarily before choosing the rail height. It should clear the counter but remain comfortable to reach. Check that a mug or ladle will not hit the wall, tap the worktop, or swing into a nearby appliance.
This organizer looks best when the contents share a purpose. Keep cooking tools near the prep zone, mugs near the tea station, or cloths near the sink. Mixing all three can make a small wall feel restless.
Leave one or two hooks empty. The gap gives your hand room to remove an item and provides temporary hanging space while you cook.
5. Use Open Baskets for Produce
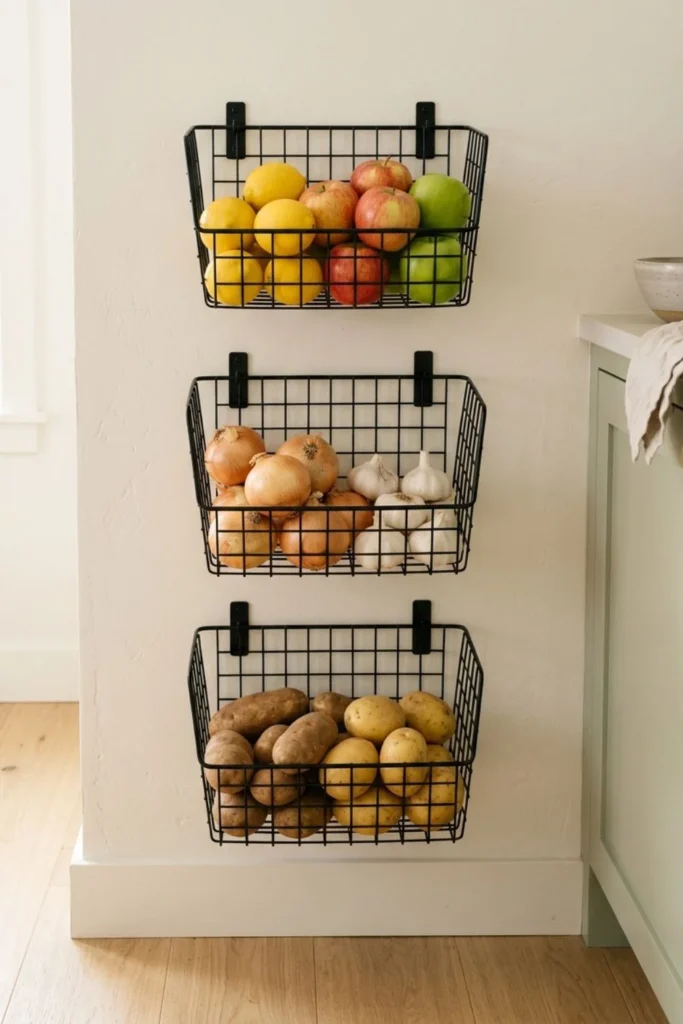
Vertical baskets use a narrow wall efficiently and help you see produce before it is forgotten. They can also add natural color without decorative signs or extra accessories.
The important measurement is not the empty basket’s weight. Think about it filled with potatoes, onions, apples, or citrus. A loaded basket pulls harder on the wall, especially when someone reaches in from the front.
Choose sturdy baskets with smooth edges and use fixings rated for the expected load. Leave enough open space above each basket to remove food without tugging it forward.
Food storage needs should guide the contents. Keep produce dry, check it often, and remove anything starting to spoil. Avoid direct sun and strong heat. If two foods need different conditions, do not group them simply because their colors look good together.
6. Create a Reclaimed-Wood Mug Rack
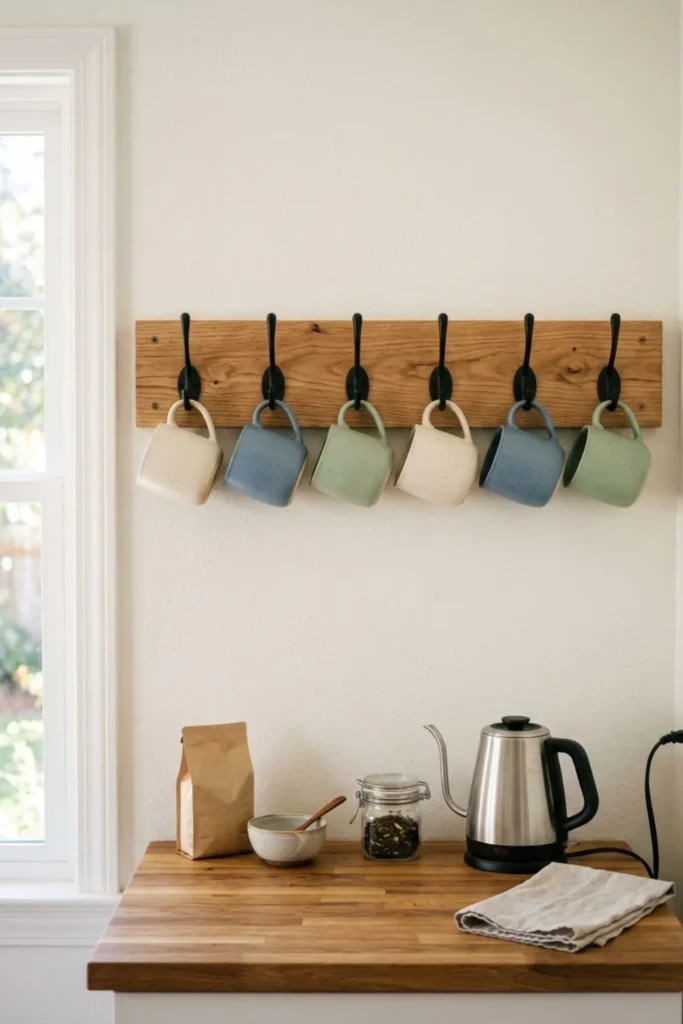
A mug rack can free shelf space and turn an unused strip of wall into a simple drink station. It feels especially natural above a kettle or beside coffee supplies.
Reclaimed wood needs inspection before styling. Reject pieces with deep splits, loose edges, hidden nails, insect damage, or a weak center. Clean the board and sand every edge until it is safe to touch.
Lay the mugs below the board before drilling the hook holes. Their widths and handle shapes may be different, so equal hook spacing does not always produce equal gaps. Make sure the cups will not knock together when one is removed.
Four to six everyday mugs are enough for most small racks. A long row may photograph well, yet it needs more wall space, stronger mounting, and more cleaning.
Make sure every handle is sound. Keep chipped or fragile favorites in a cabinet rather than hanging them above a hard counter.
7. Store Cutting Boards in a Vertical Holder
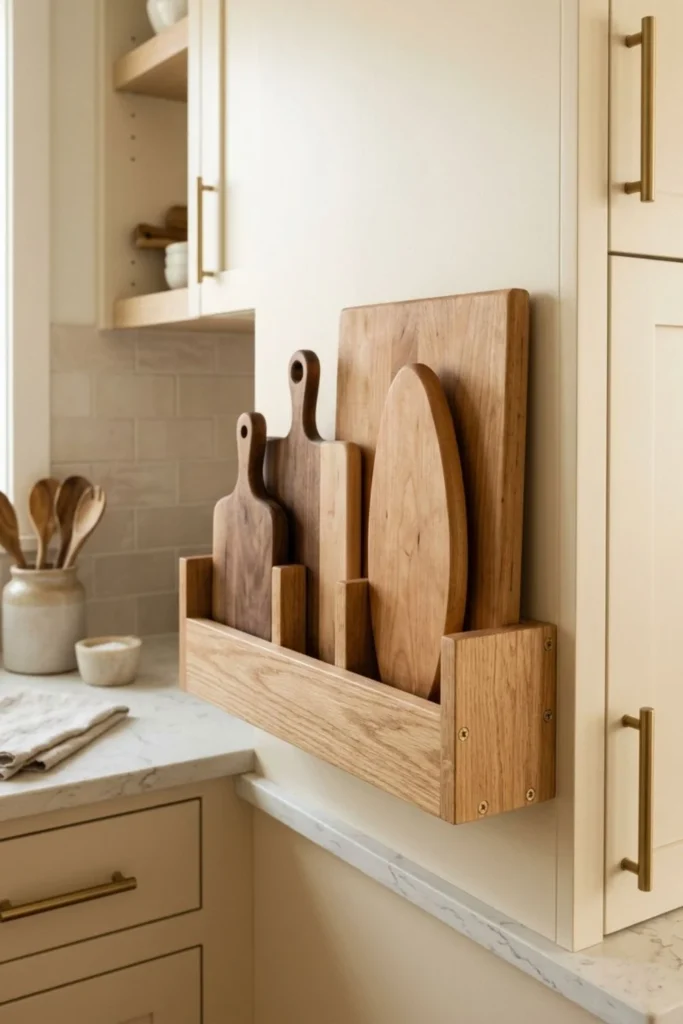
This is one of my three strongest choices because cutting boards are difficult to stack neatly. They slide against trays, lean inside cabinets, and often require lifting the whole pile to reach the right size.
A shallow vertical holder keeps the boards separated. It can be attached to the side of a cabinet, placed inside a deep cabinet, or fixed to a suitable wall when the walkway has enough clearance.
Measure the thickest board first. The holder needs enough depth to support its lower section, but it should not project farther than necessary. Add simple dividers so wide and narrow boards stay upright rather than leaning together.
Round or sand every exposed corner. A holder on the end of a cabinet sits close to passing clothes and hands, so sharp edges will quickly become annoying.
The boards must be fully dry before storage. A tight wooden pocket can trap moisture around the lower edges. Leave enough air around the dividers, remove crumbs, and wipe the holder regularly.
Homeowner option: the cabinet side closest to the prep counter, provided it does not narrow the path.
Rental option: a freestanding vertical divider inside an existing cabinet.
8. Turn Strong Glass Jars into Light Storage
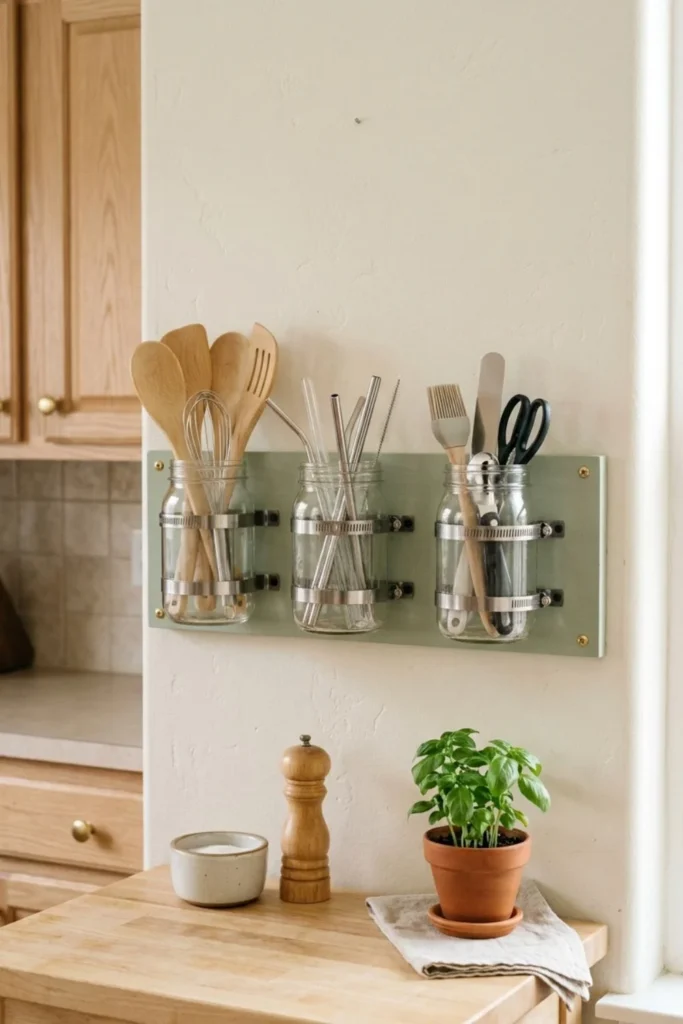
Glass jars attached to a wooden board can hold reusable straws, clips, wooden spoons, or other light tools. This project reuses containers and brings small items into view.
Inspect each jar in bright light. A chip, fine crack, or damaged rim makes it unsuitable for wall storage. Use proper metal clamps fixed to a sound backing board, and tighten them only enough to hold the glass securely.
The contents should remain light and easy to remove. Do not use hanging jars for knives, heavy cutlery, or tools that need a hard pull. Place the board at a height where the jars can be seen and cleaned without stretching.
Before continuing, ask whether the project is needed. If one jar can sit safely inside a cabinet, attaching three glass containers to the wall may add more cleaning than storage.
9. Add a Fold-Down Shelf for Temporary Work Space
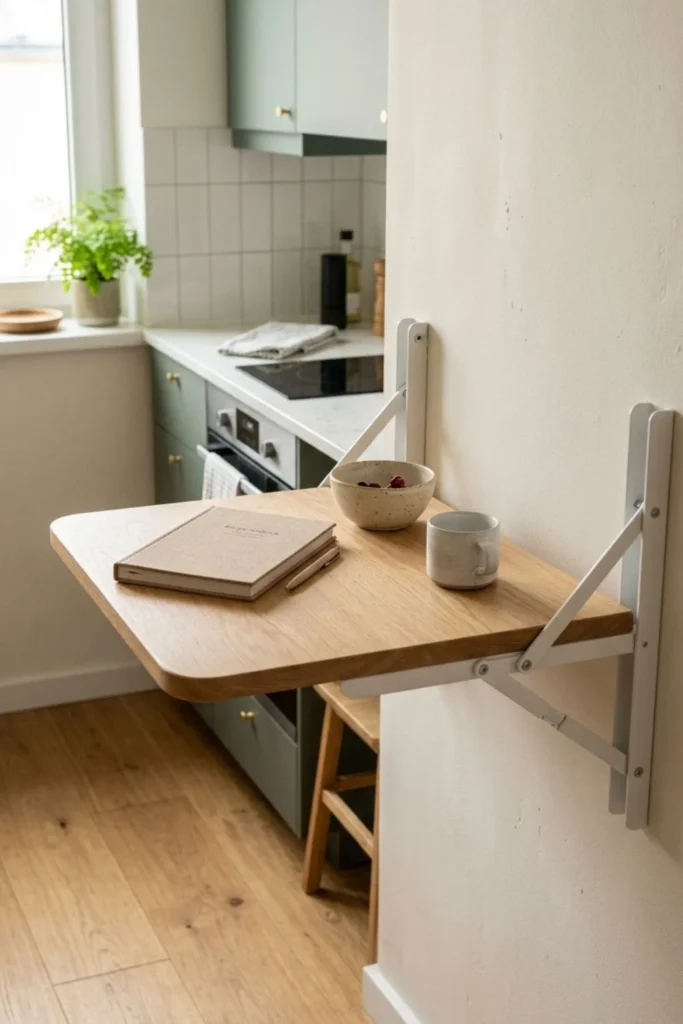
A fold-down shelf can create extra space for a recipe book, mixing bowl, or quick breakfast. When closed, it gives the walkway back to the room.
This is not a beginner wall project. The brackets, board, anchors, and wall structure must work together. People may also lean on the surface without thinking, which creates a different load from placing a light bowl on it.
Mark the open shelf on the floor and wall with tape. Then test every movement around it:
- Open the fridge, oven, drawers, and nearby doors.
- Walk past while carrying a plate.
- Check whether two people can still move safely.
- Confirm that the shelf can close without hitting handles.
Use a sealed, easy-to-clean top with smooth corners. Follow the bracket maker’s load and fitting instructions. If you cannot confirm the wall structure, ask an experienced installer.
Treat it as temporary work space, not a seat or support for heavy appliances.
10. Fit a Paper Towel Holder Below a Cabinet
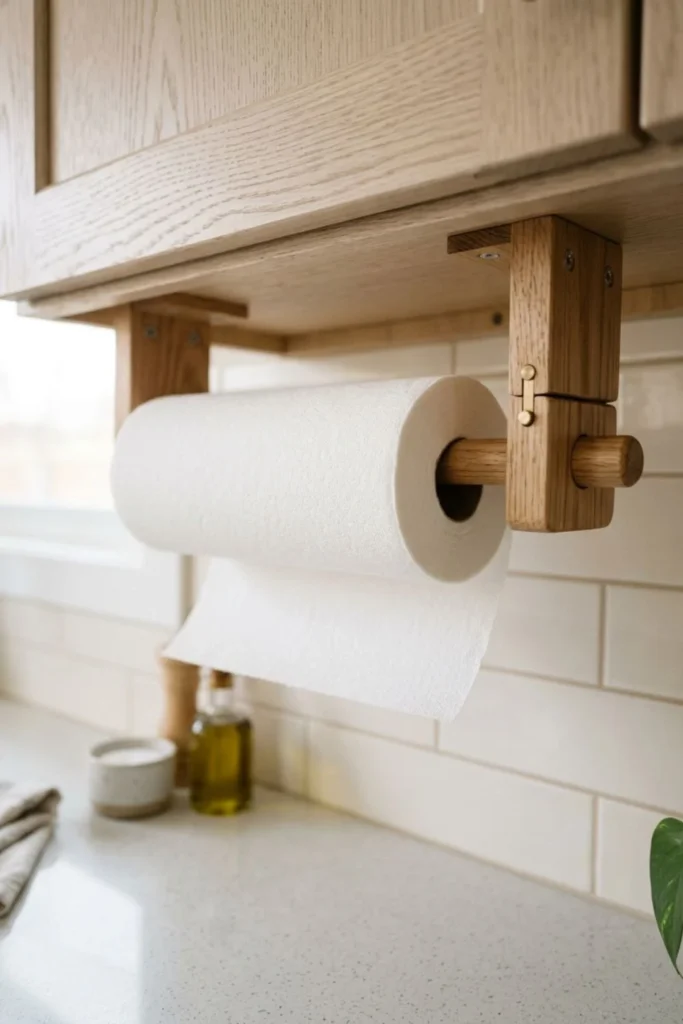
An under-cabinet holder is a small project with a clear result: one less item on the counter. It keeps the roll close without giving up a full wall section.
A simple DIY version can use a smooth wooden dowel and two secure supports. One side needs to open for a new roll, but the dowel should not jump out when paper is pulled with one hand.
Test the location with a full roll. Tall appliances, mixing bowls, cabinet doors, and your normal hand movement all need clearance.
Keep paper away from flames, hot surfaces, and regular sink spray. If the only suitable position is risky, a holder inside a cabinet door may be better.
Renters should avoid drilling into cabinetry without permission and can consider a purpose-made clamp-on holder.
11. Choose a Wall-Mounted Dish Drying Rack
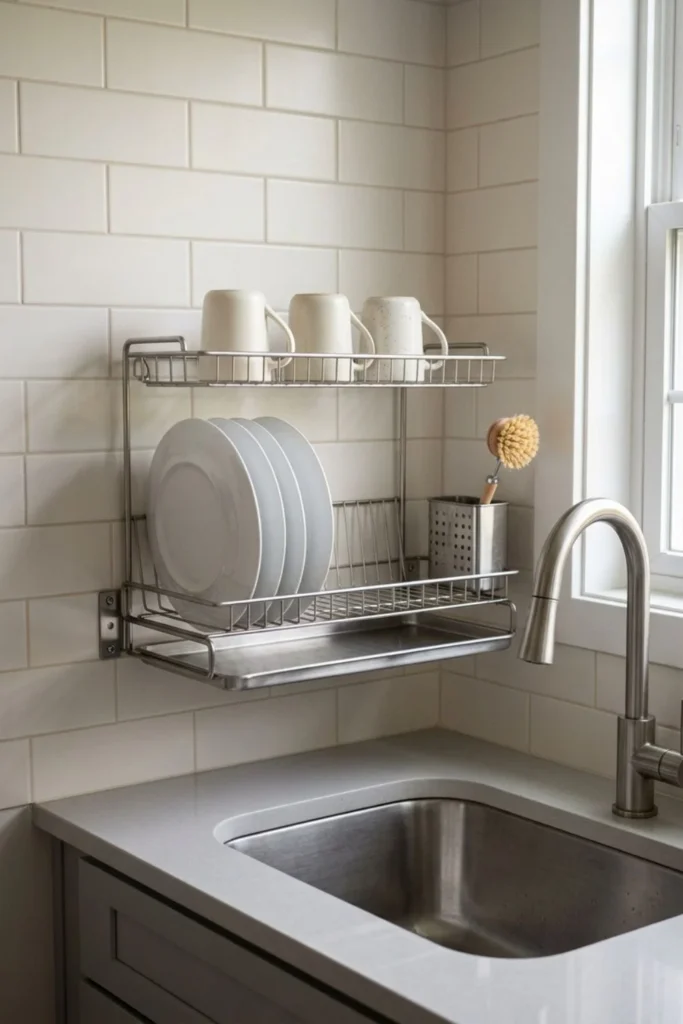
A wall-mounted dish drying rack is my third top choice because it can return a large section of counter to a very small kitchen. Unlike a decorative shelf, it solves a problem that appears after almost every meal.
It also carries a demanding load. Wet plates, cups, and metal parts are heavier than the empty rack shown online. Water increases the need for rust resistance, drainage, and regular cleaning.
Measure the largest plates, the faucet height, and the distance from the sink to the wall. Stand at the sink and pretend to load the upper level. You should not need to stretch over the faucet or place dishes above your head.
For this idea, I would choose a tested rack designed for wall mounting rather than make one from leftover wire. Use the manufacturer’s specified fixings and calculate for the loaded rack.
A removable drip tray is useful when water cannot fall directly into the sink. It should slide out without removing the dishes. Empty and wash it often so standing water does not collect out of sight.
This is generally a homeowner project or a landlord-approved installation. Adhesive hooks are not a suitable shortcut for a rack full of wet dishes.
12. Consider a Chalkboard Grocery and Meal Station
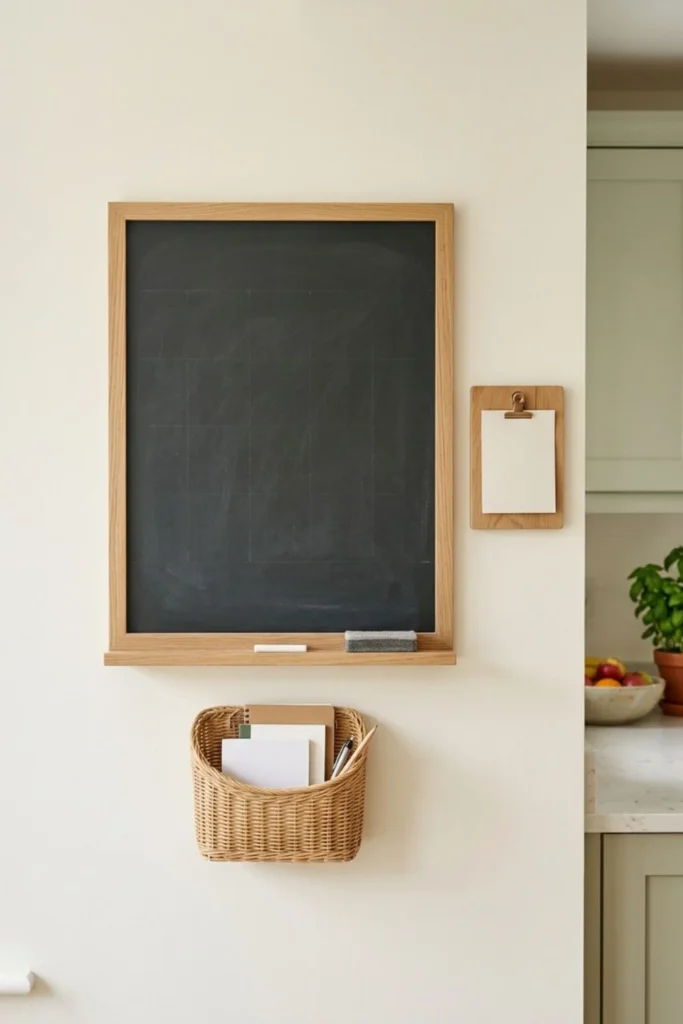
A chalkboard can collect meal ideas and shopping notes in one place. It may help a household that already plans meals and regularly updates a list.
It is lower on my list because the board only works when someone maintains it. Old menus, chalk dust, receipts, and half-finished lists can become a second kind of visual clutter.
If this idea matches your routine, keep it small. Divide the board into two areas—meals and shopping—and add one clip for a receipt. More sections may look organized on day one but take longer to update.
Place it away from grease and sink splashes. The side of a pantry or an open wall near the kitchen entrance may make more sense than the main cooking zone.
13. Test a Wall Pocket for Wraps and Foil
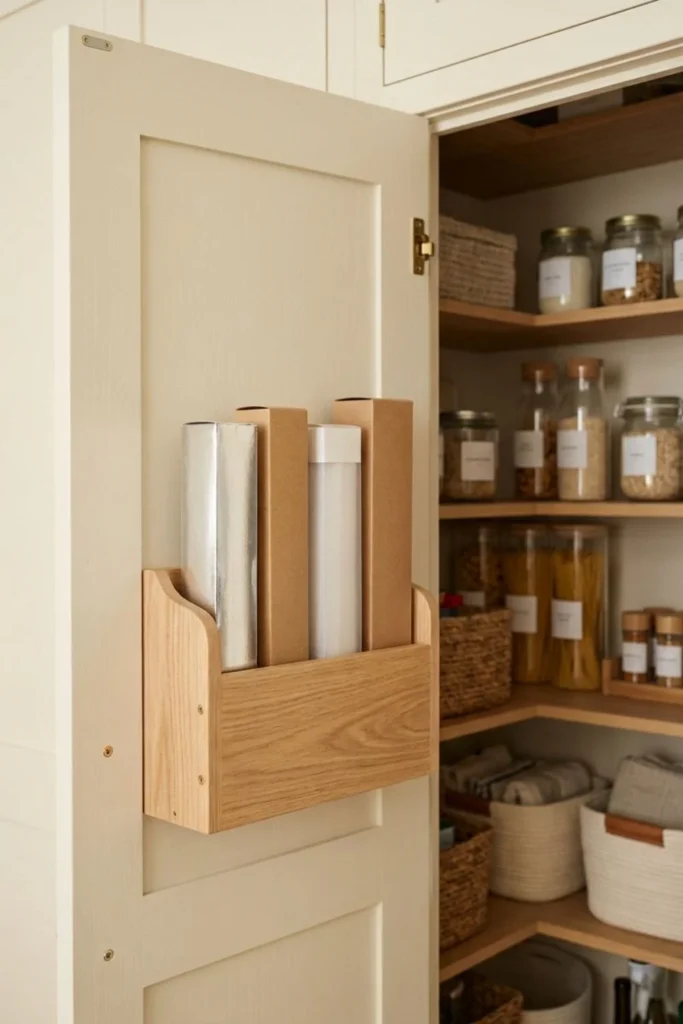
Foil, baking paper, and food-wrap boxes are long and awkward. A narrow pocket can hold them upright, but this idea deserves a trial before any holes are made.
The most practical location is often the inside of a pantry door. Tape empty boxes to the planned area, then close the door slowly. Check the shelves, hinges, handles, and any items stored behind it.
A pocket that is only a little too deep can stop the door closing. It may also be inconvenient if wraps are used at the counter on the other side of the room.
That is why this organizer is not one of my first choices. It solves a narrow problem and may simply move four boxes from a drawer to a less convenient place.
If the test works, use a shallow wooden pocket or a strong wire file holder. Keep sharp cutting edges inside their original boxes and make the front low enough to identify each roll.
14. Turn Wooden Crates into Deep Wall Shelves
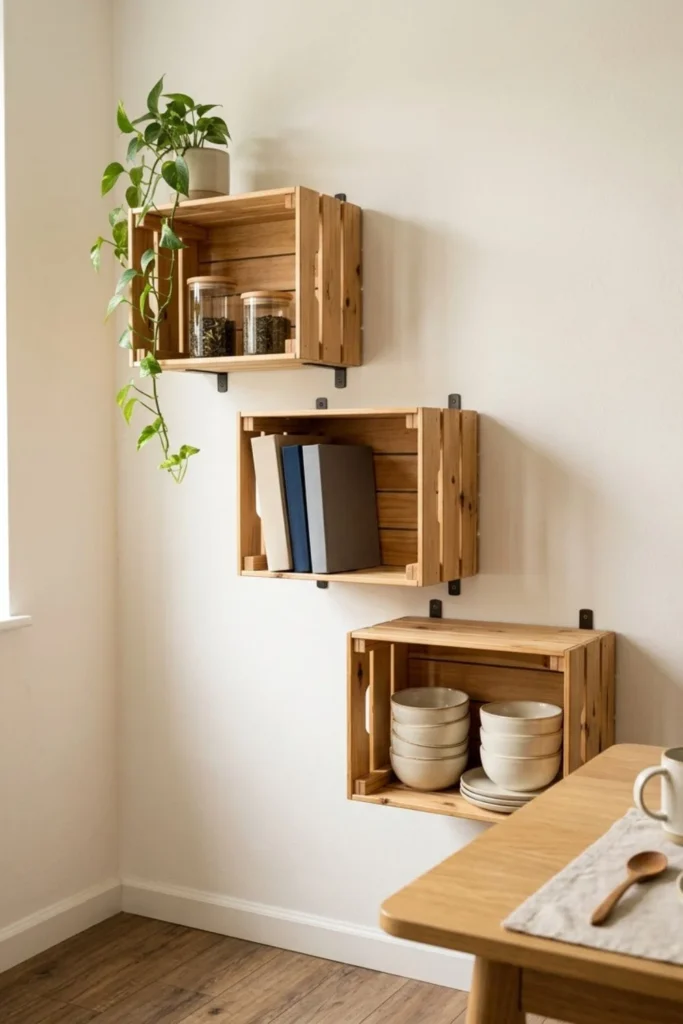
Wooden crates provide more depth than a normal shelf and help keep bowls, tea supplies, or folded kitchen linens contained. They suit a dining-side wall better than a narrow cooking aisle.
Check every crate for weak slats, loose staples, splinters, or movement. Sand and clean the wood before deciding on the arrangement.
Each crate needs secure support. Do not glue a group together and attach the full weight through one weak box. Keep heavier objects low and use upper crates for light items.
Depth is the main trade-off. A crate can catch a shoulder in a narrow route even when it looks fine on an empty wall. Mark its full projection with cardboard and walk past it before installation.
Leave visible space inside the finished shelves. When every crate is packed tightly, closed storage may be more practical and easier to clean.
15. Sew a Lightweight Fabric Pocket Organizer
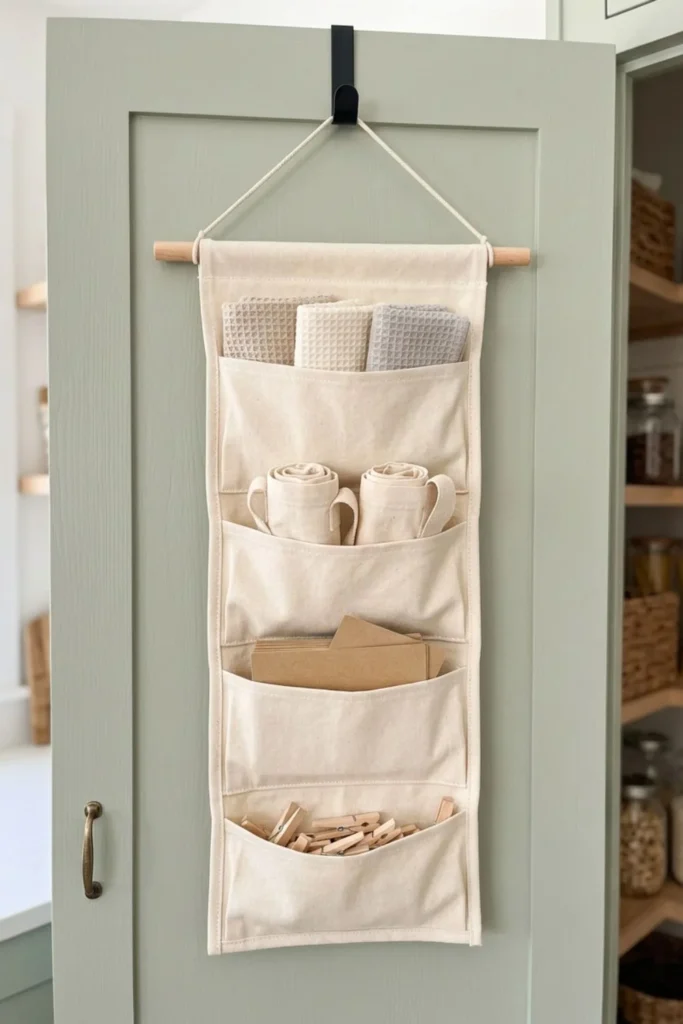
Fabric pockets are one of the easiest renter-friendly options. They can store clean cloths, reusable shopping bags, recipe cards, clips, and other dry, lightweight objects.
Use sturdy canvas or cotton for the backing. Reinforce the top seam and the area around the hanging rod. Deeper pockets belong near the bottom so the organizer does not become top-heavy.
The location matters because fabric absorbs moisture, grease, and smells. Inside a pantry door or on a wall away from the cooking area is better than beside the stove.
Choose fabric that can be removed and washed. A plain color usually stays calmer once the pockets are filled.
Keep glass, cans, knives, and heavy tools out. A fabric organizer is useful because it is light; overloading removes that advantage.
The Three Organizers I Would Choose First
After comparing all 15 ideas, my first three choices remain the wooden spice rack, vertical cutting board holder, and wall-mounted dish drying rack.
The wooden spice rack is the easiest starting point. It takes little depth, works with several decorating styles, and makes everyday jars easier to see. It is a sensible first project when the counter feels crowded but the kitchen does not need a large change.
The vertical cutting board holder handles an awkward group of items without turning them into wall decor. I especially like the option of using a cabinet side or an internal freestanding divider, because renters and homeowners can solve the same problem differently.
The wall-mounted dish rack offers the biggest possible counter improvement, but it needs the most caution. I would choose it only as a tested system with a secure, approved installation and easy drainage.
These three choices also show why there is no single best organizer. One is simple, one uses a narrow forgotten space, and one makes a major change. The right starting point depends on which problem bothers you most.
Two Ideas I Would Treat as Optional
The chalkboard meal station and the wrap-and-foil pocket are not bad projects. They are simply more dependent on household habits and layout.
Choose the chalkboard only if meal planning and written lists are already part of your routine. Otherwise, the board may become decoration that needs wiping.
Choose the wrap pocket only after testing the cabinet or pantry door with the real boxes. If it blocks a shelf, stops the door closing, or sits far from the prep area, keep the boxes in a drawer.
An honest storage guide should help you reject projects as well as choose them. Not using an idea can be the right decision for a small room.
How to Keep Open Kitchen Storage Looking Good
Open organizers collect more dust and cooking residue than closed cabinets. A rack can still be useful, but it needs to be easy to empty and wipe.
Use a simple maintenance routine:
- Every week: return items to their proper place and wipe surfaces near cooking.
- Every month: empty one organizer and clean behind it.
- Every few months: inspect screws, anchors, hooks, brackets, clamps, and wall movement.
- After any change: check the load again when adding heavier jars, larger boards, or more dishes.
- Immediately: unload anything that bends, loosens, cracks, or begins pulling away from the wall.
Do not fill every shelf and hook. Empty space makes items easier to remove, helps the wall look calmer, and gives you room when your needs change.
Final Thoughts
The best DIY kitchen wall organizer ideas are not the ones that hold the most objects. They are the ones that remove a real frustration without blocking movement, creating a cleaning problem, or asking the wall to carry an unsafe load.
Start with one category of clutter. Measure the actual items, mark the full organizer with tape, test the doors and walkway, and choose fixings made for the wall and expected weight.
For a simple first change, the wooden spice rack is difficult to beat. For awkward boards, a vertical holder makes better use of a narrow area. When the dish rack takes over the whole counter, a properly installed wall-mounted system may create the largest improvement.
Renters and homeowners do not need identical solutions. A renter may use an internal divider, while a homeowner can consider permanent storage after checking the wall.
Choose one useful project, install it honestly and safely, then live with it before adding another. A small kitchen rarely needs every wall filled. It needs enough clear space to make cooking feel easier.
Written and reviewed by Ali Hamza | Styled Room Living
Disclosure: Some visuals are AI-assisted design concepts created for inspiration. Always confirm measurements, materials, load limits, and installation requirements for your home.